


3 purchase benefits
-
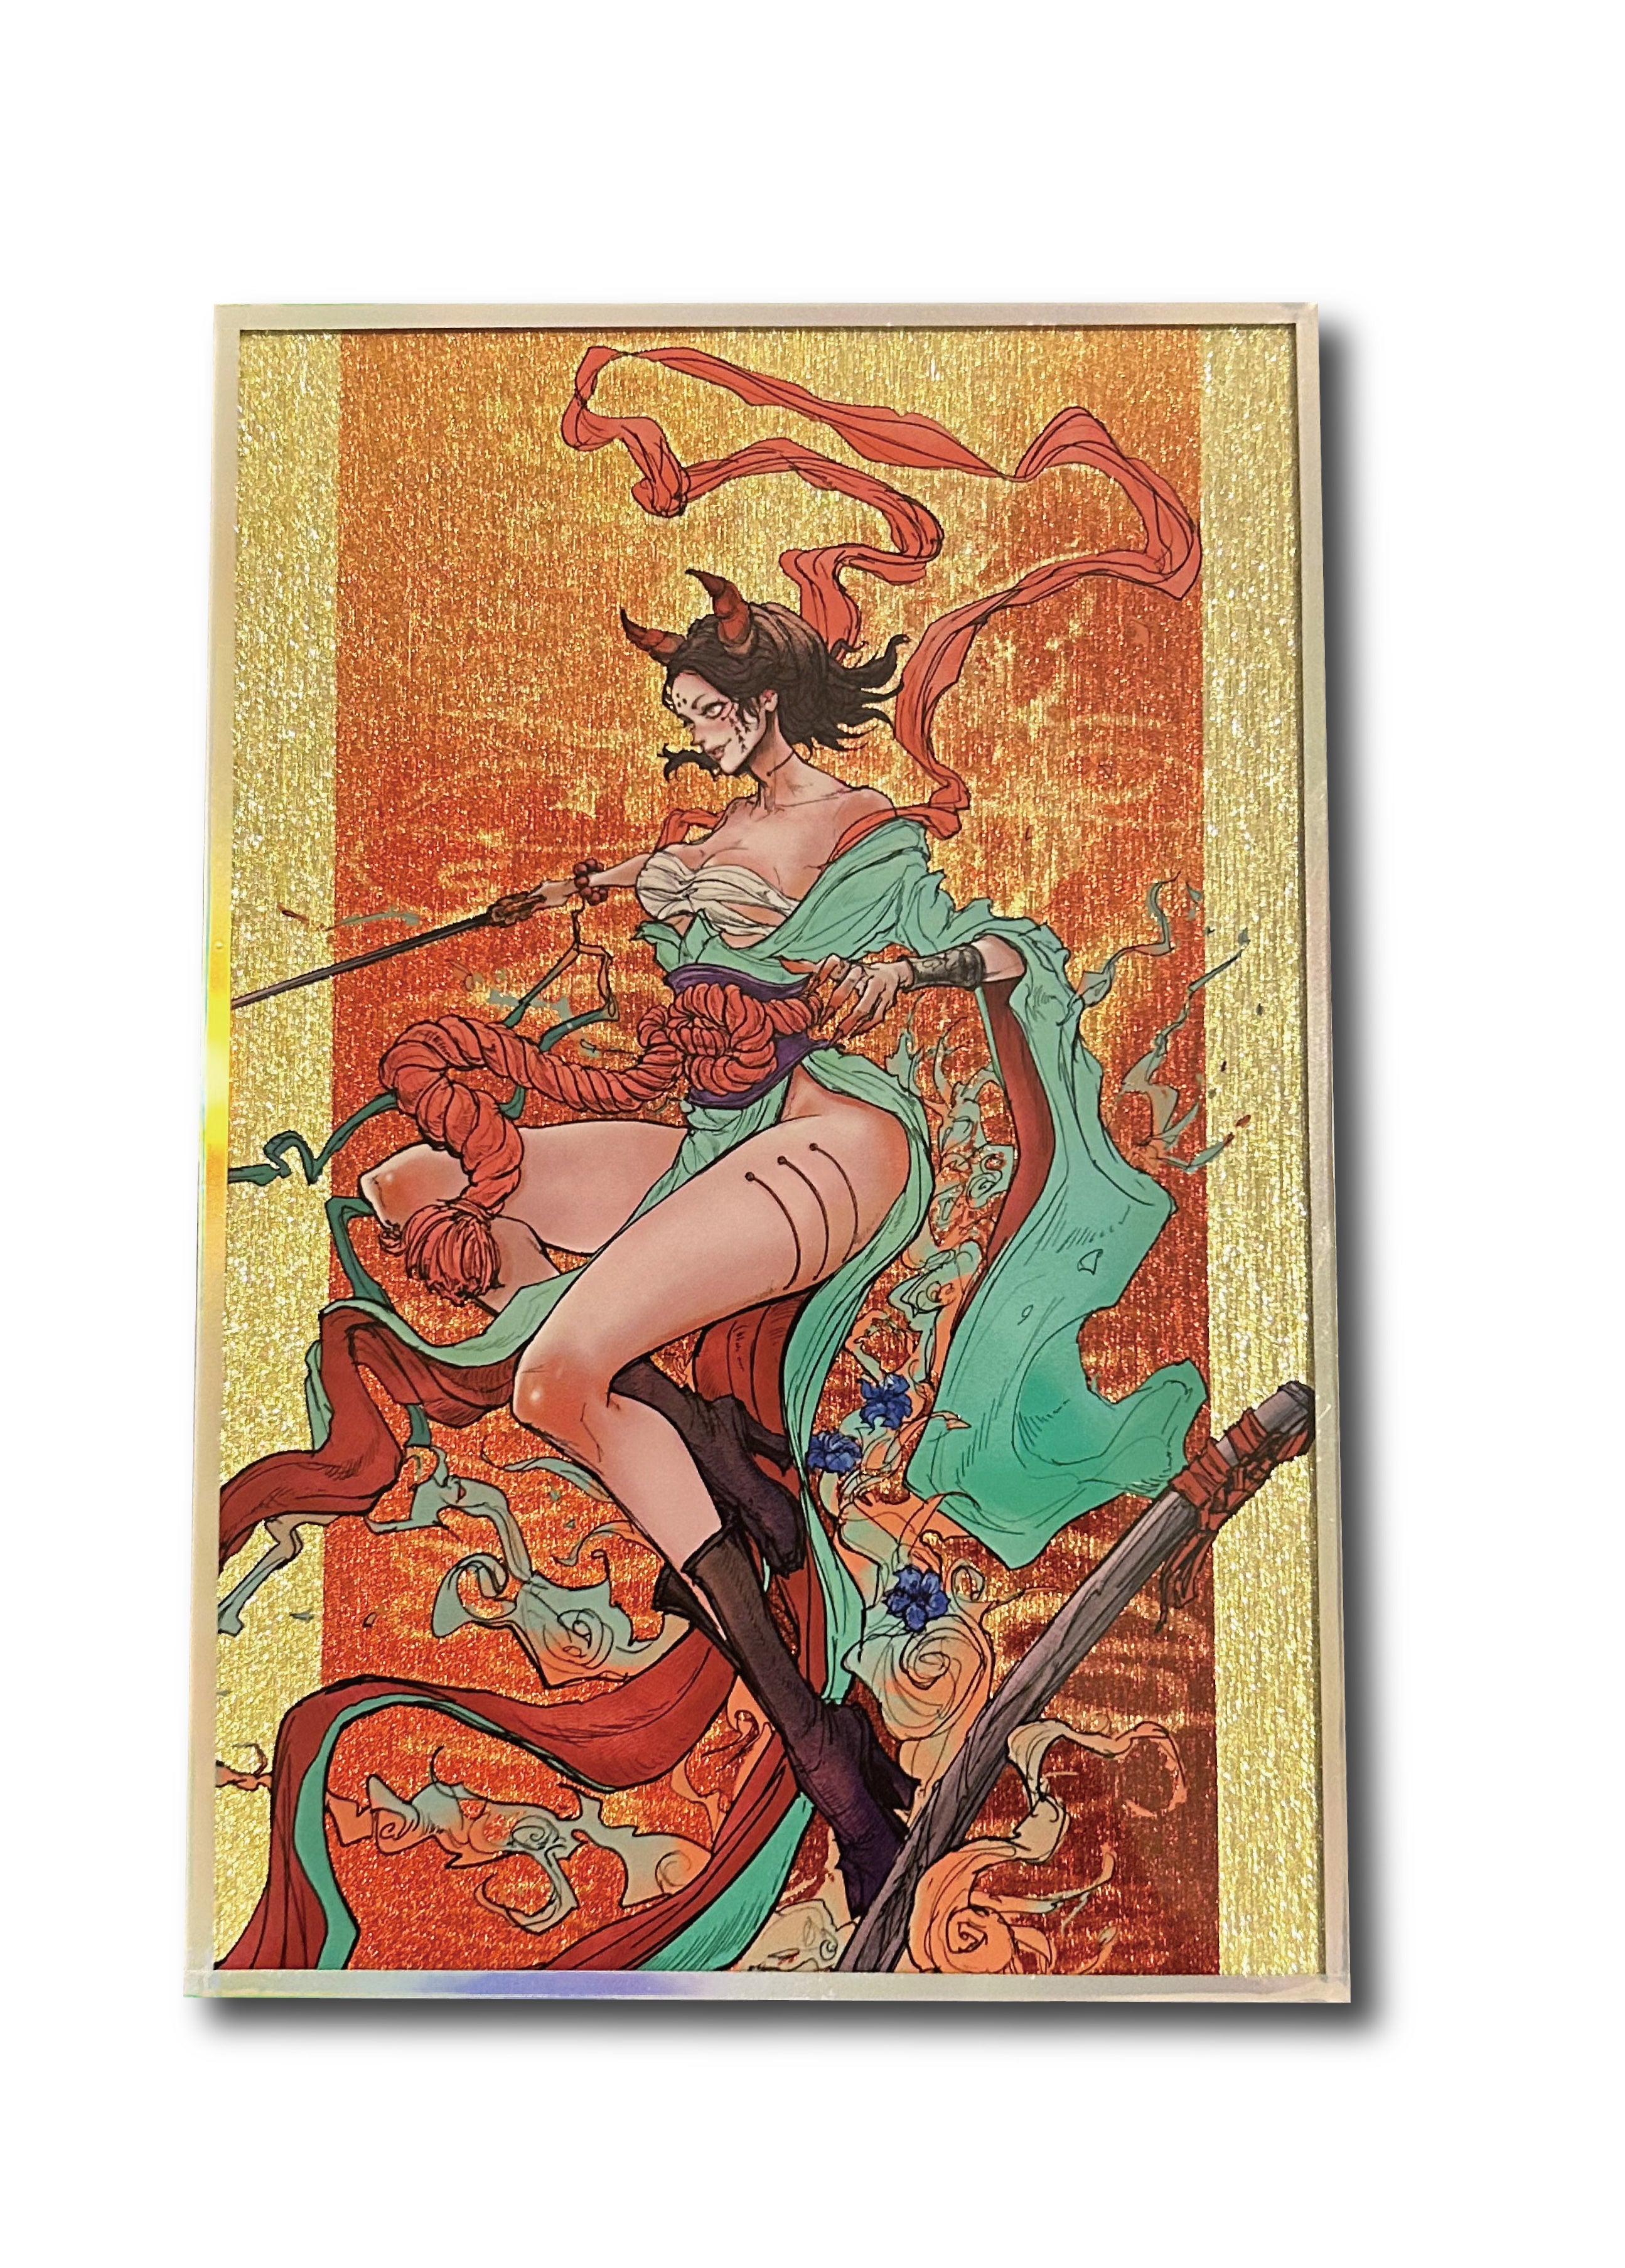
Bonus 1: ONINO ART shikishi
Size: w140xh210mm
This is a gold leaf shikishi (decorative paperboard) featuring a newly drawn illustration by Onino. -
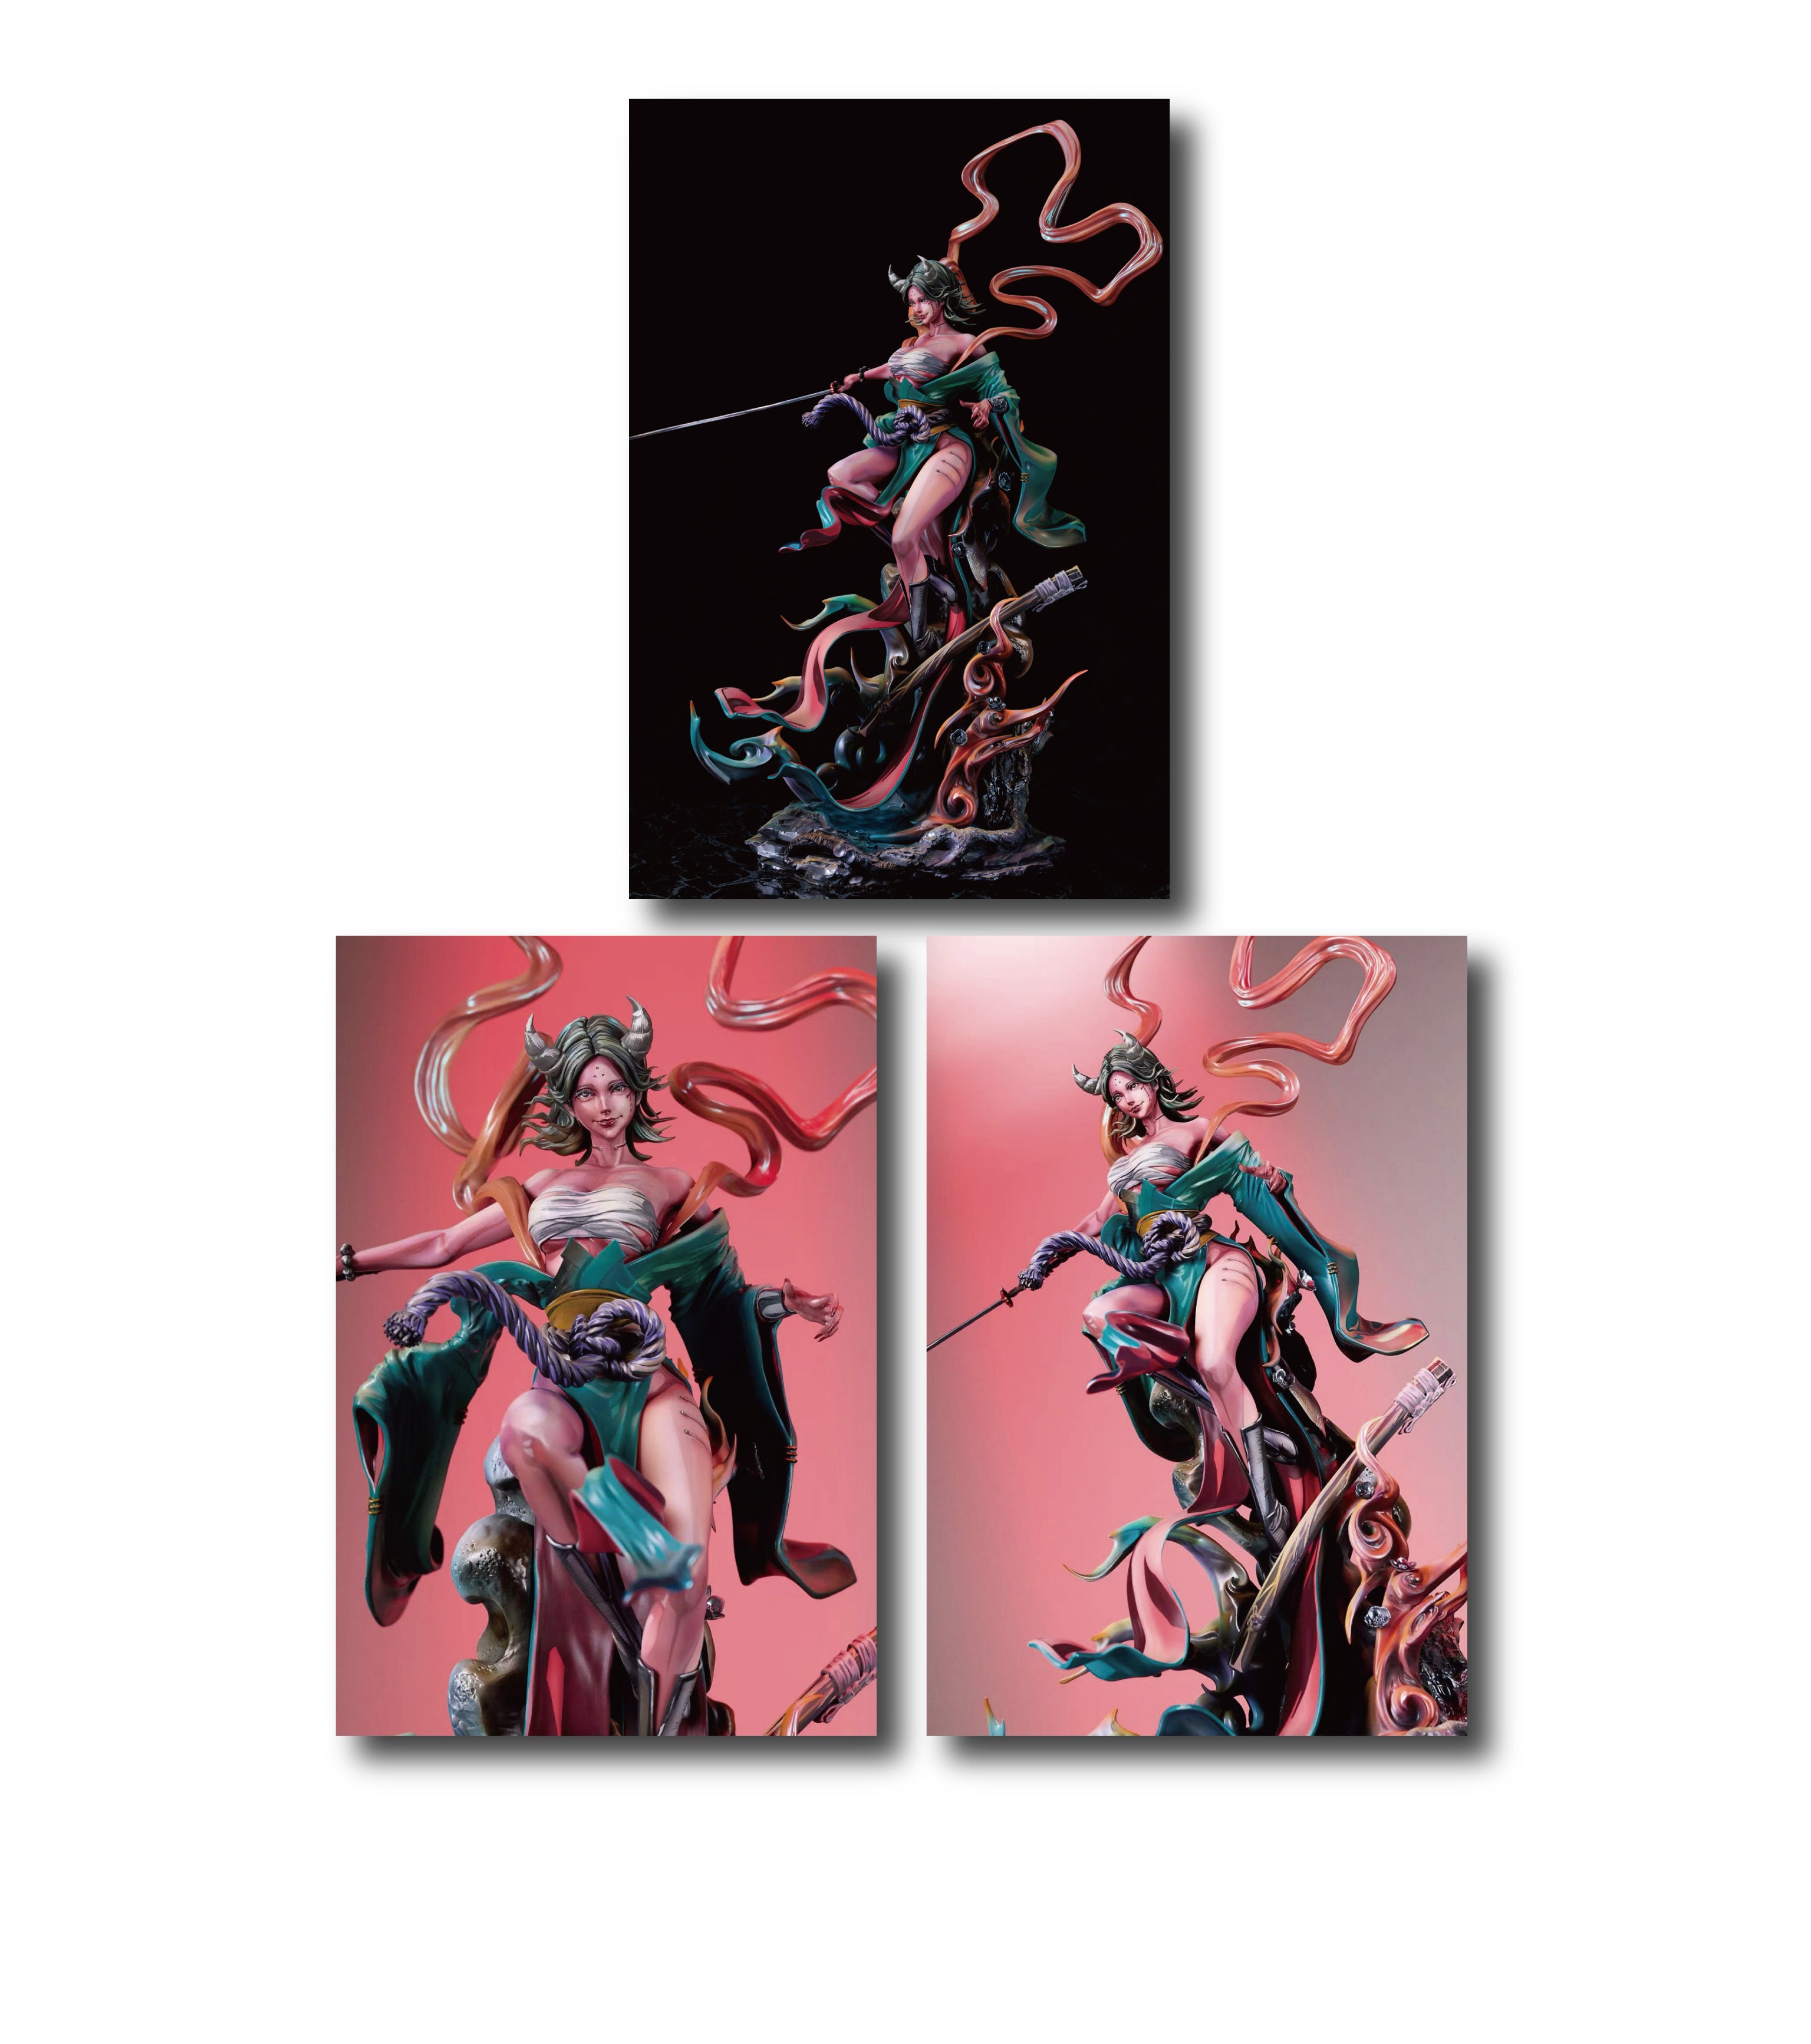
Bonus #2: 3D-2D Postcard
Size: w100xh148mm
A postcard featuring an example of MA-man's work, expressed in 3D 2D coloring. -
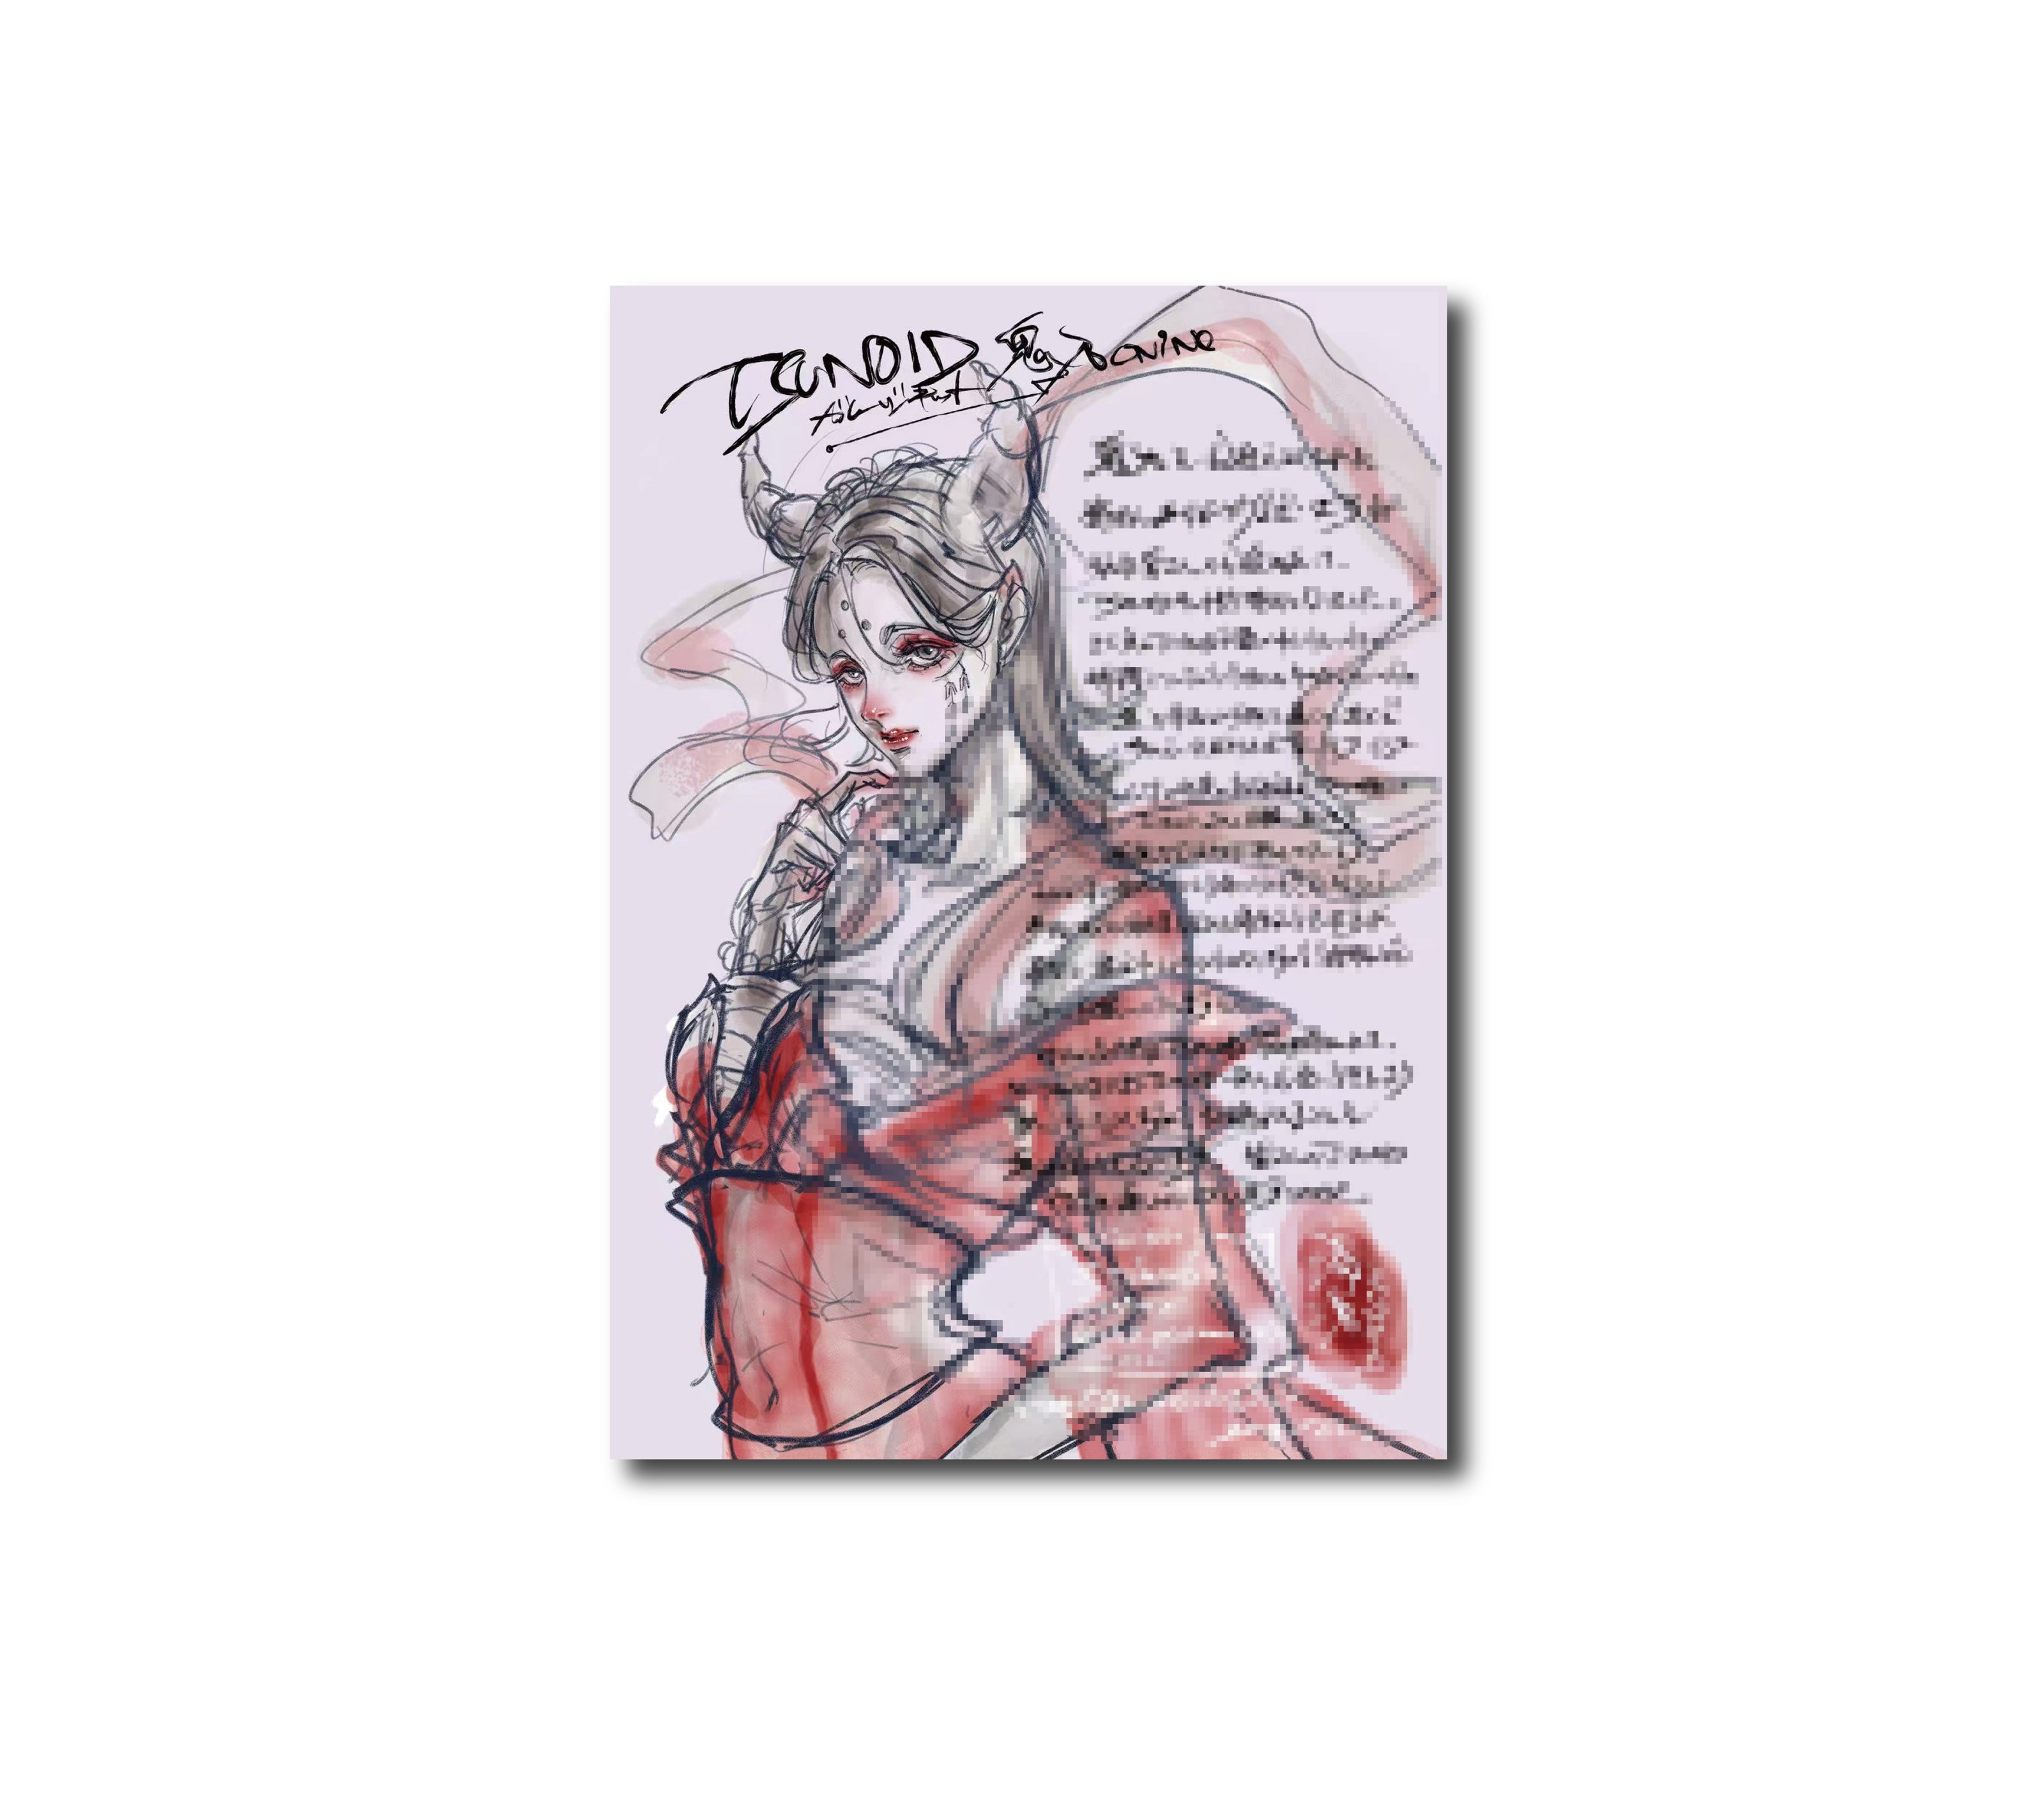
Bonus #3: A letter from Onino
Size: w100xh148mm
Includes a letter with an original illustration and handwritten message from MA-Man!


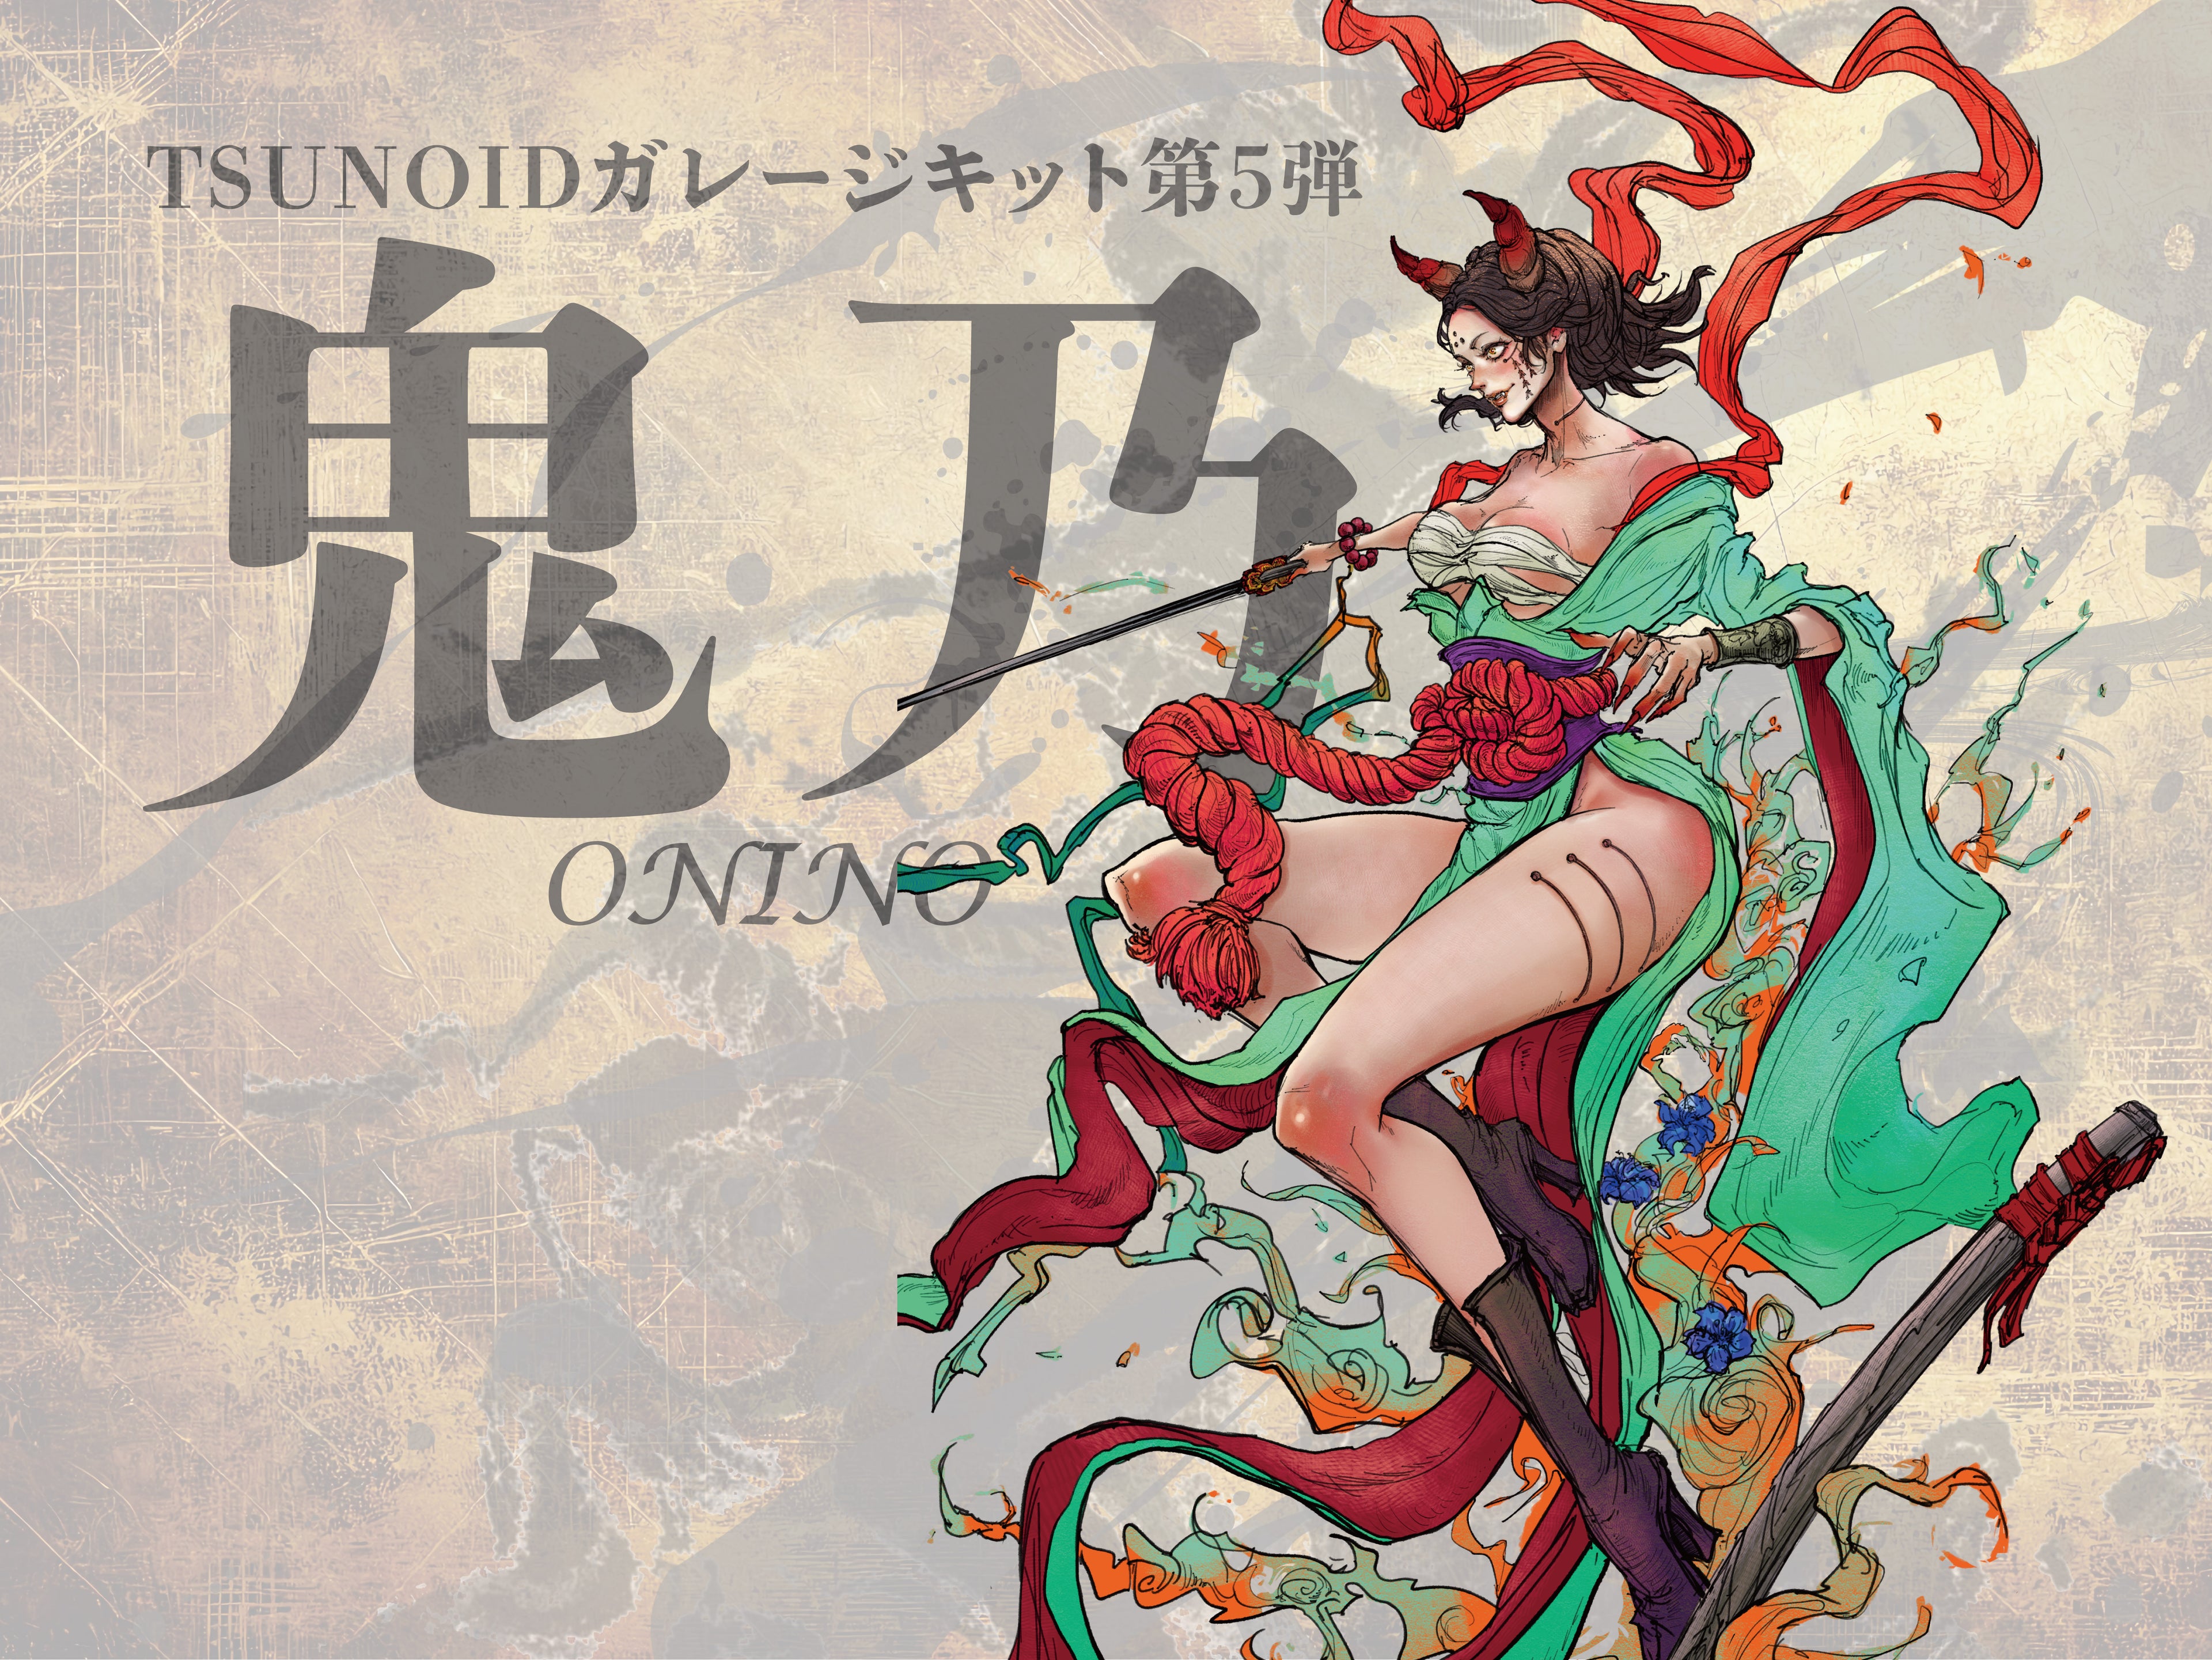

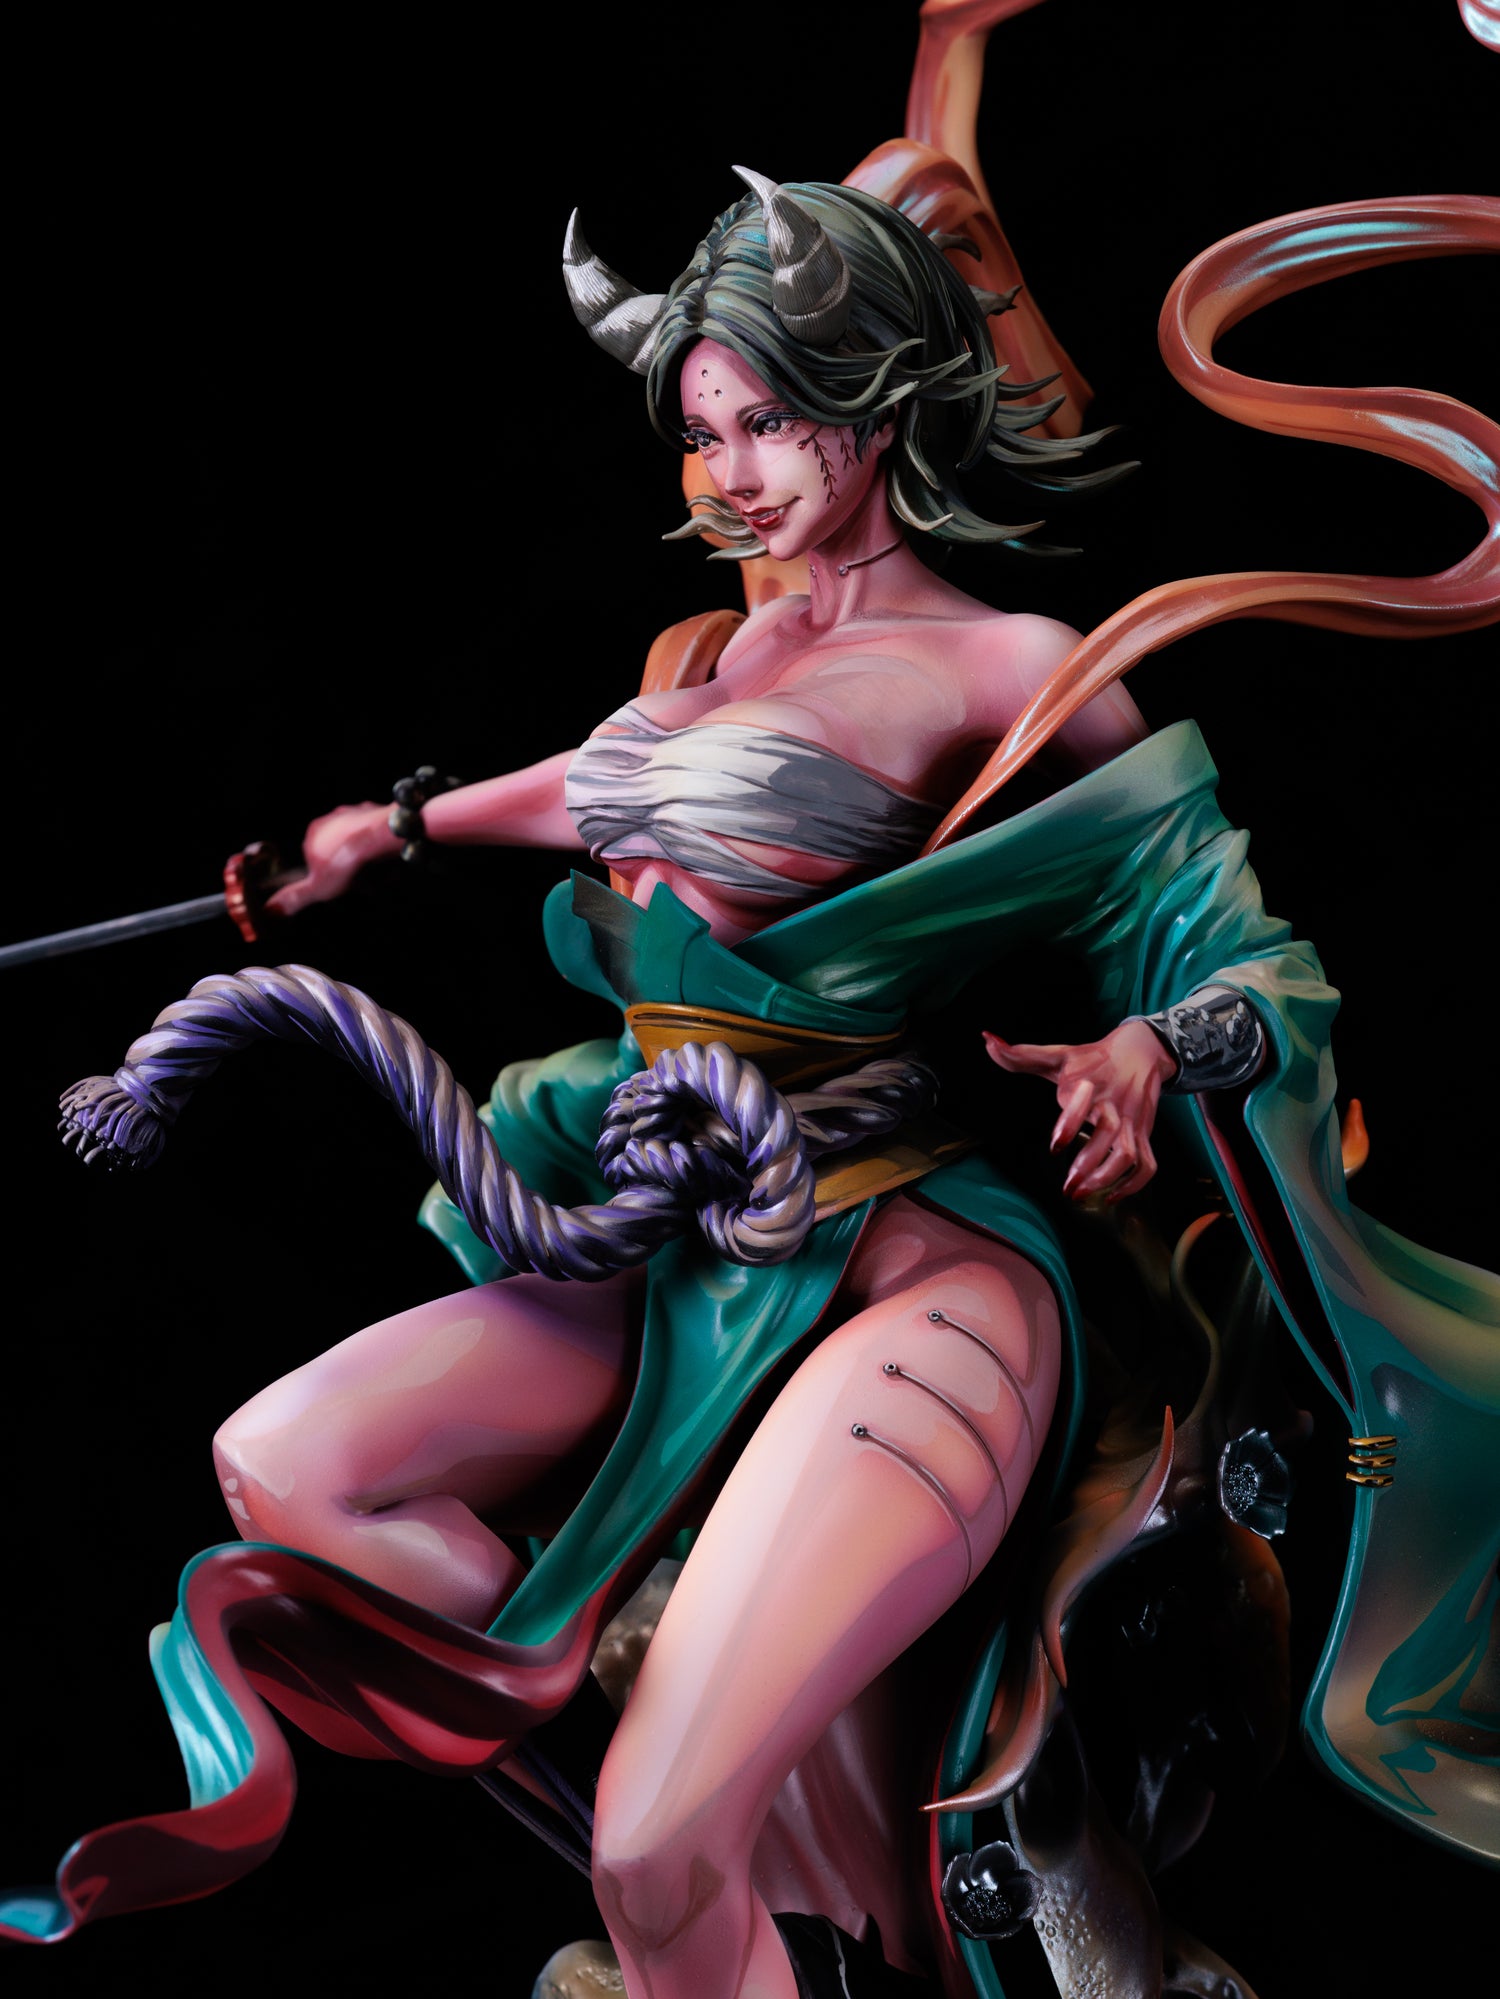
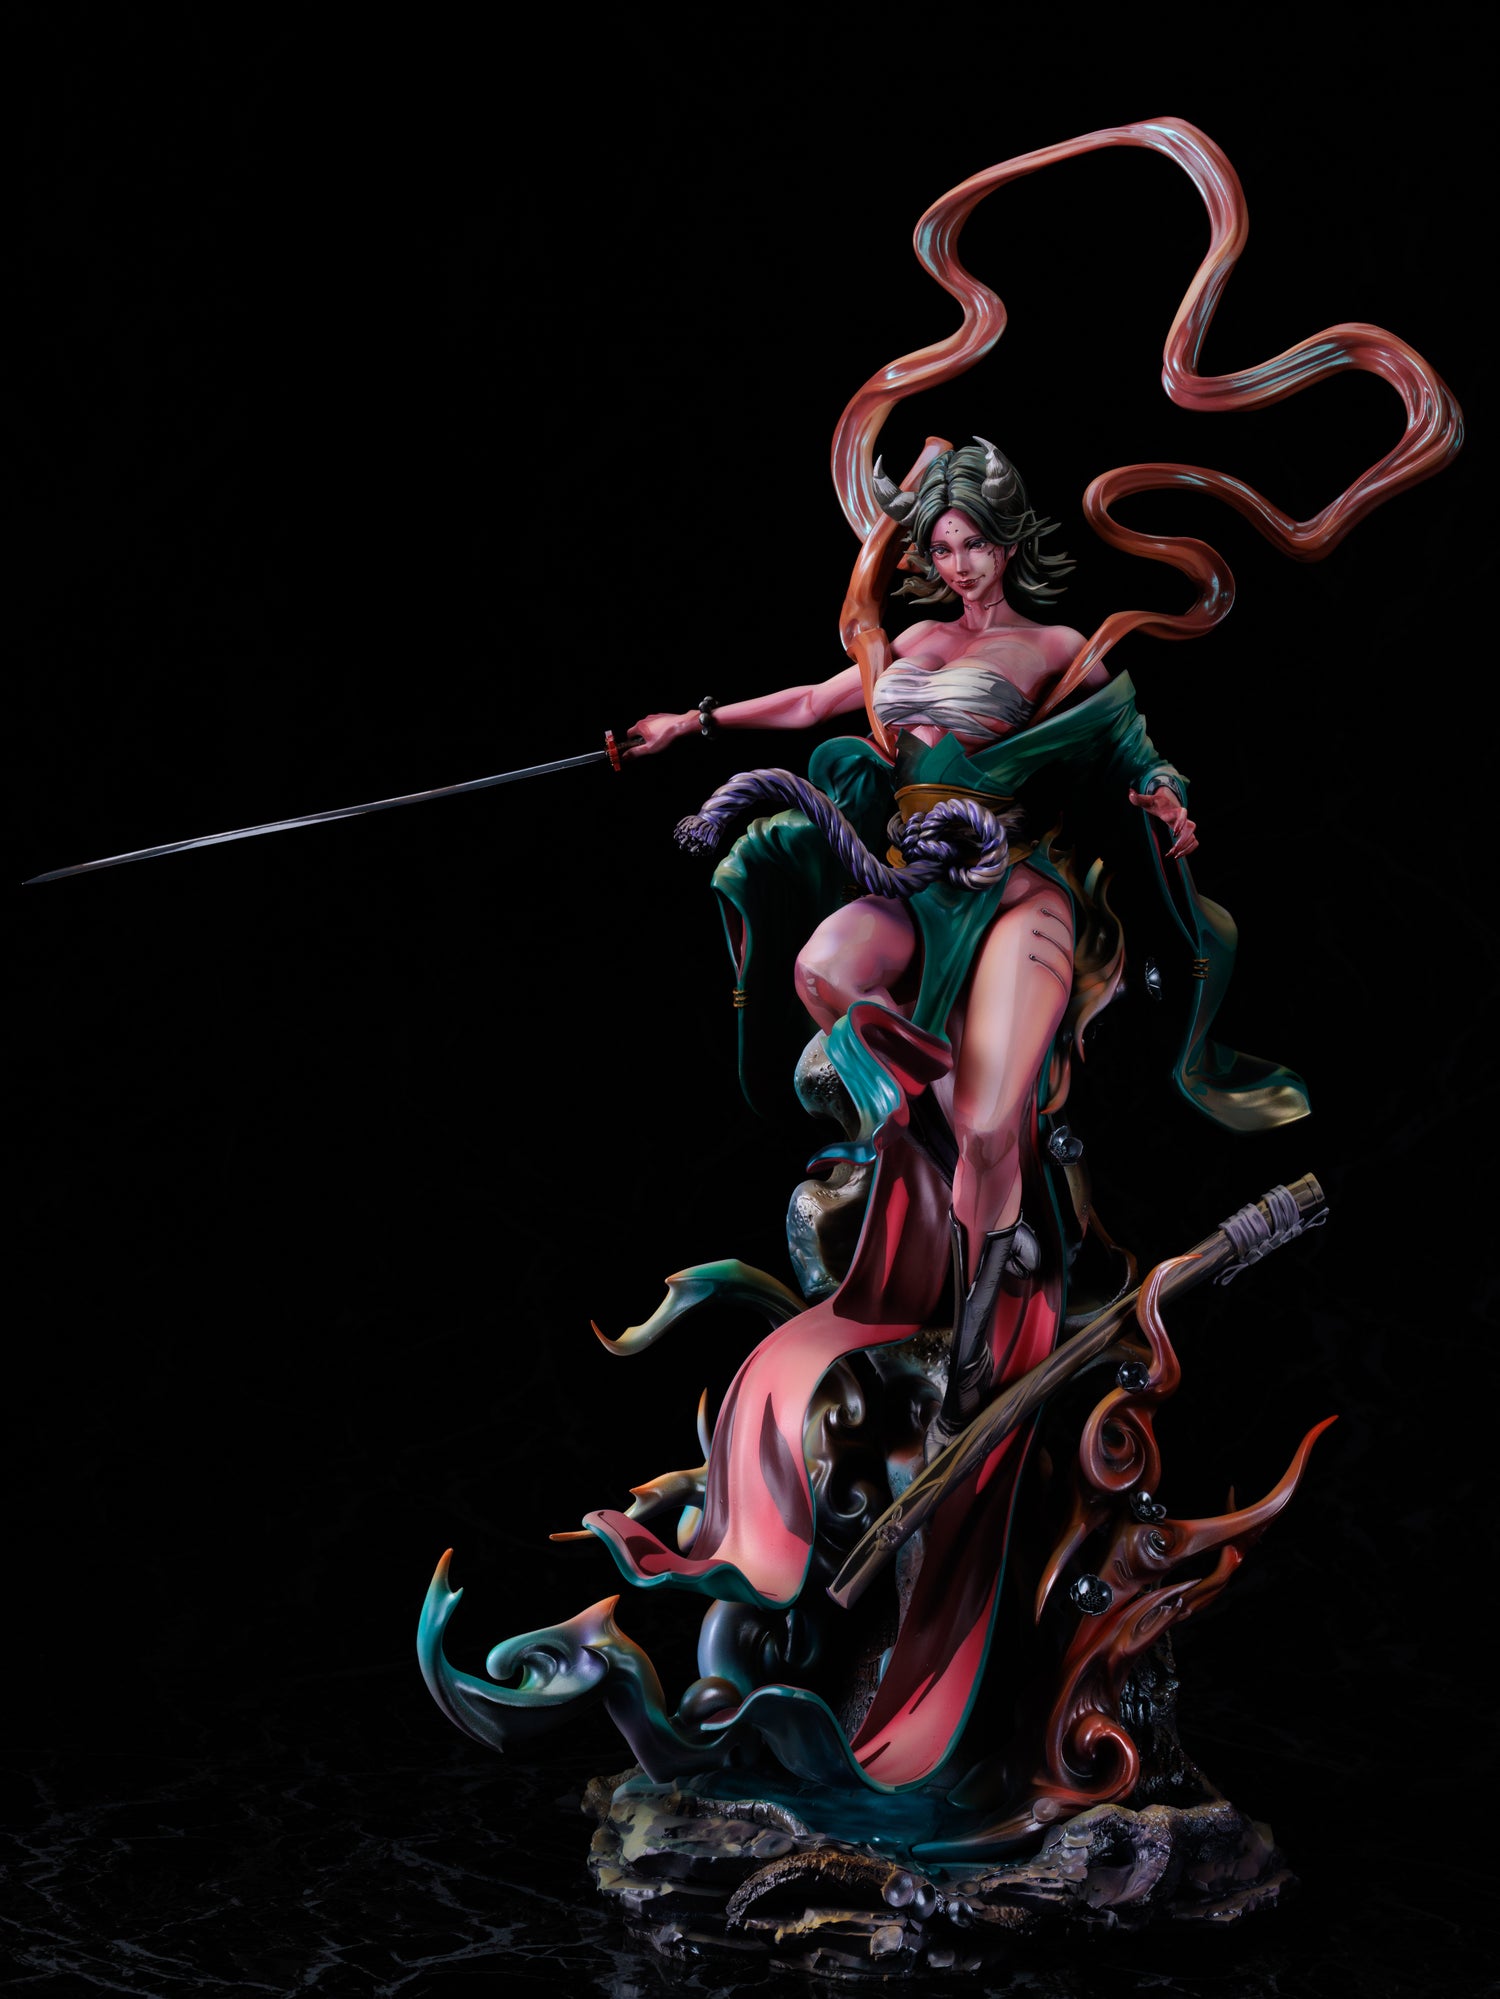
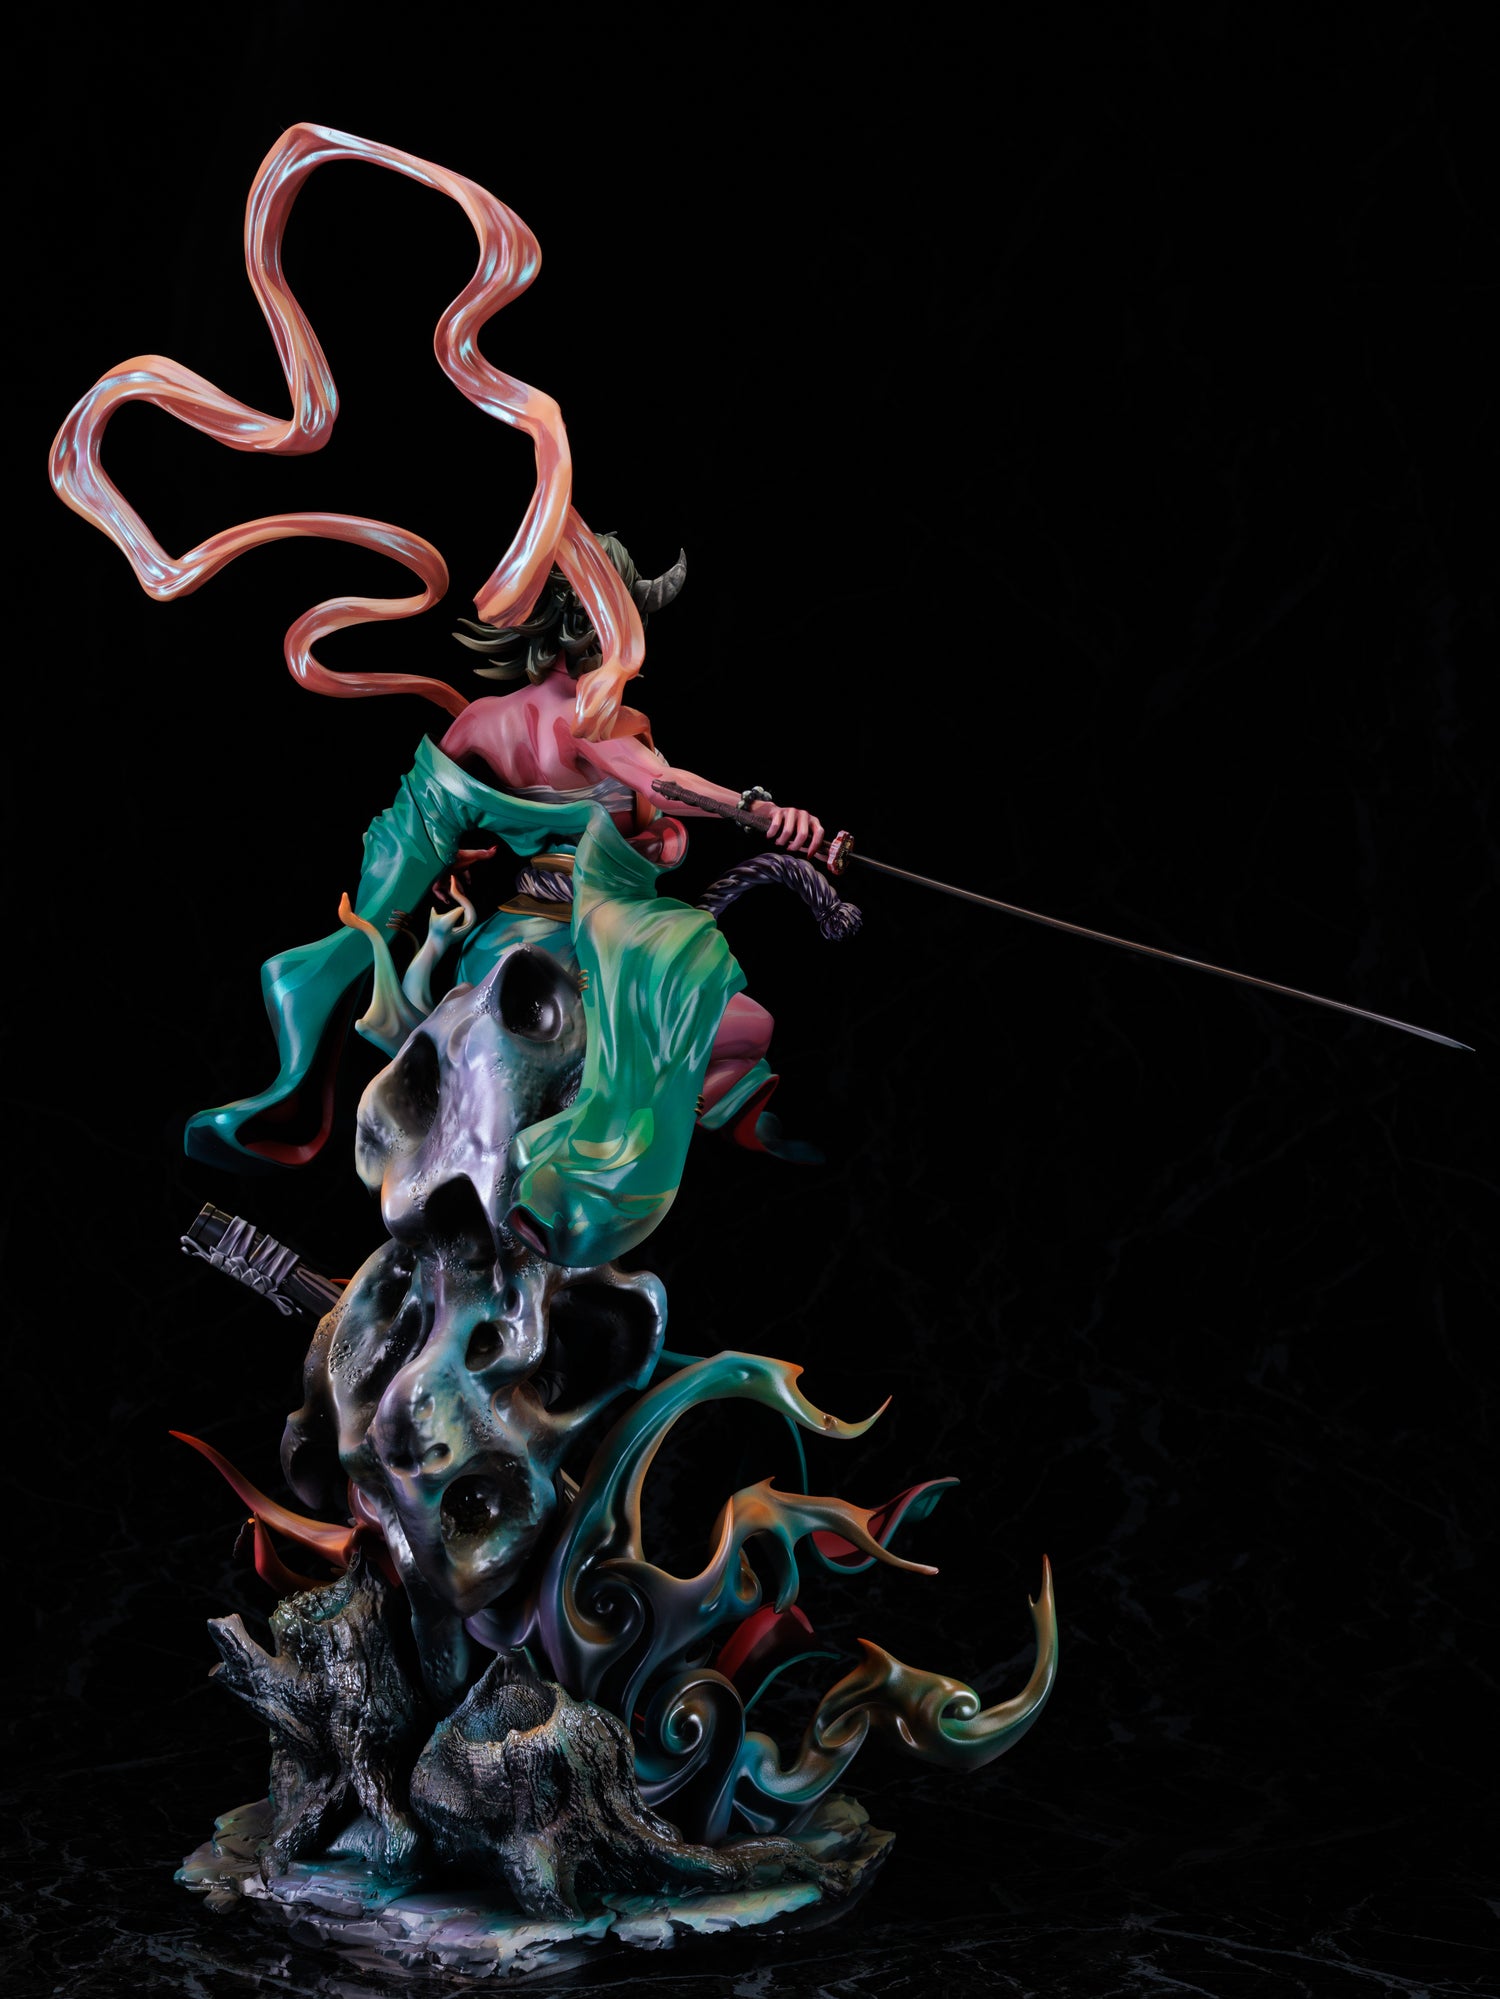
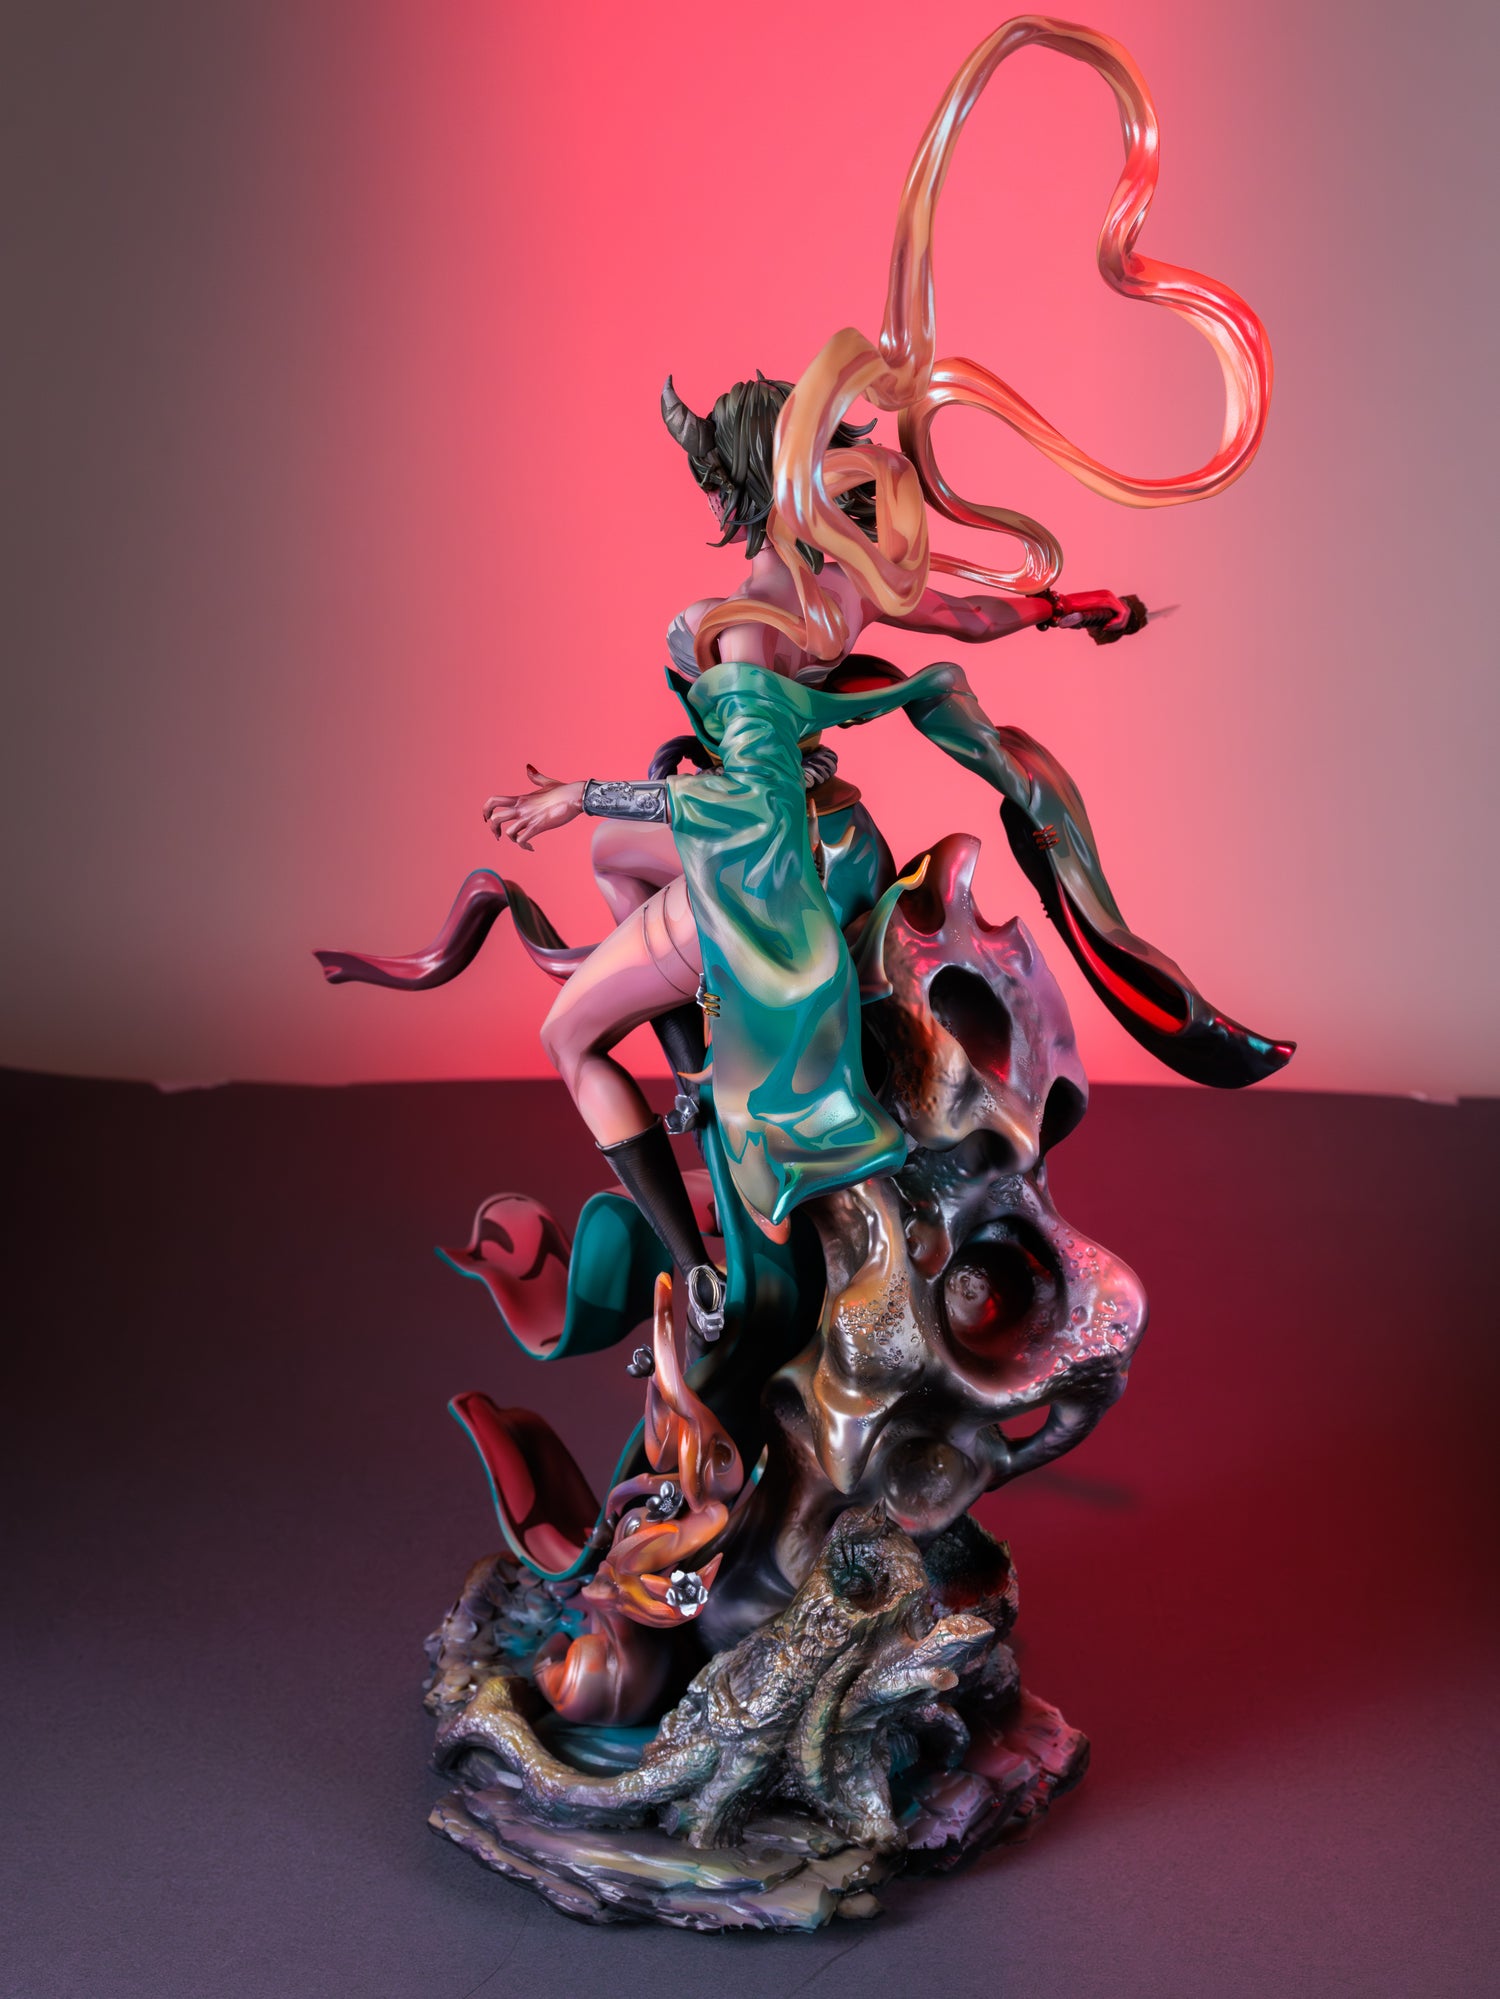
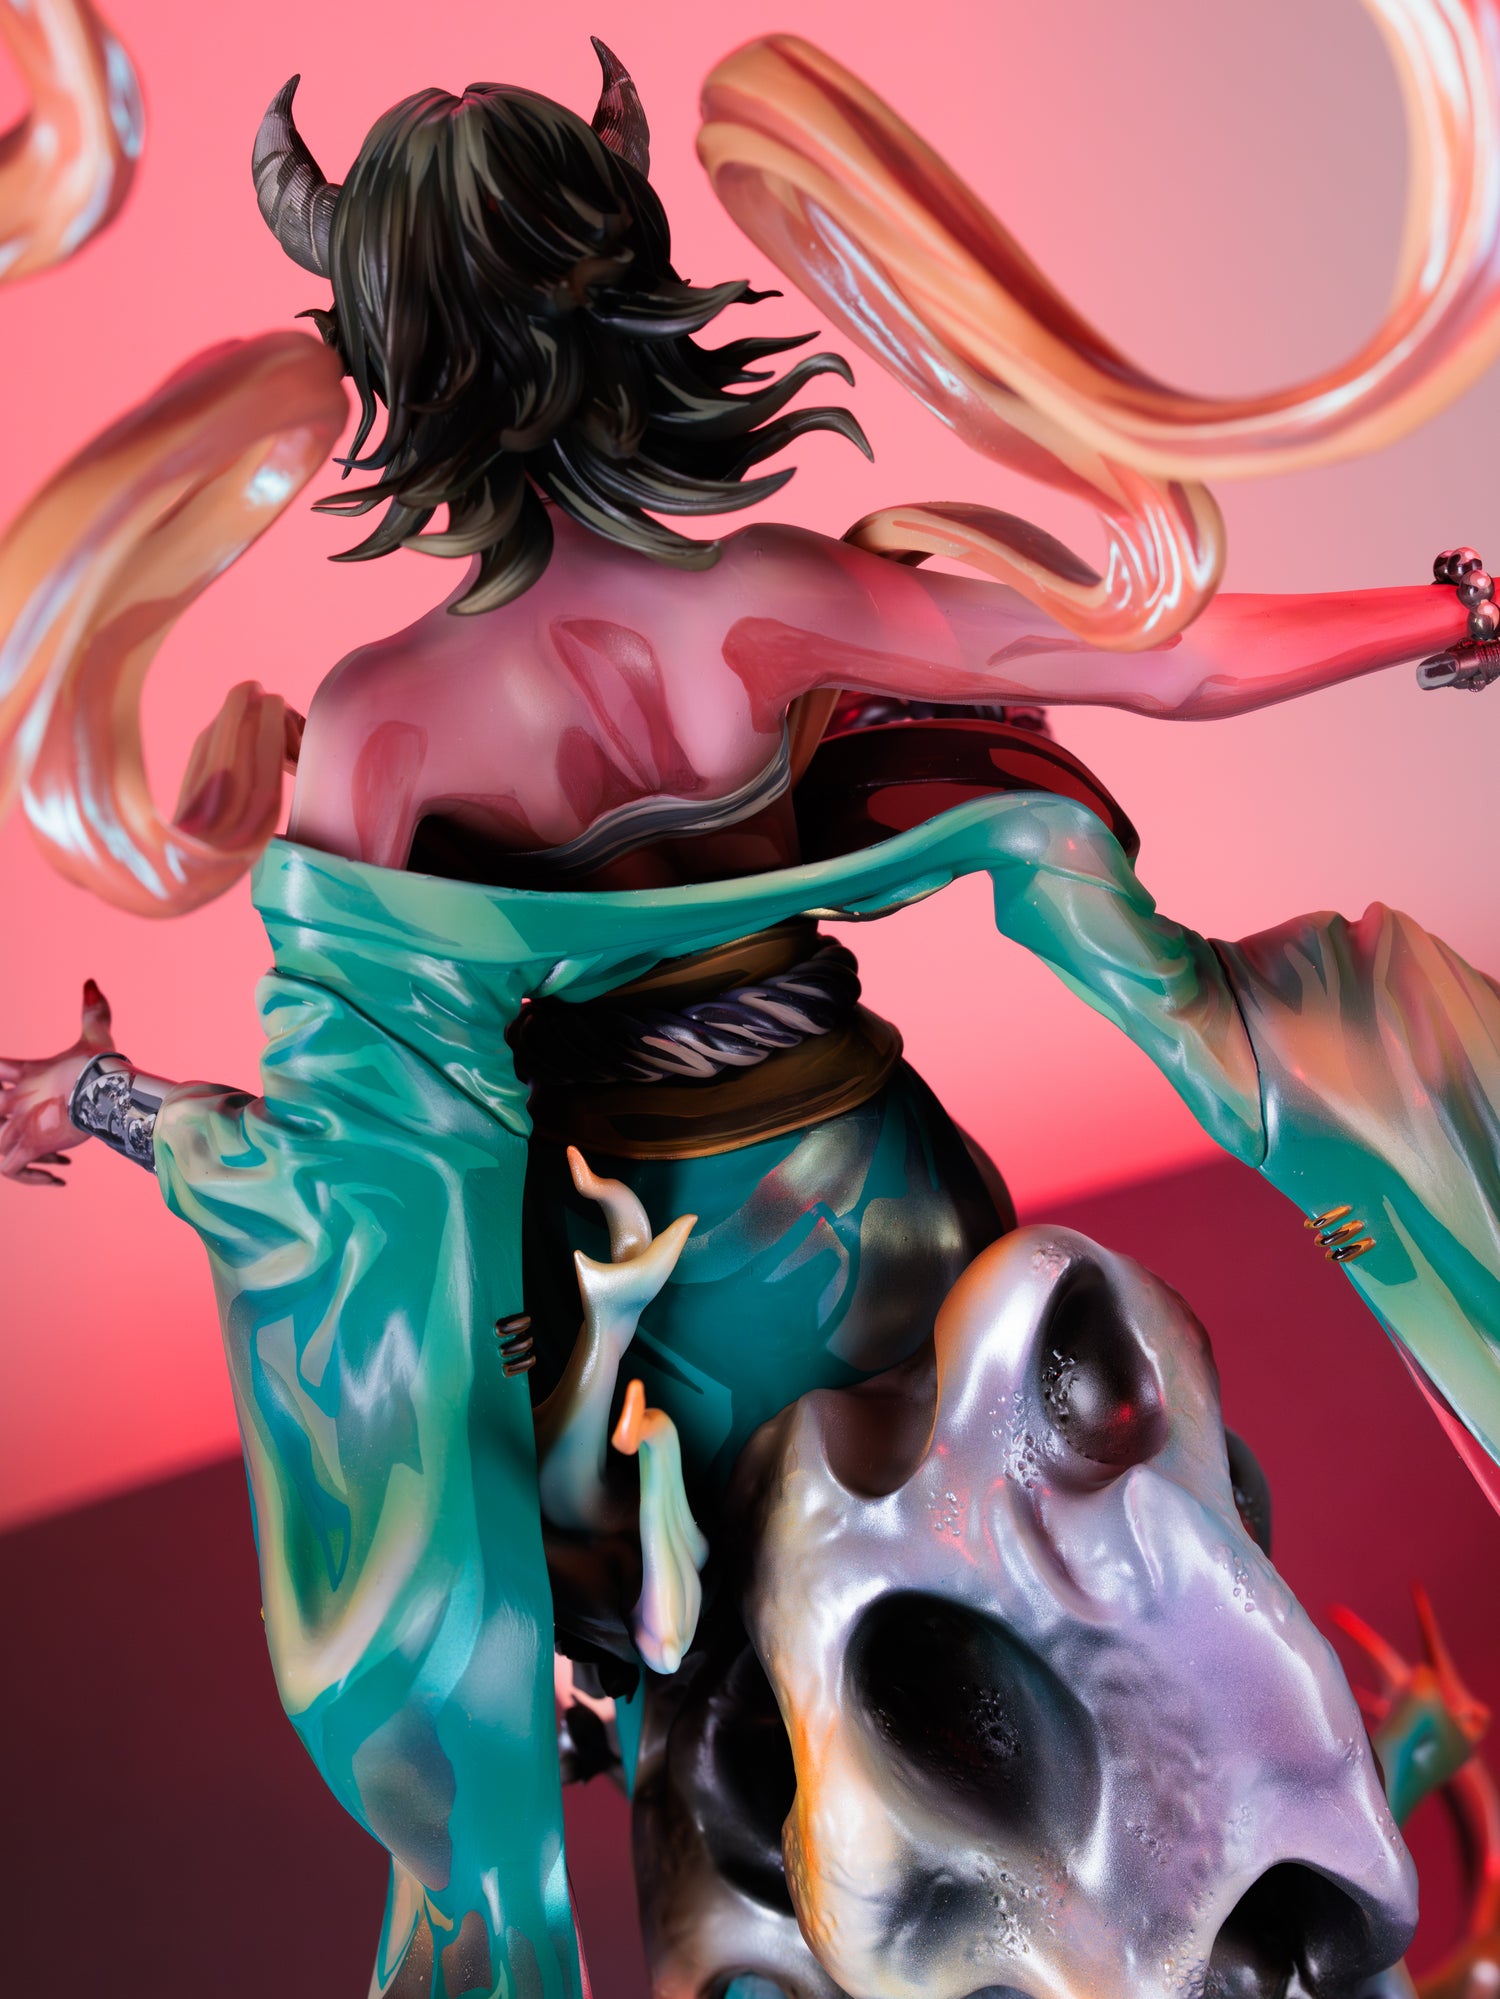
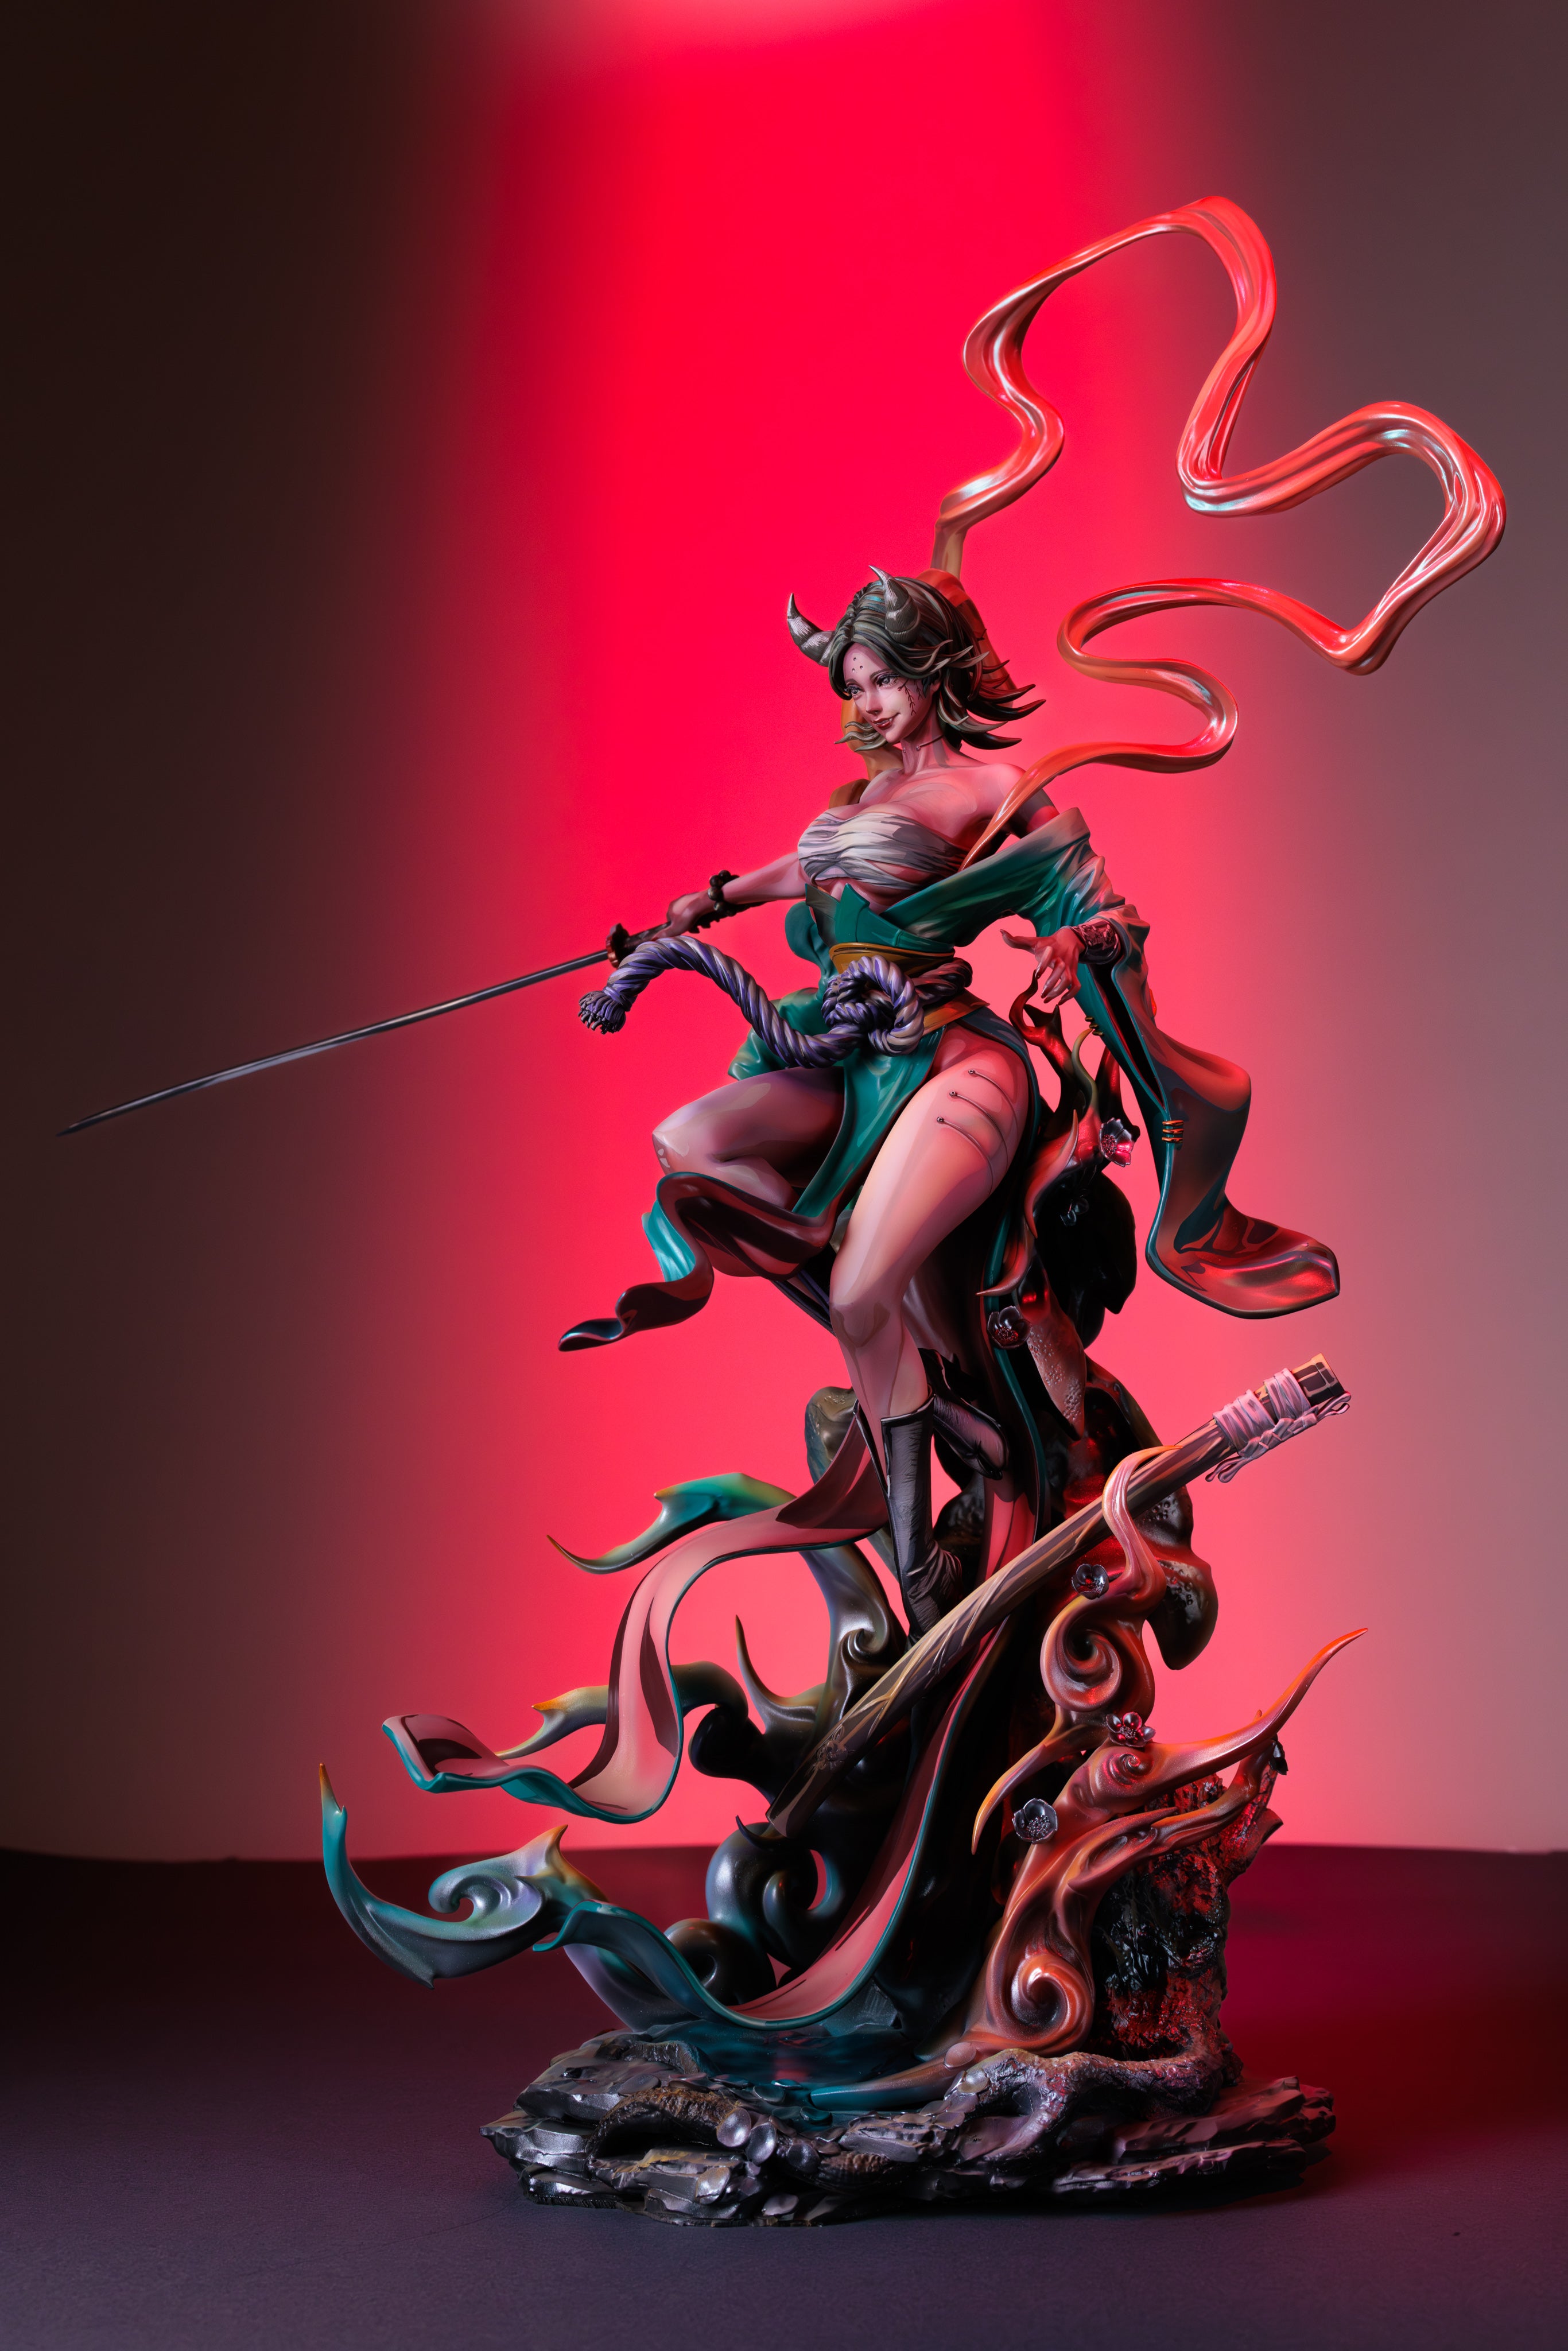
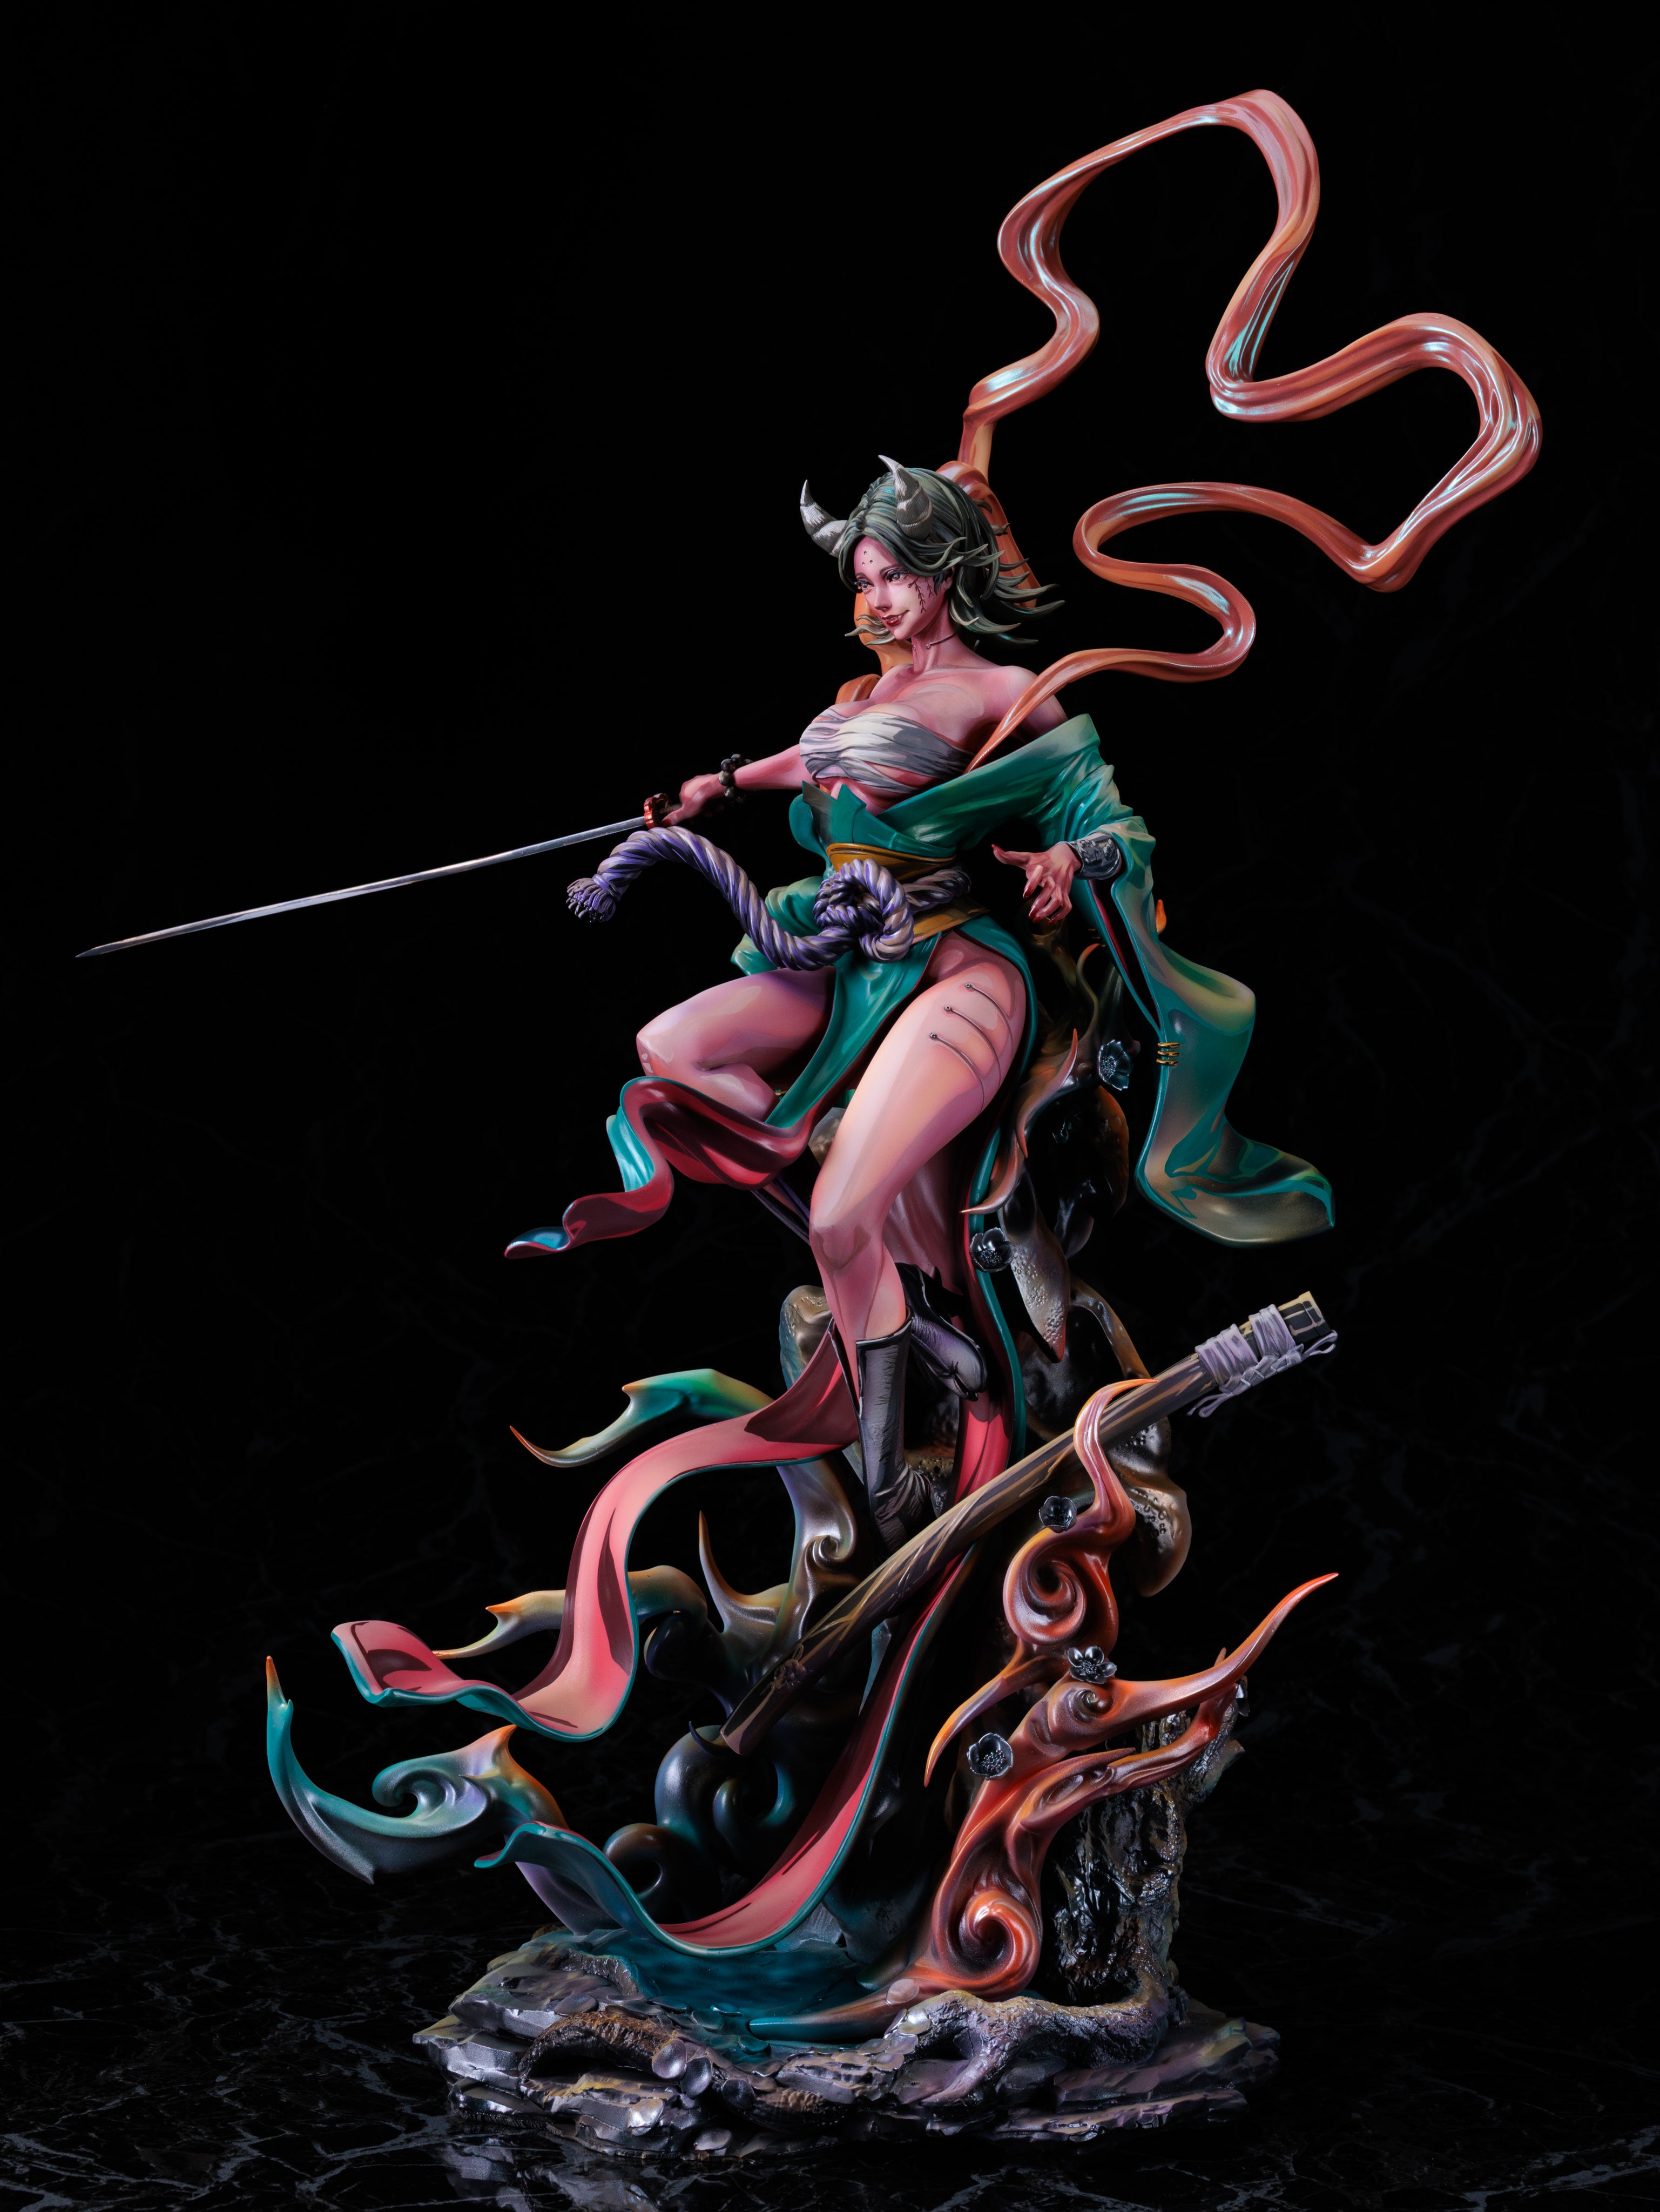
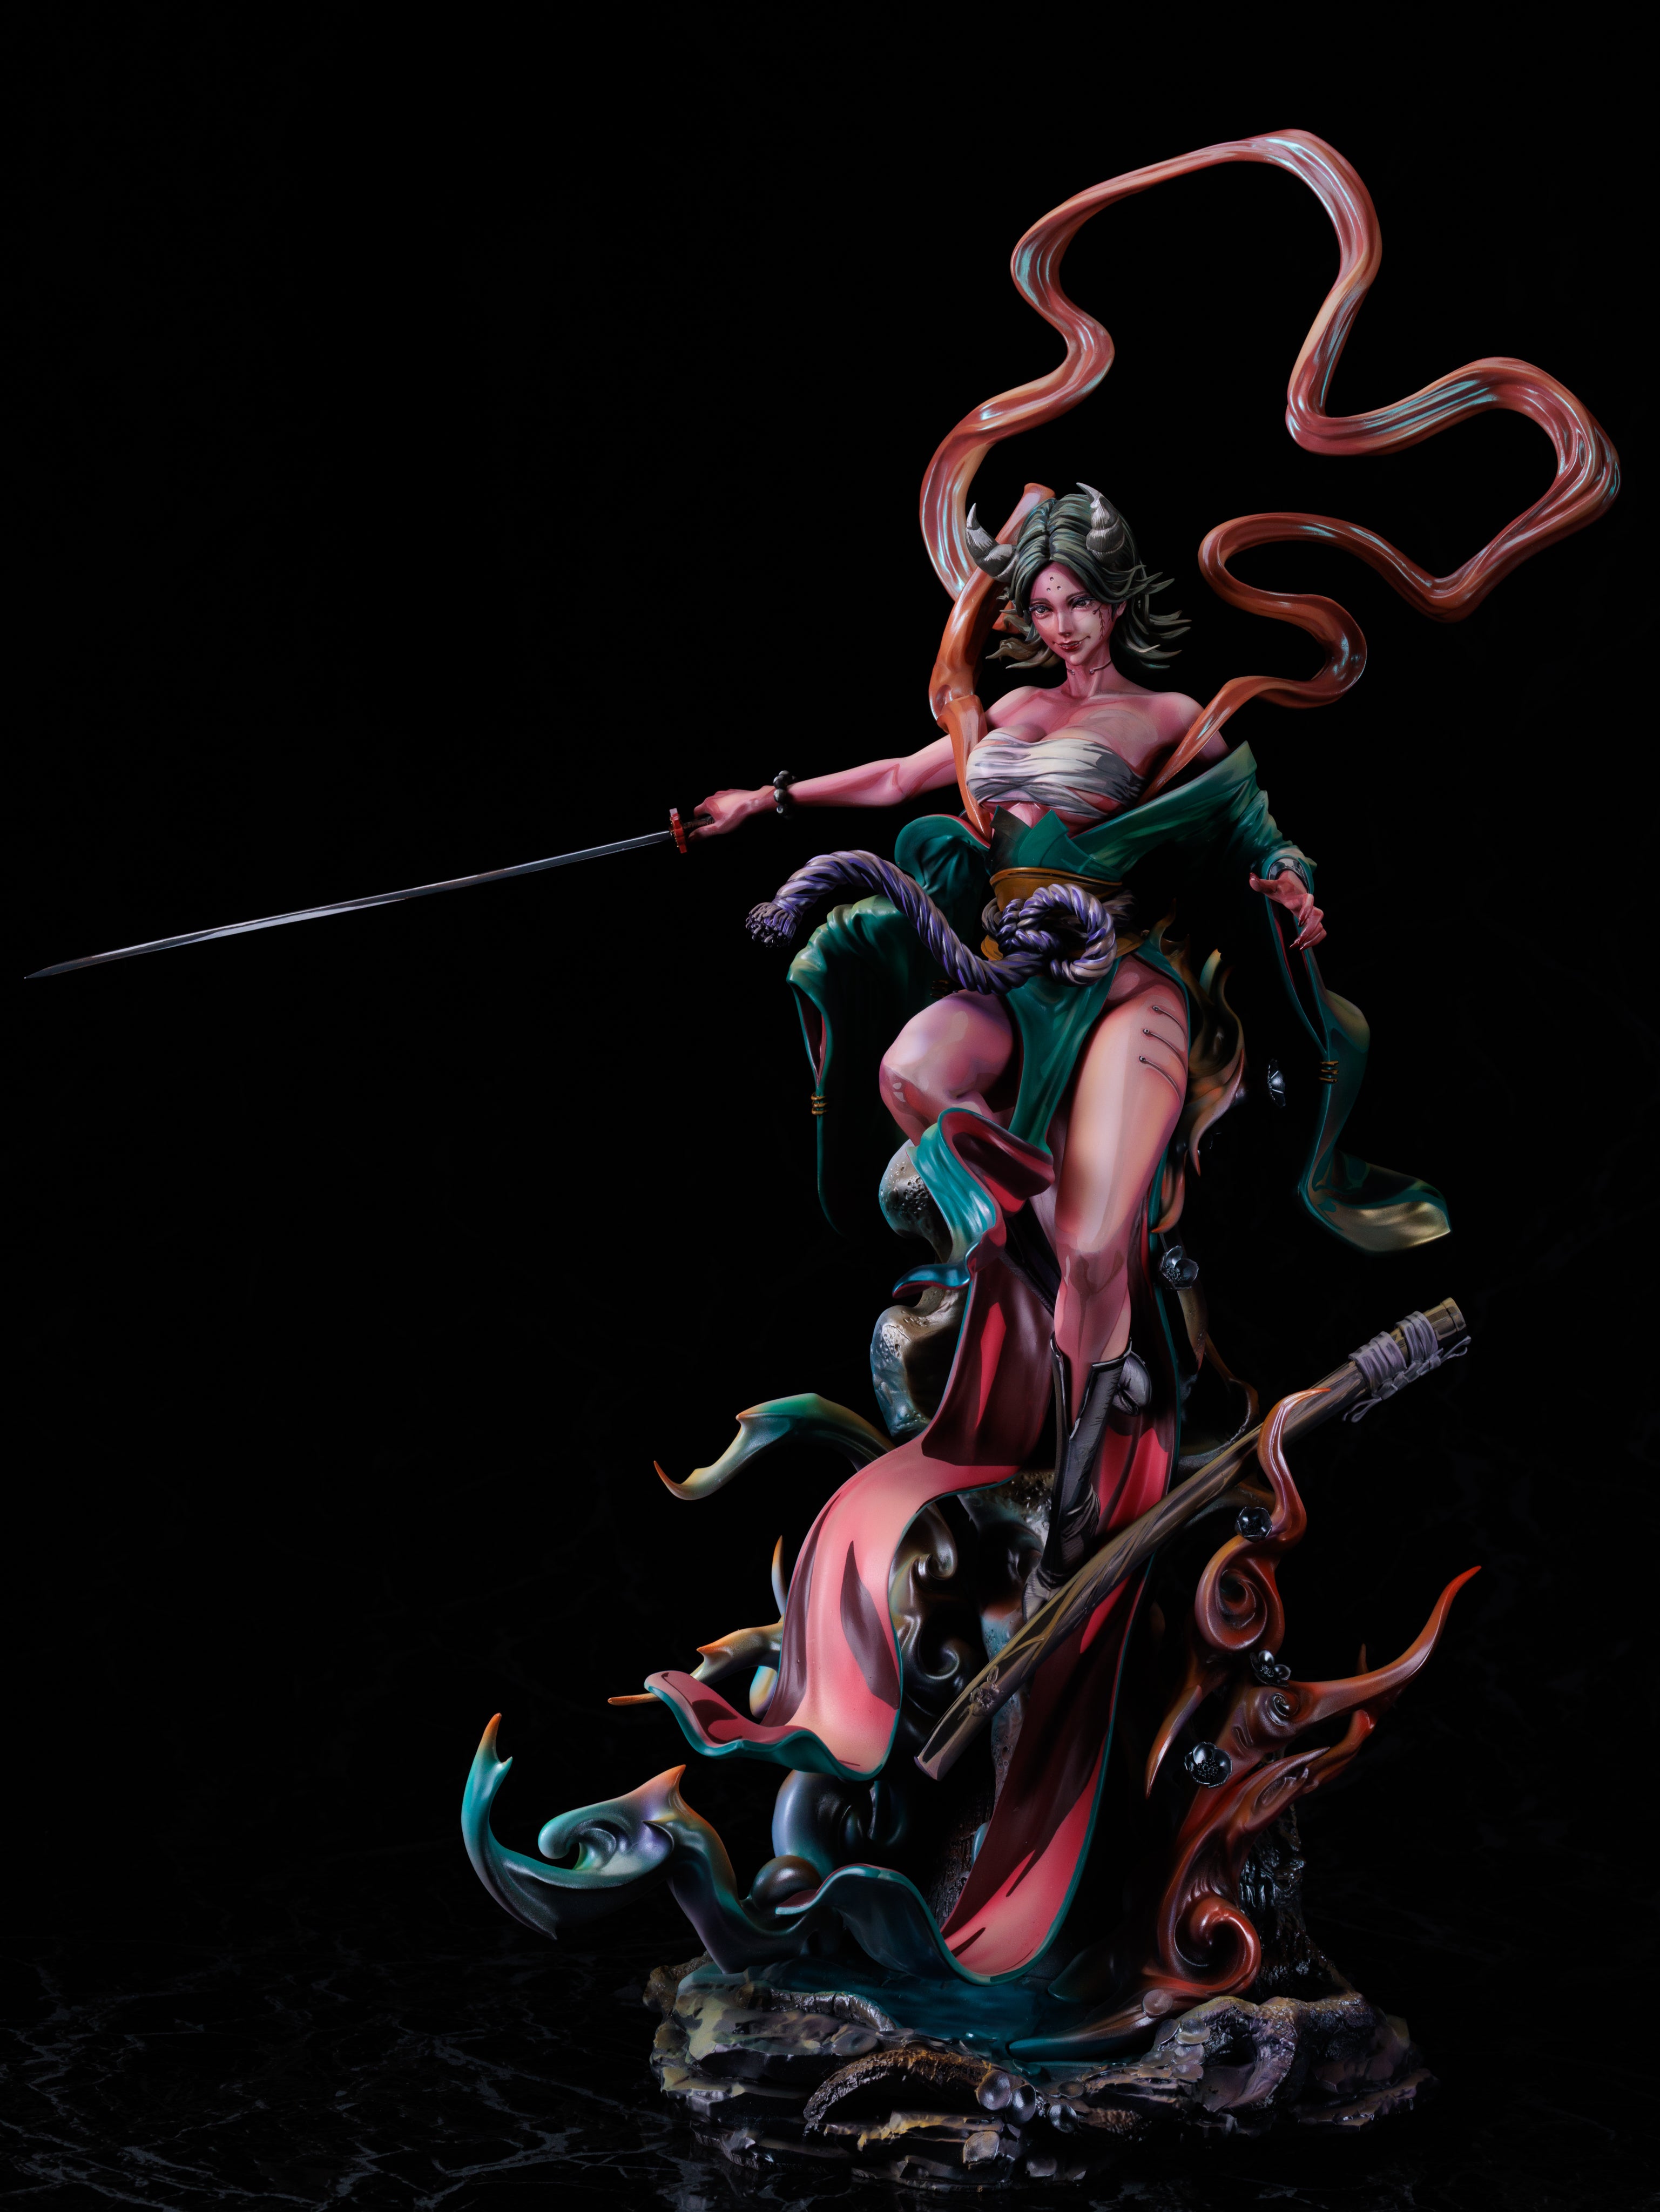
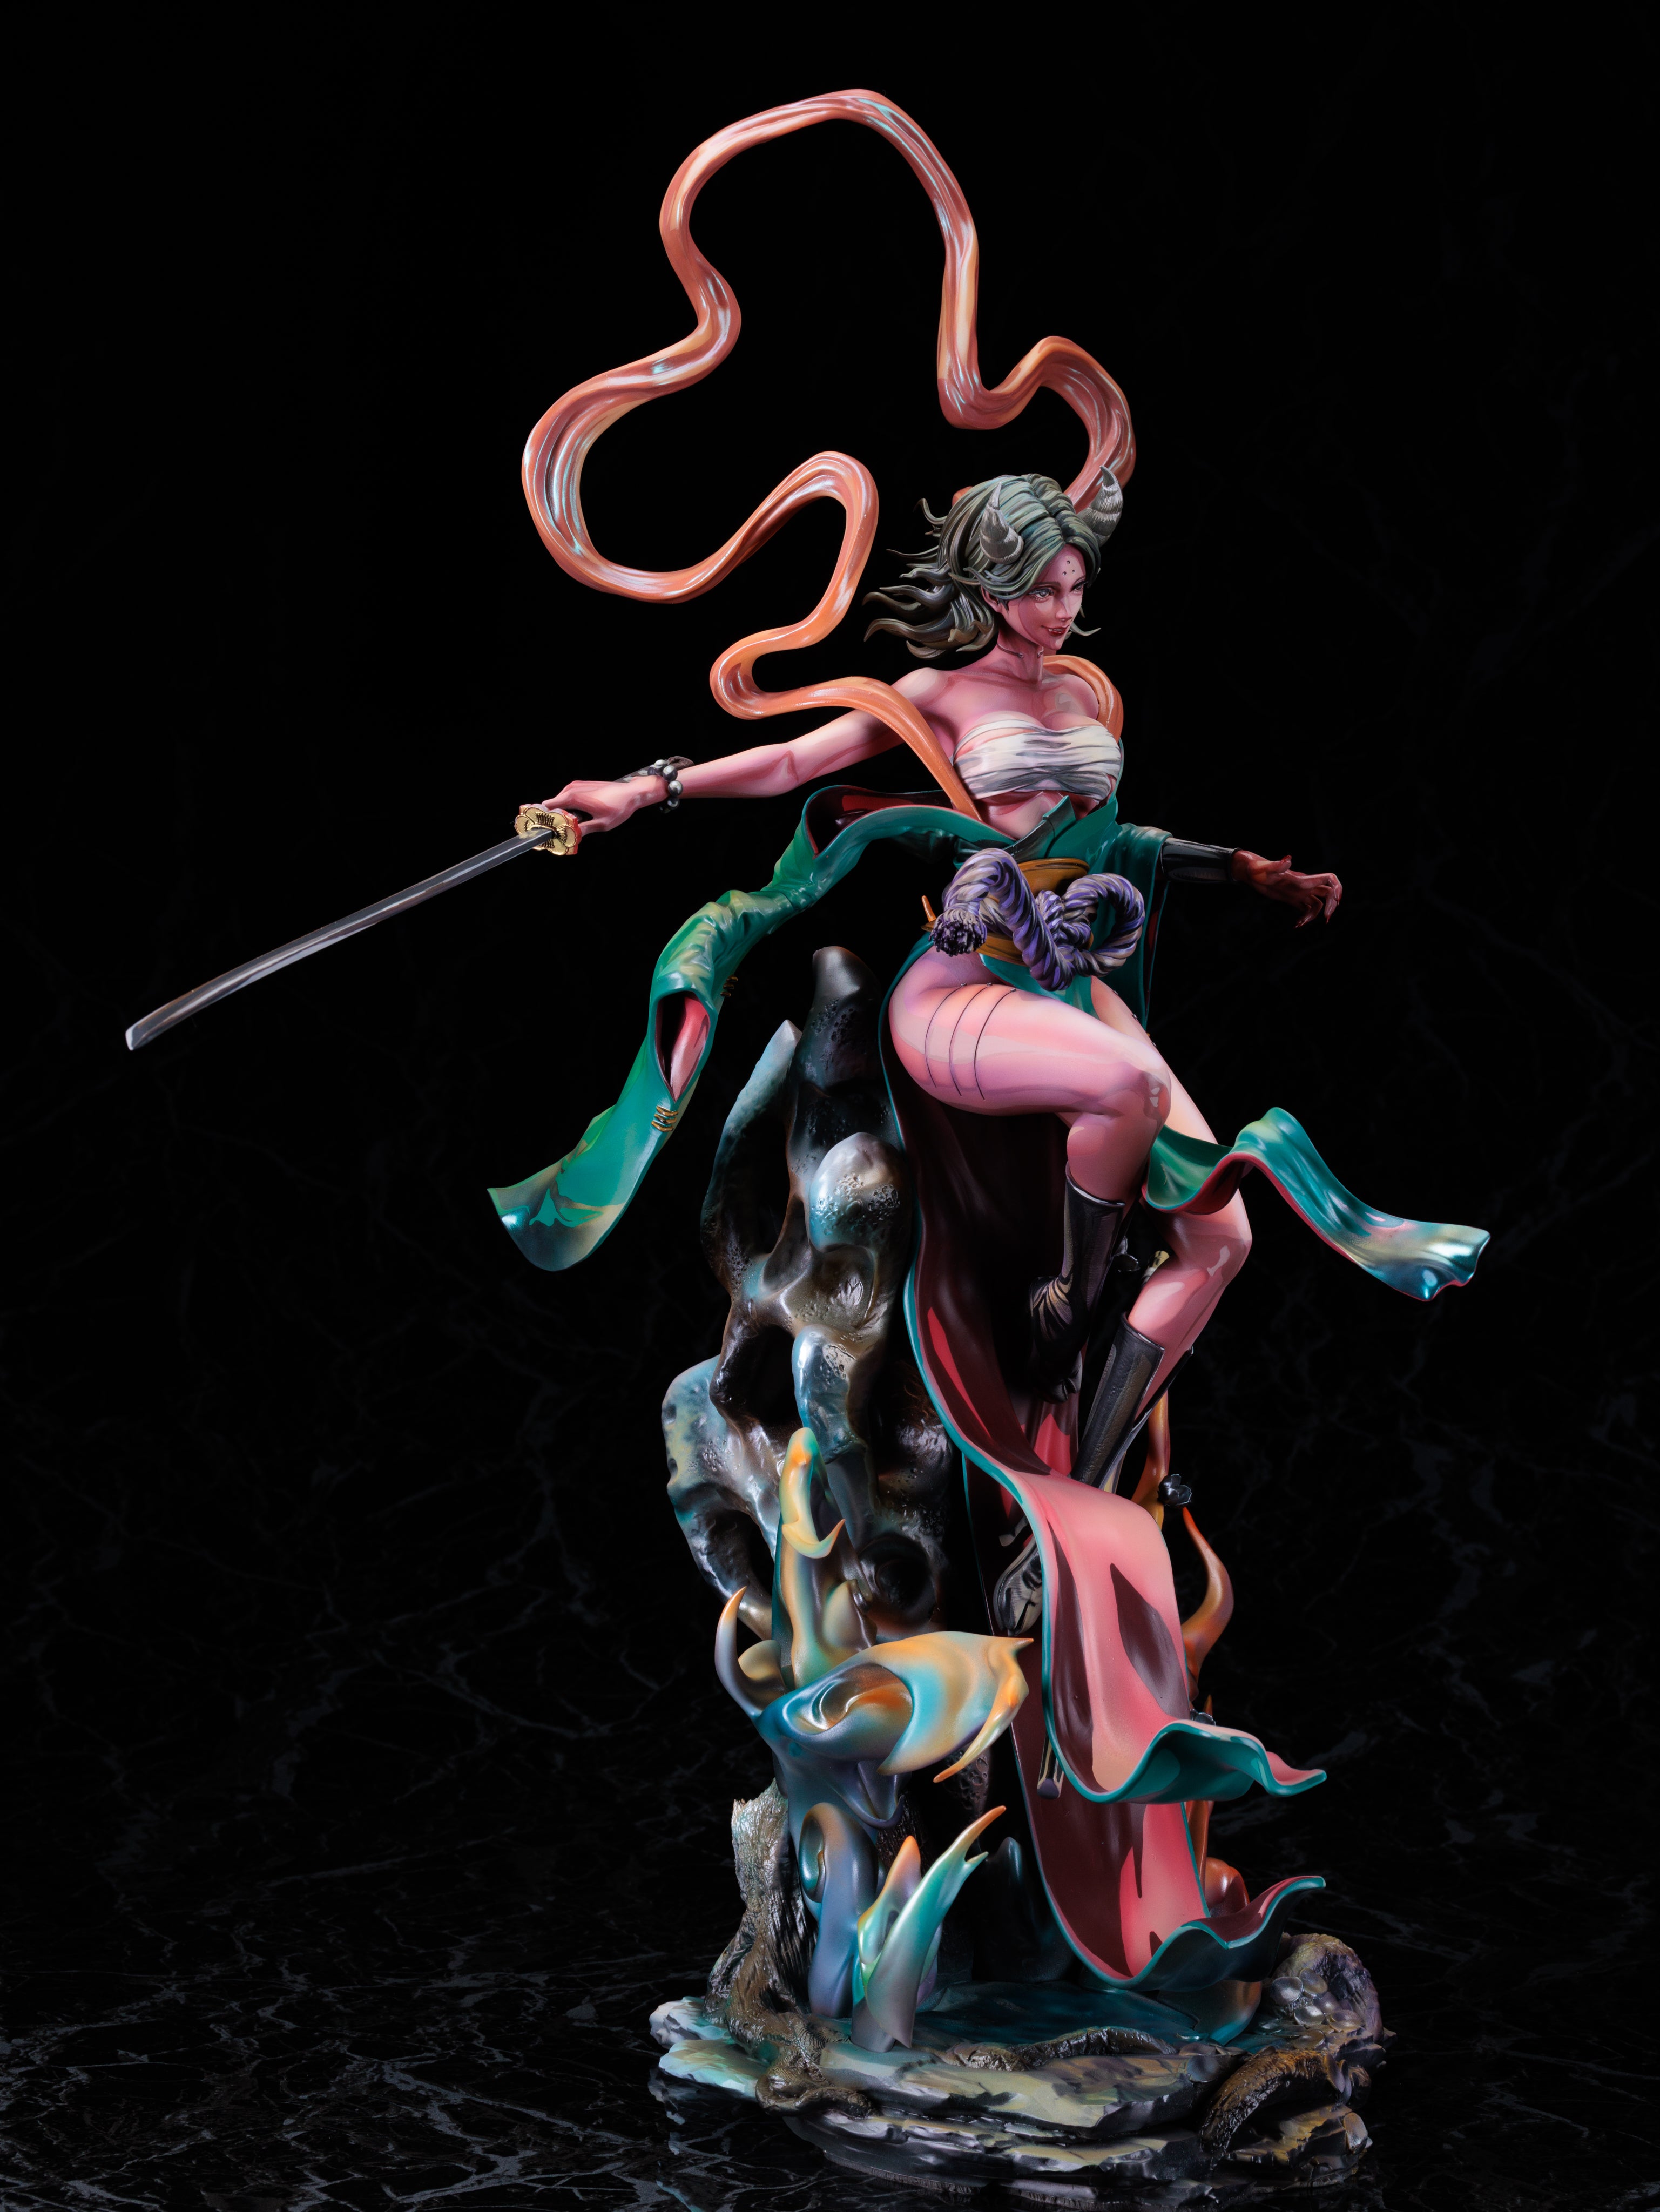
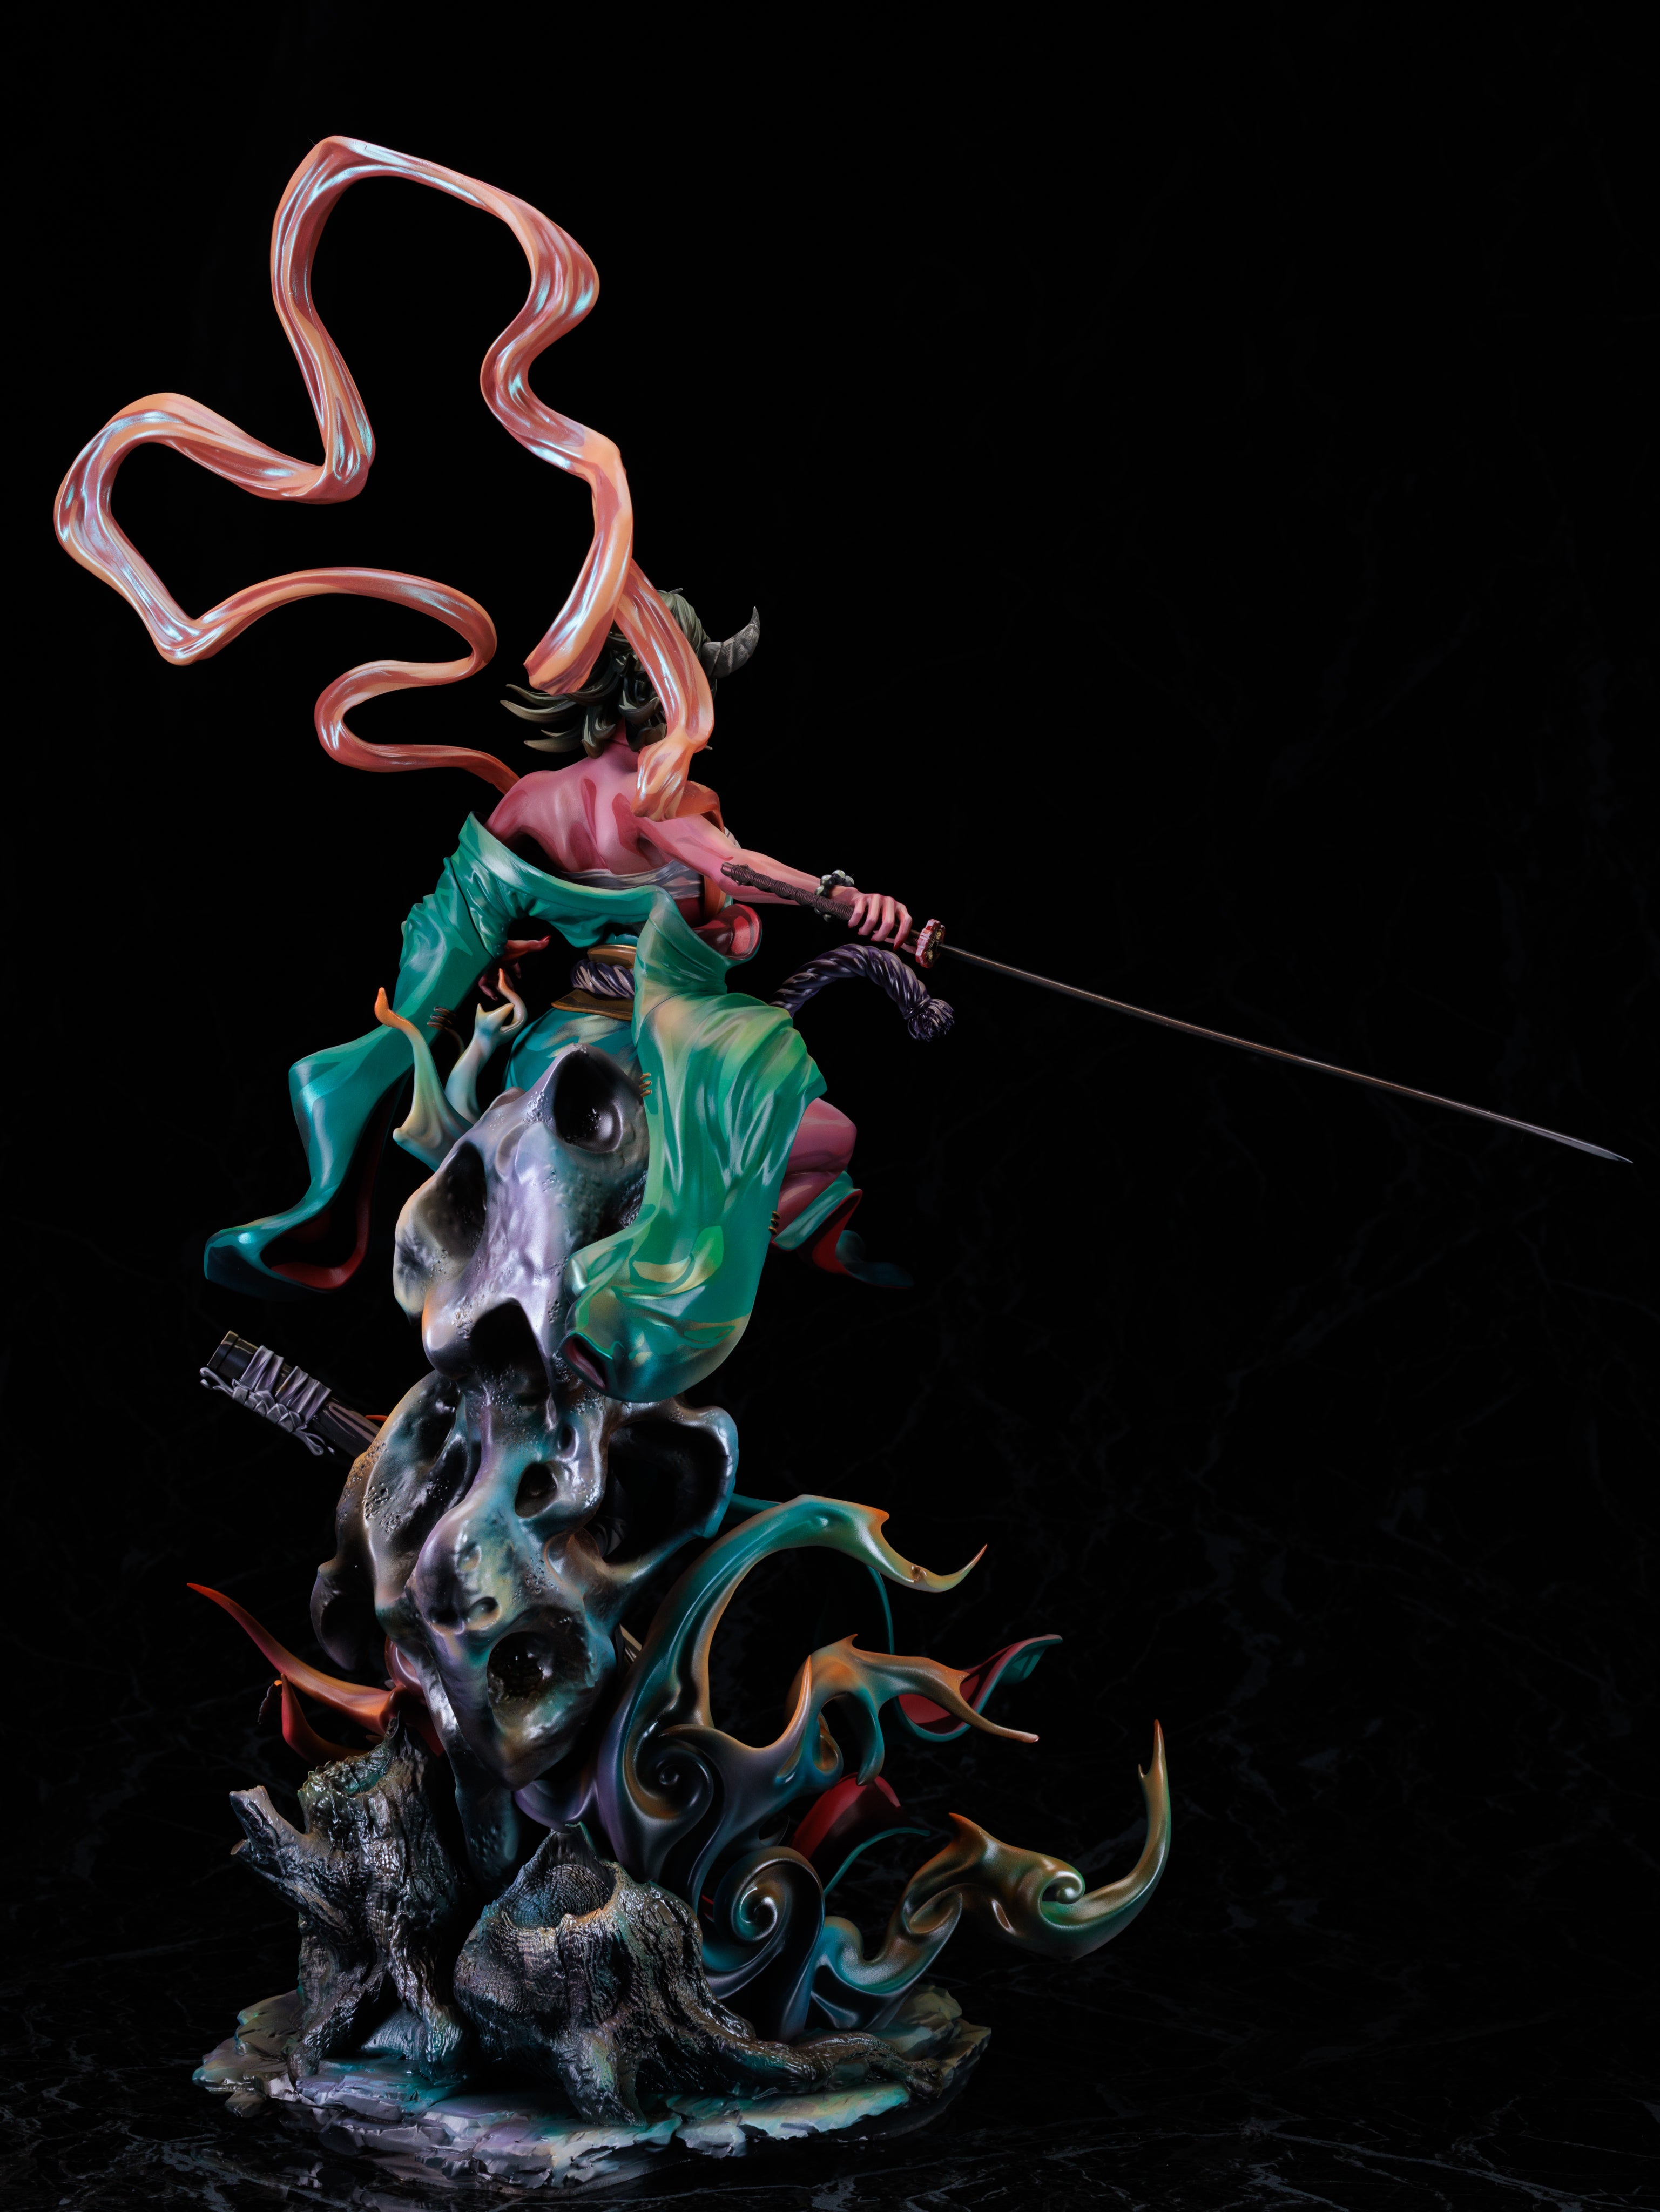
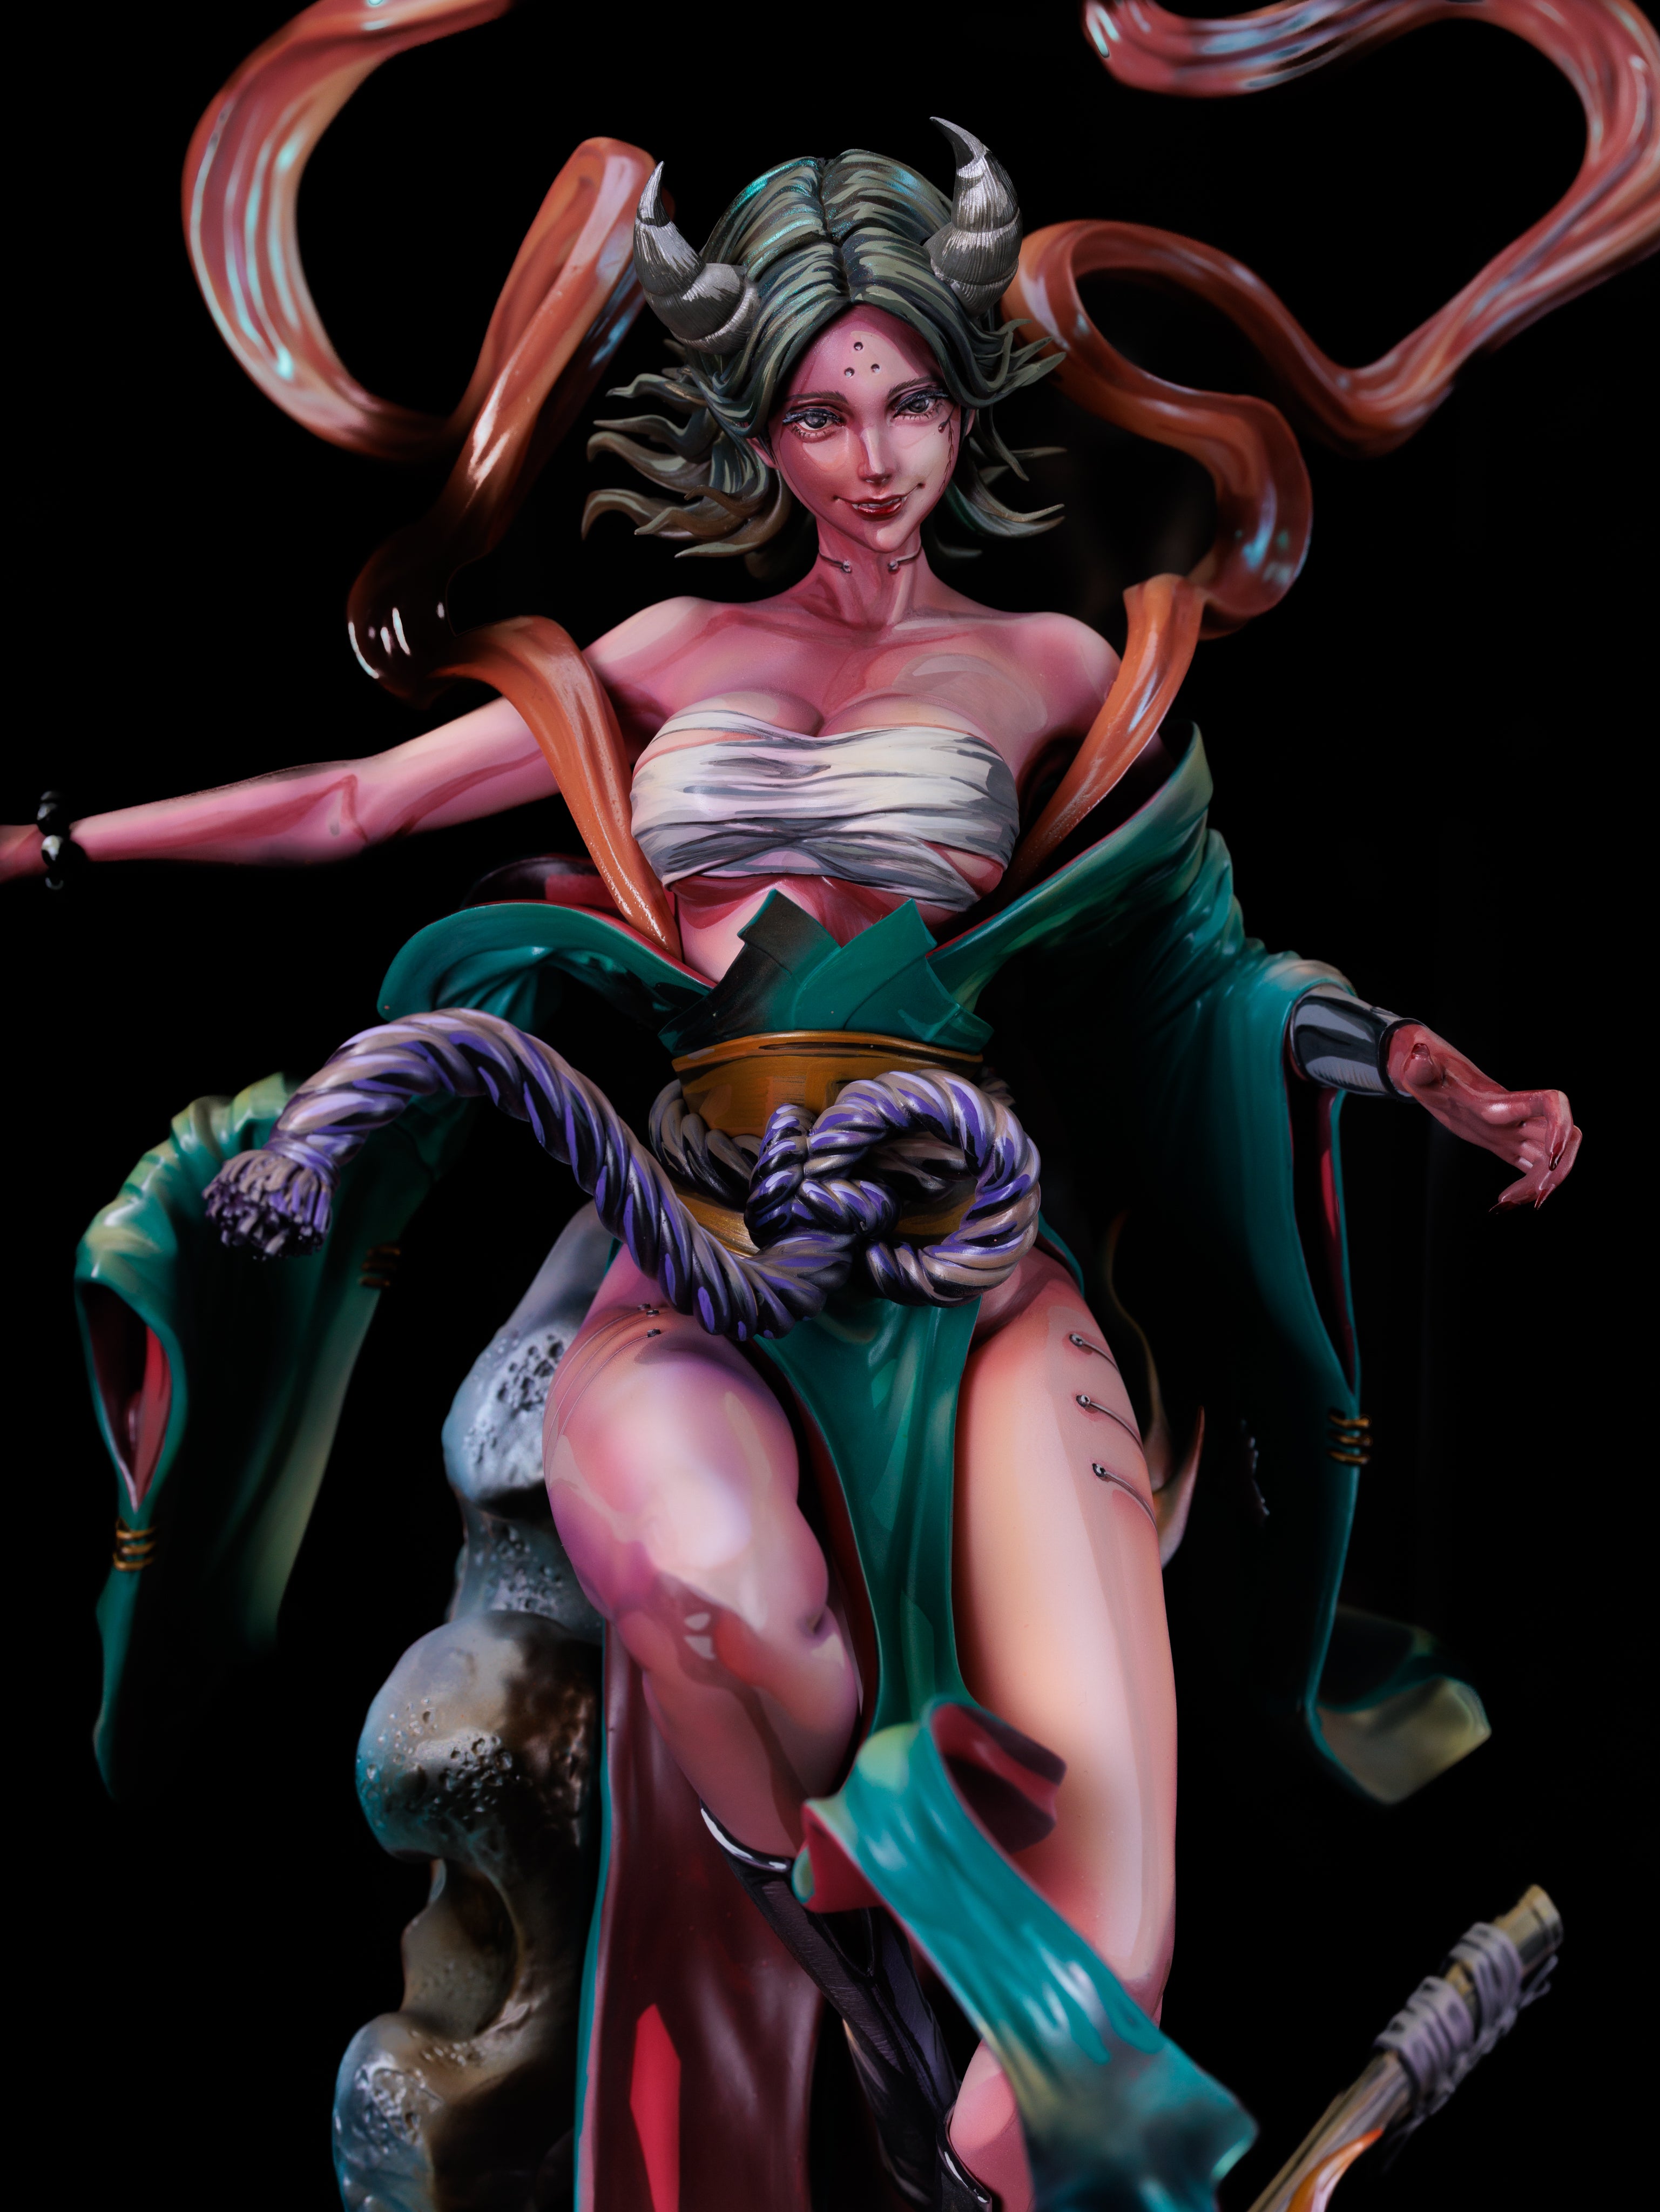
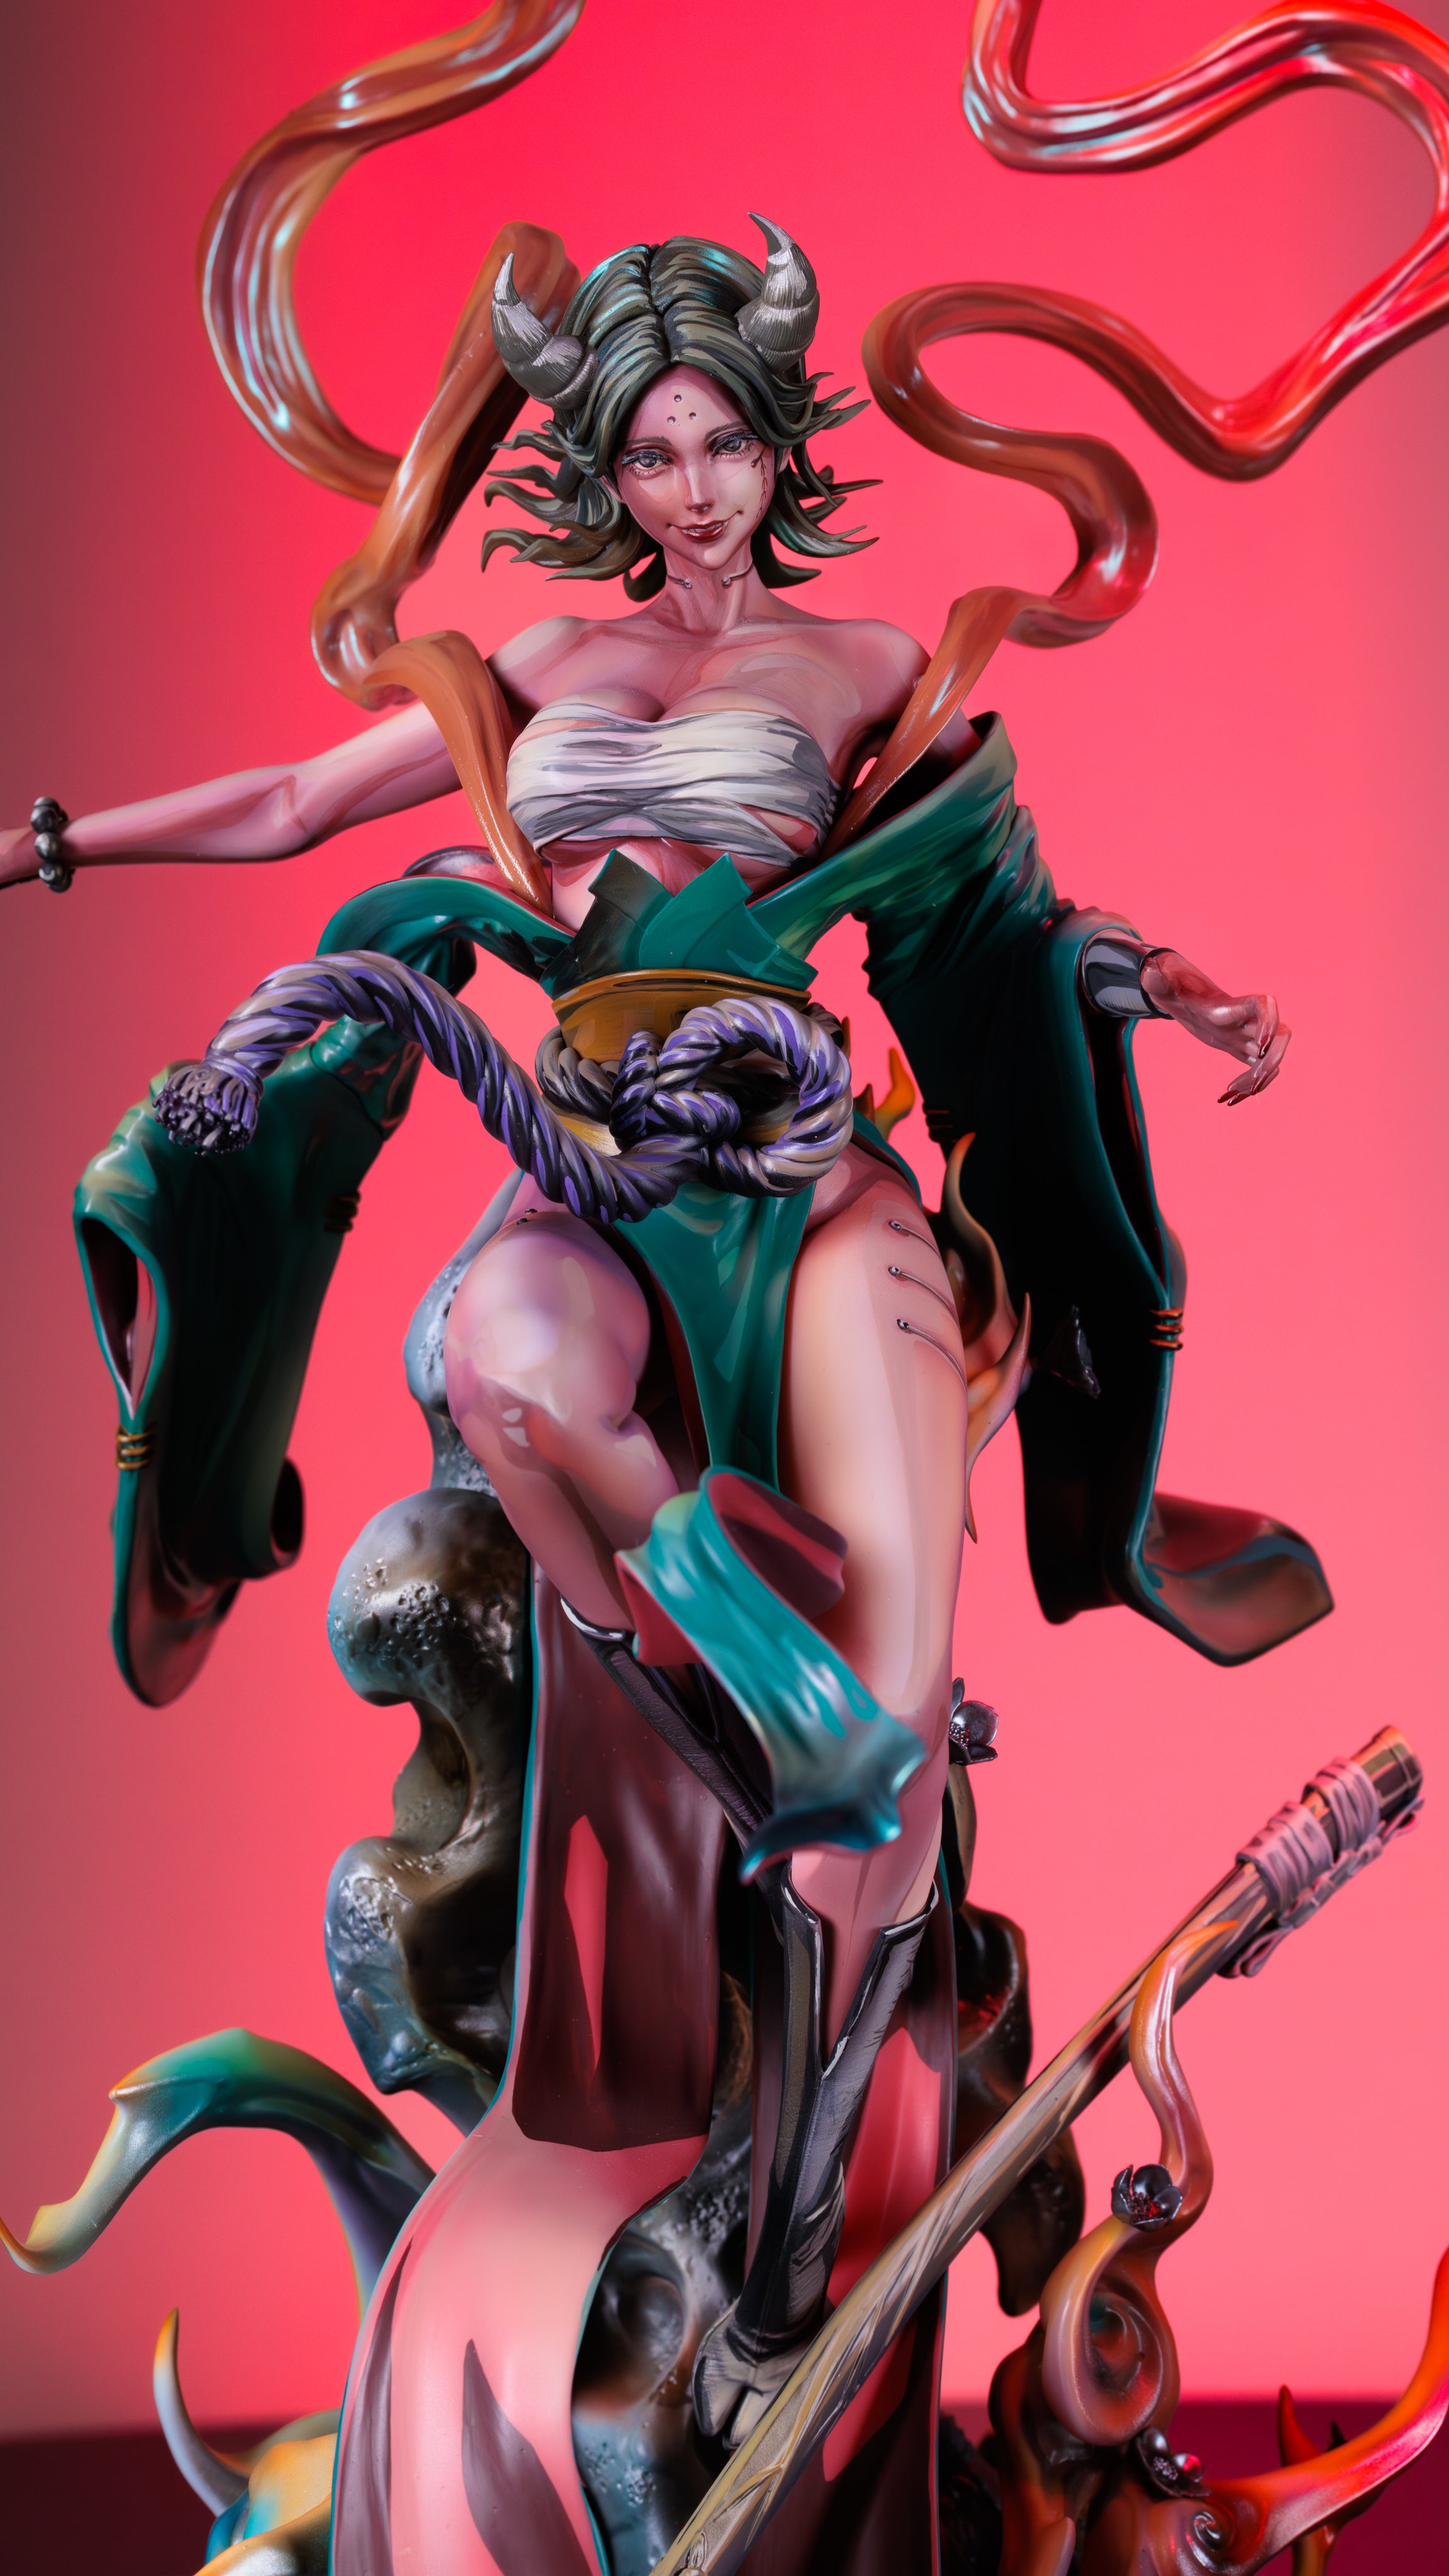
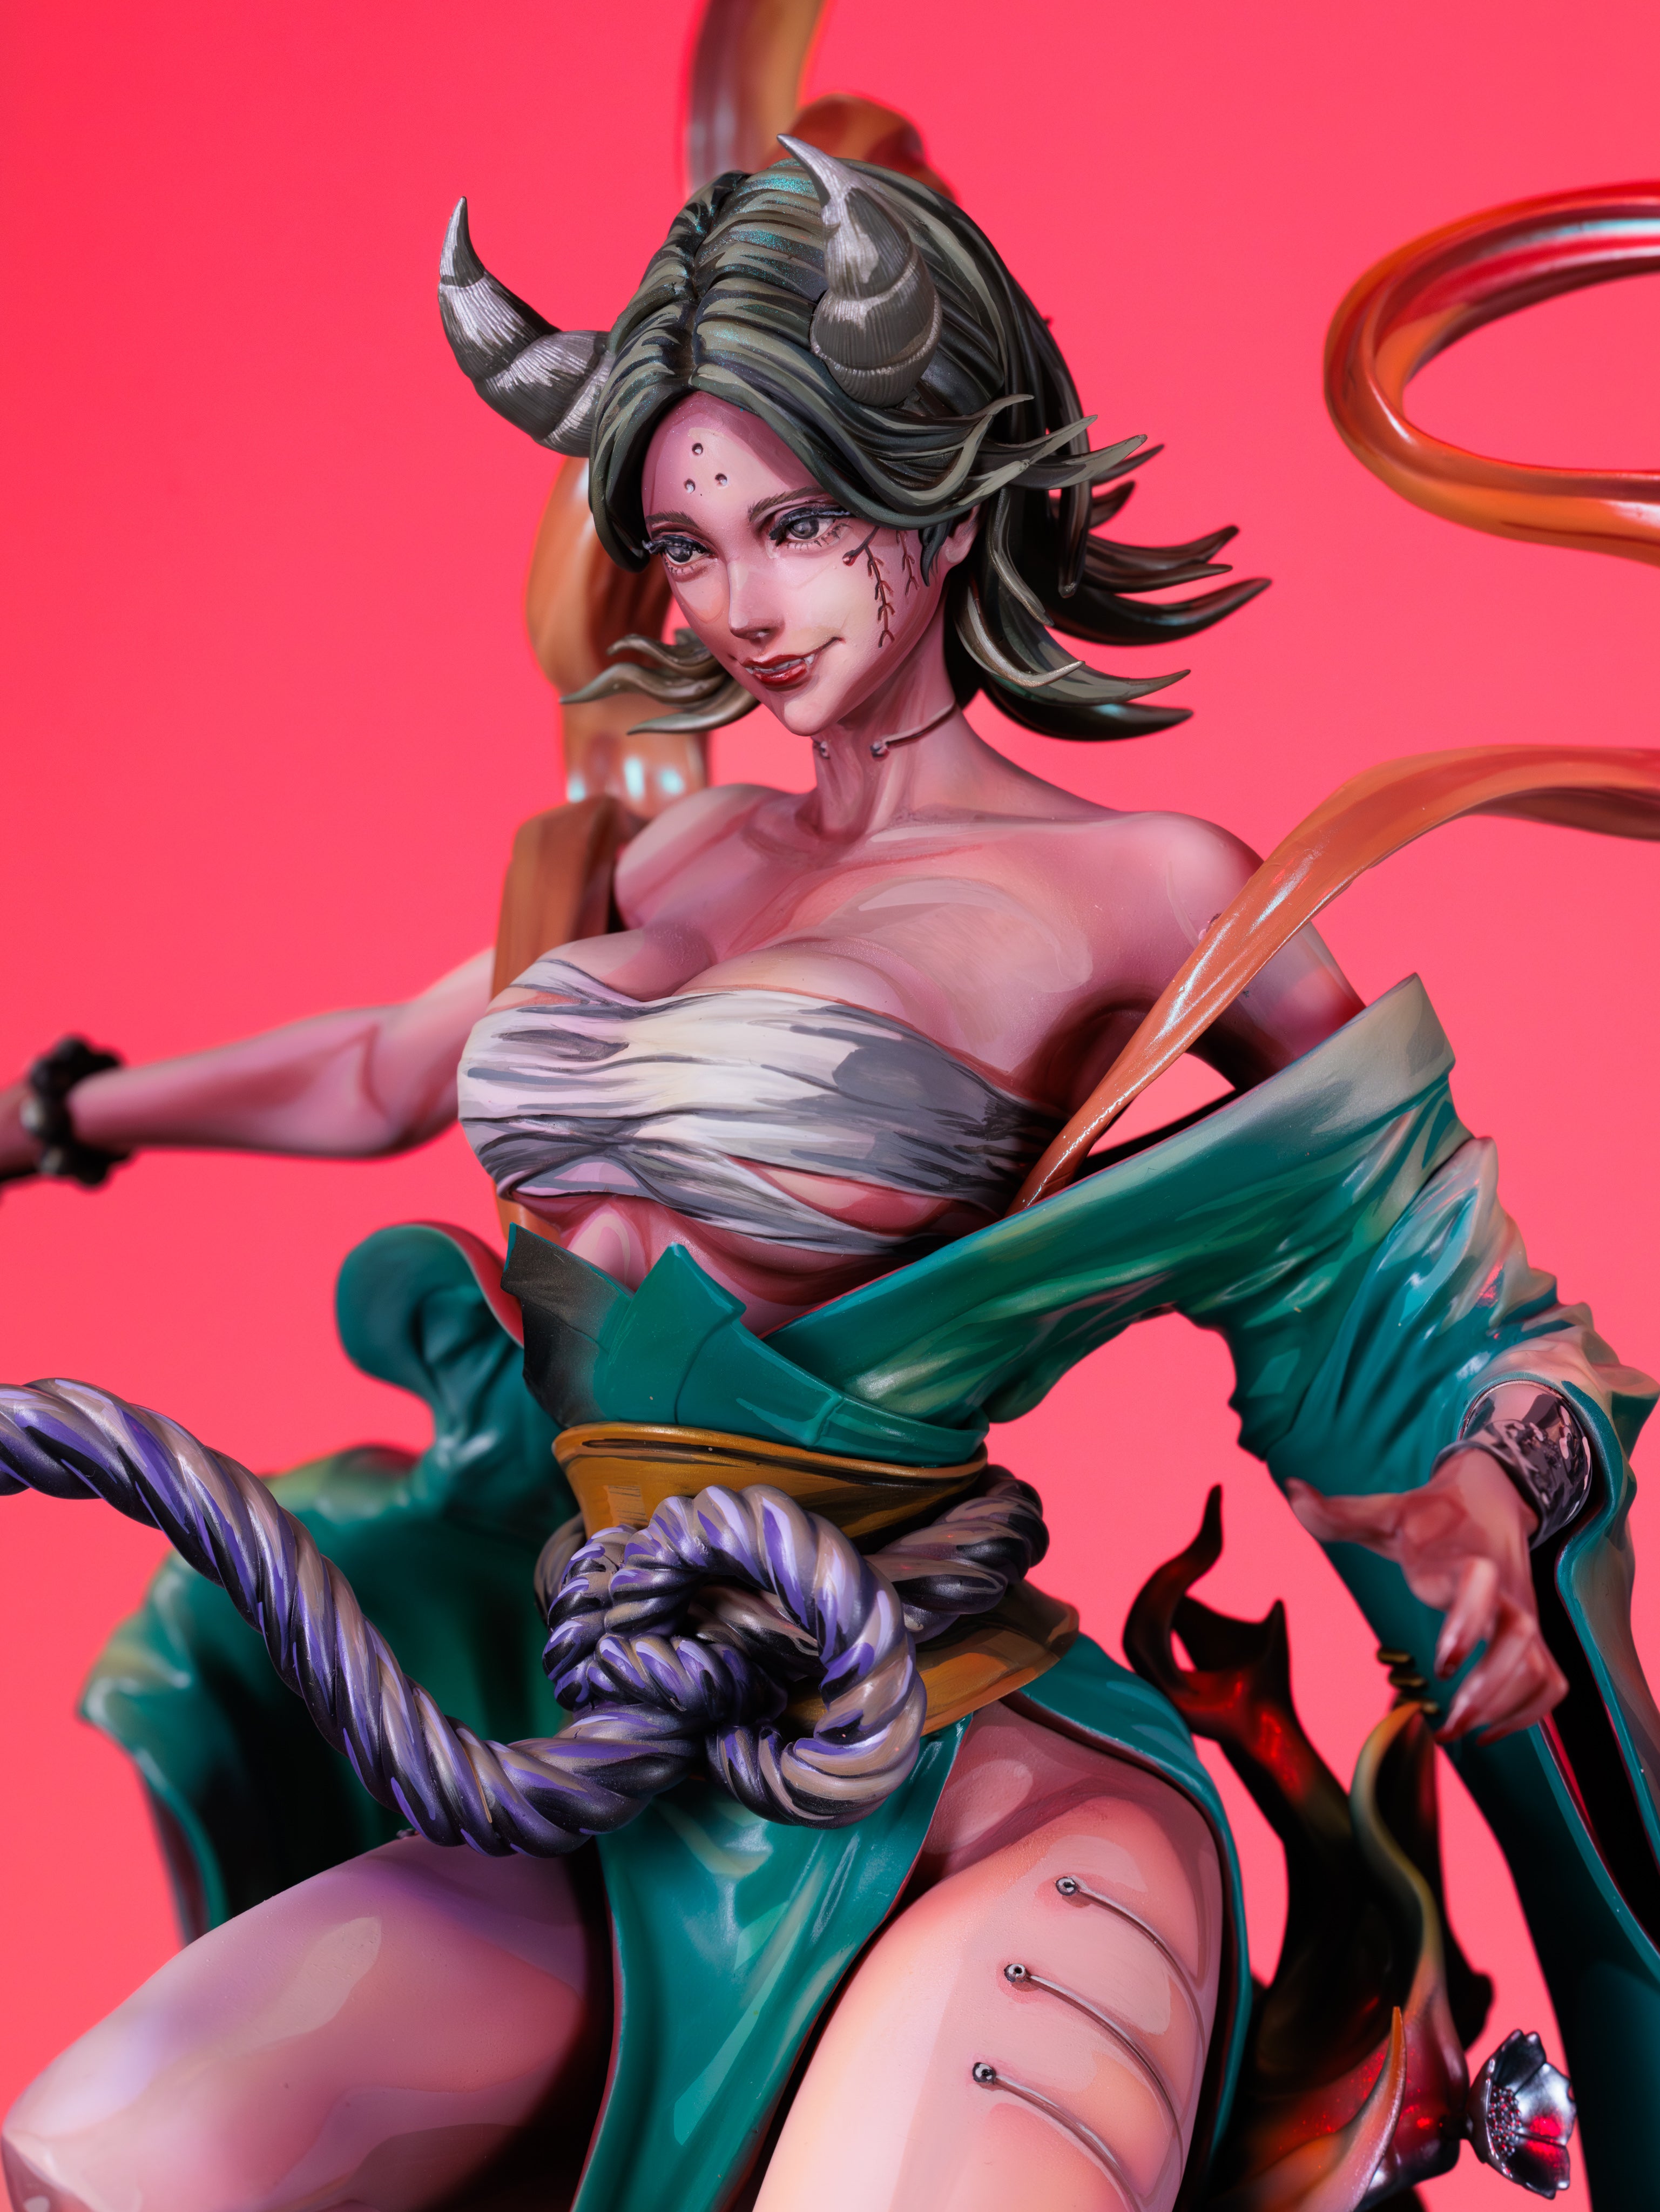
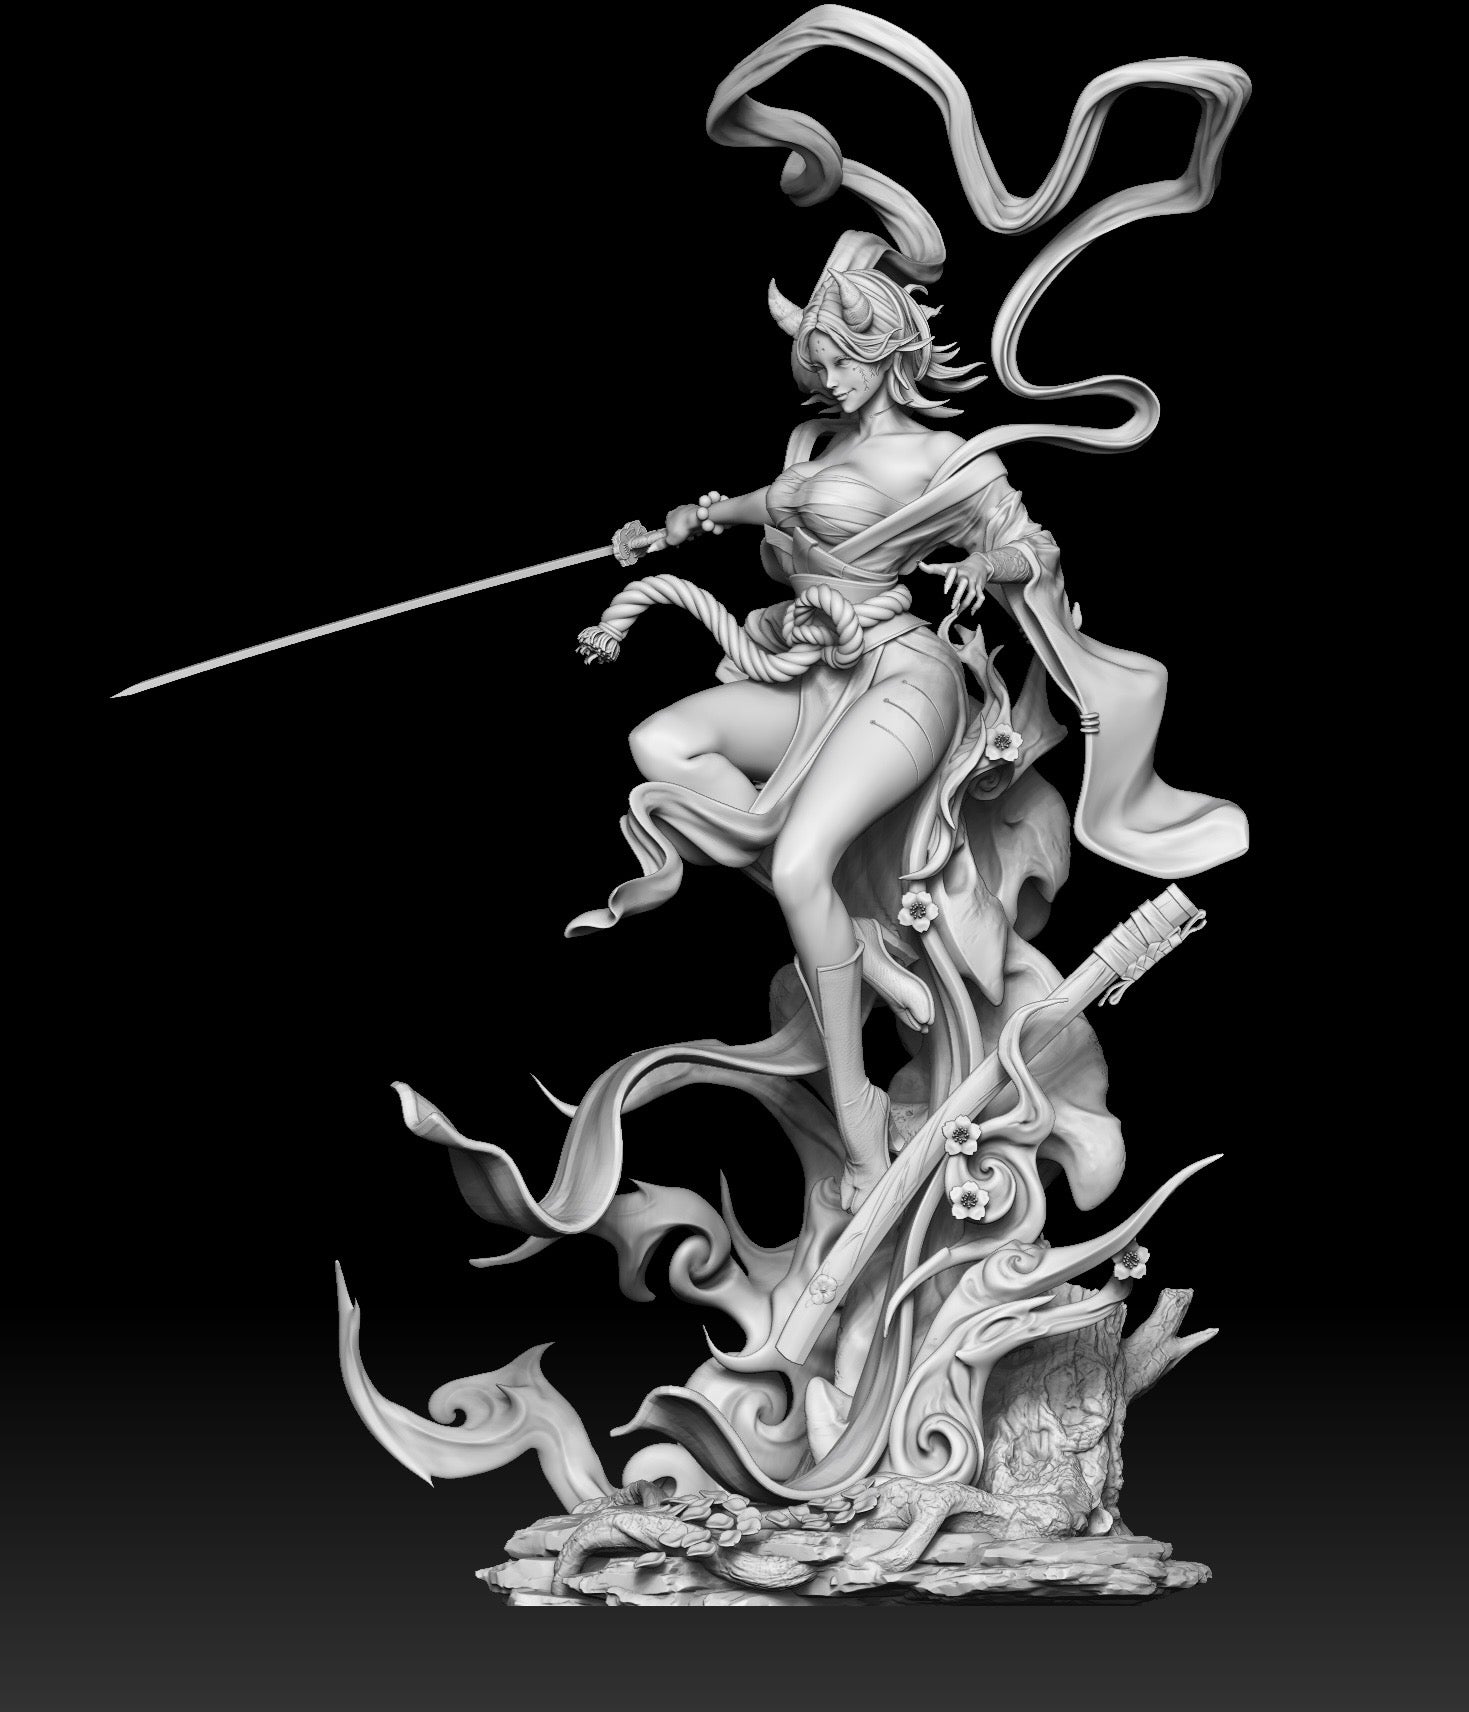
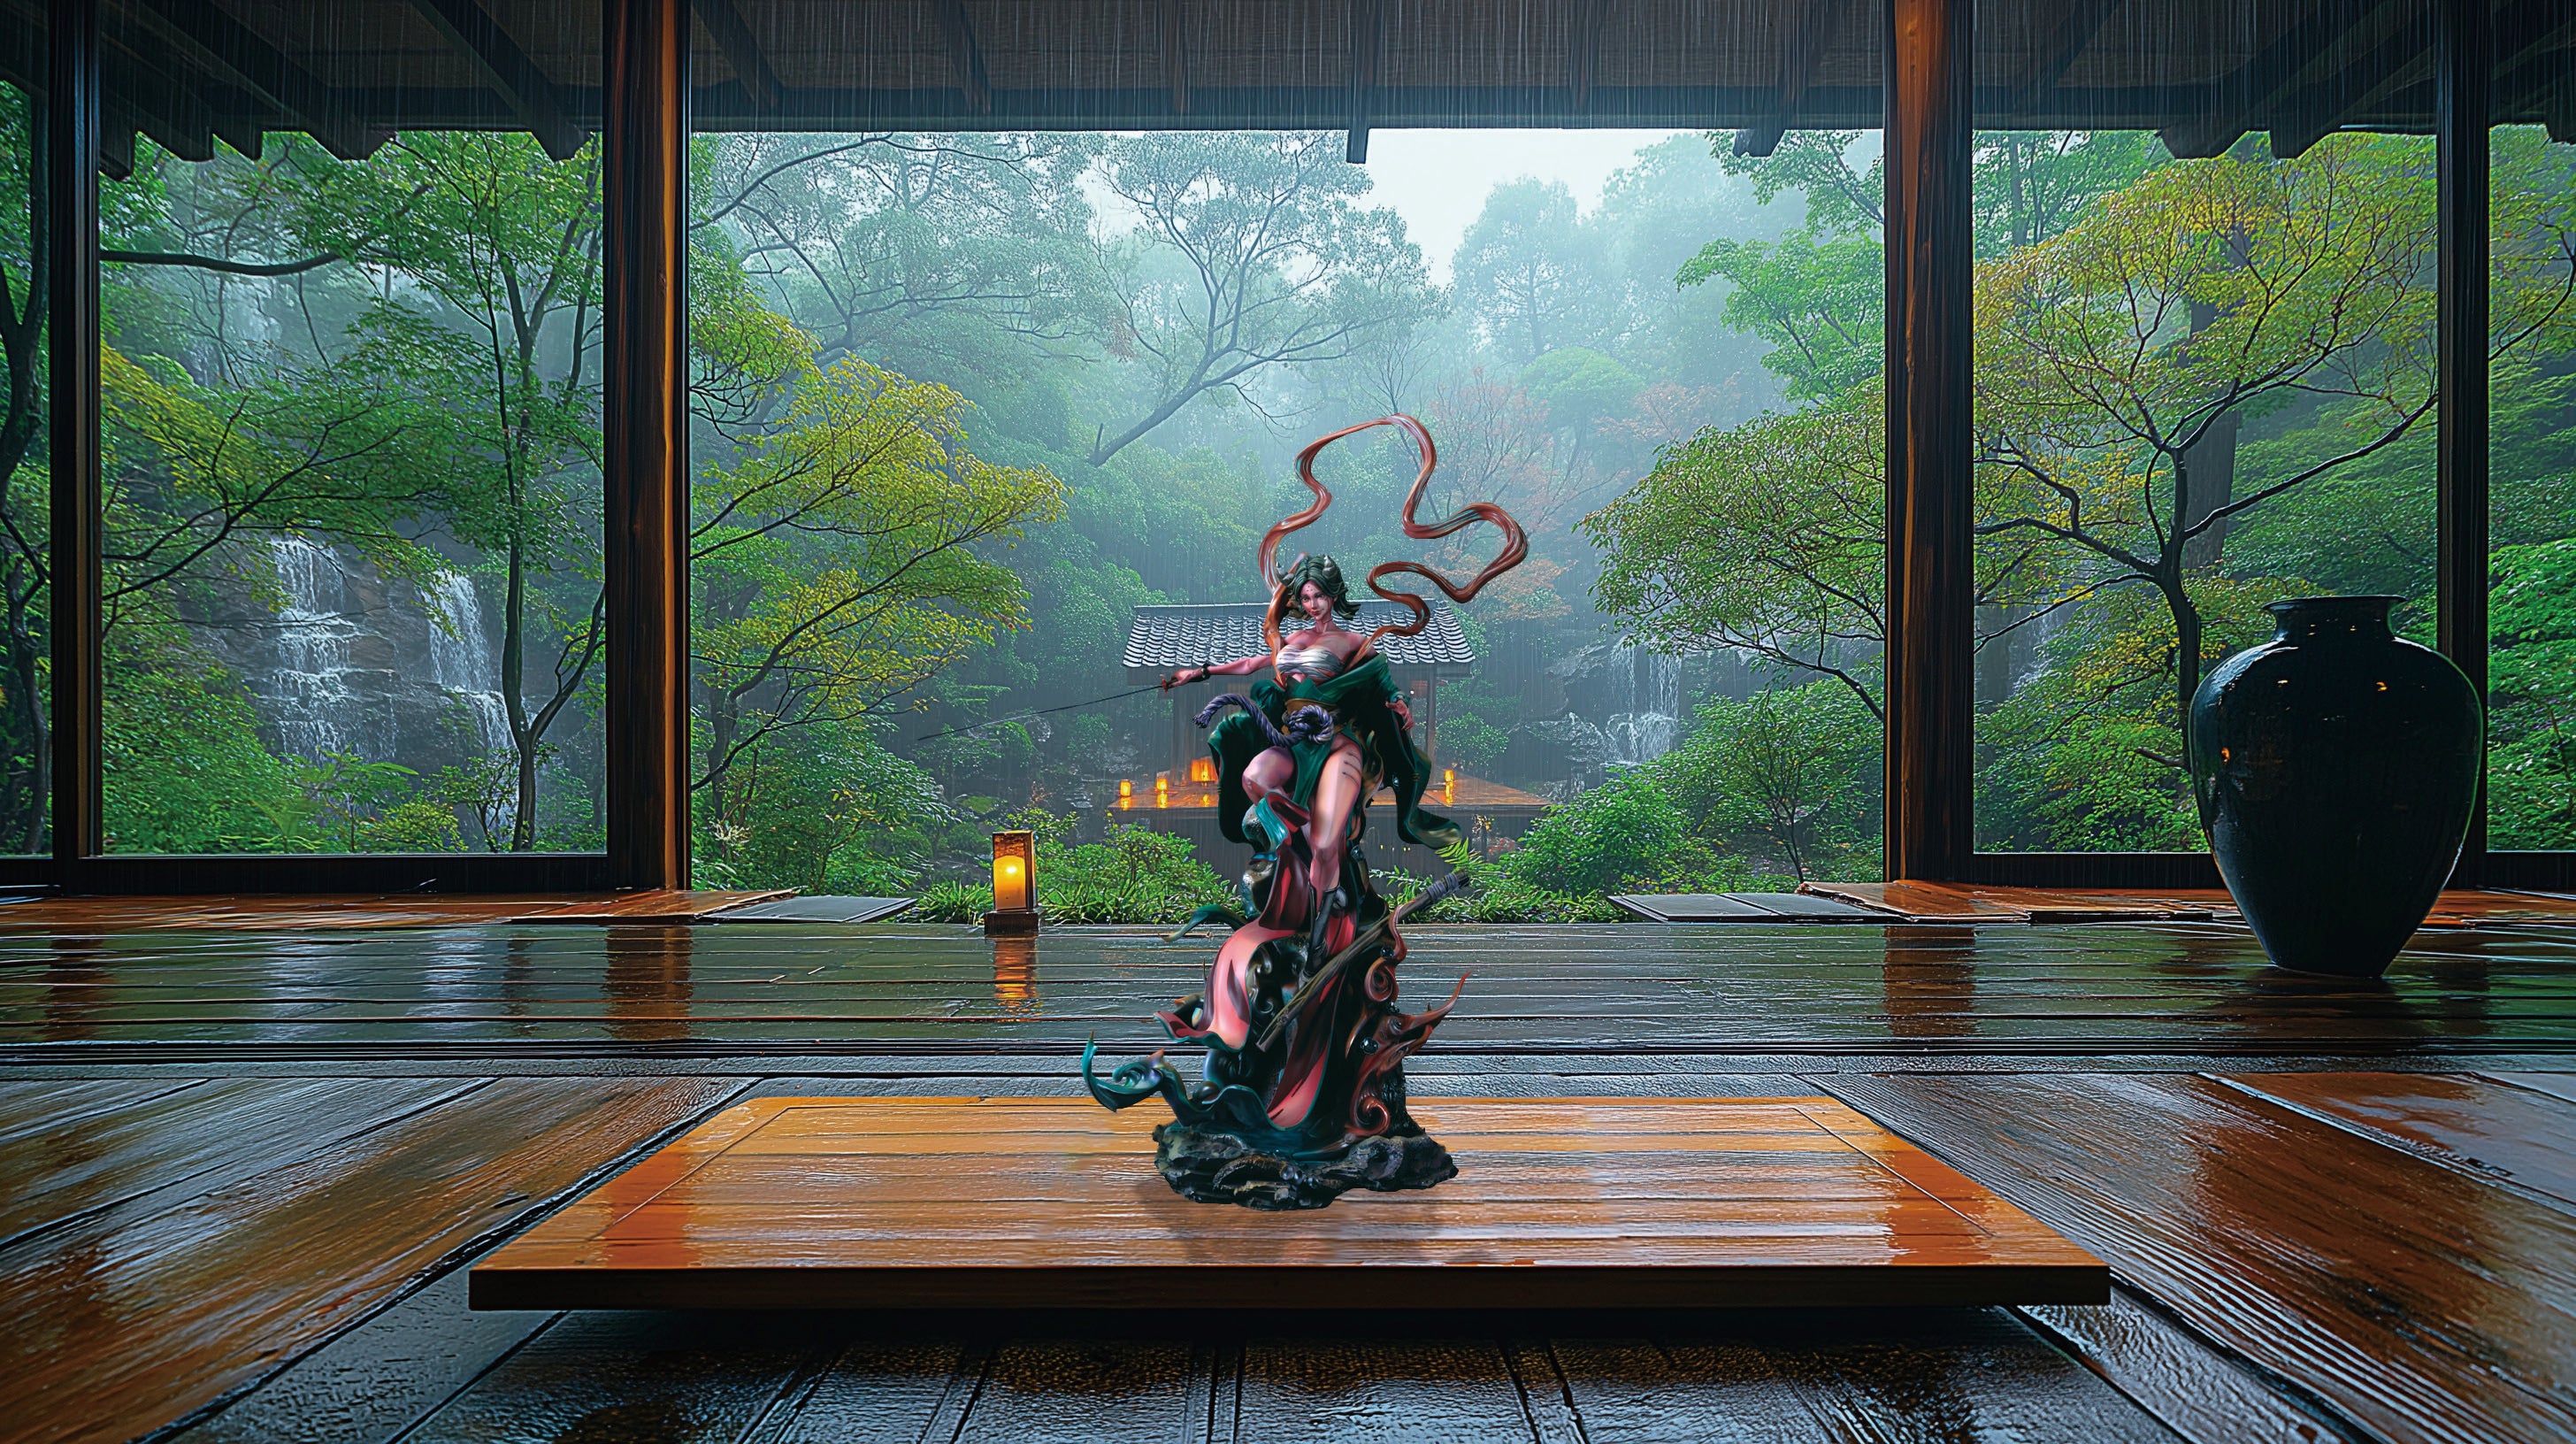
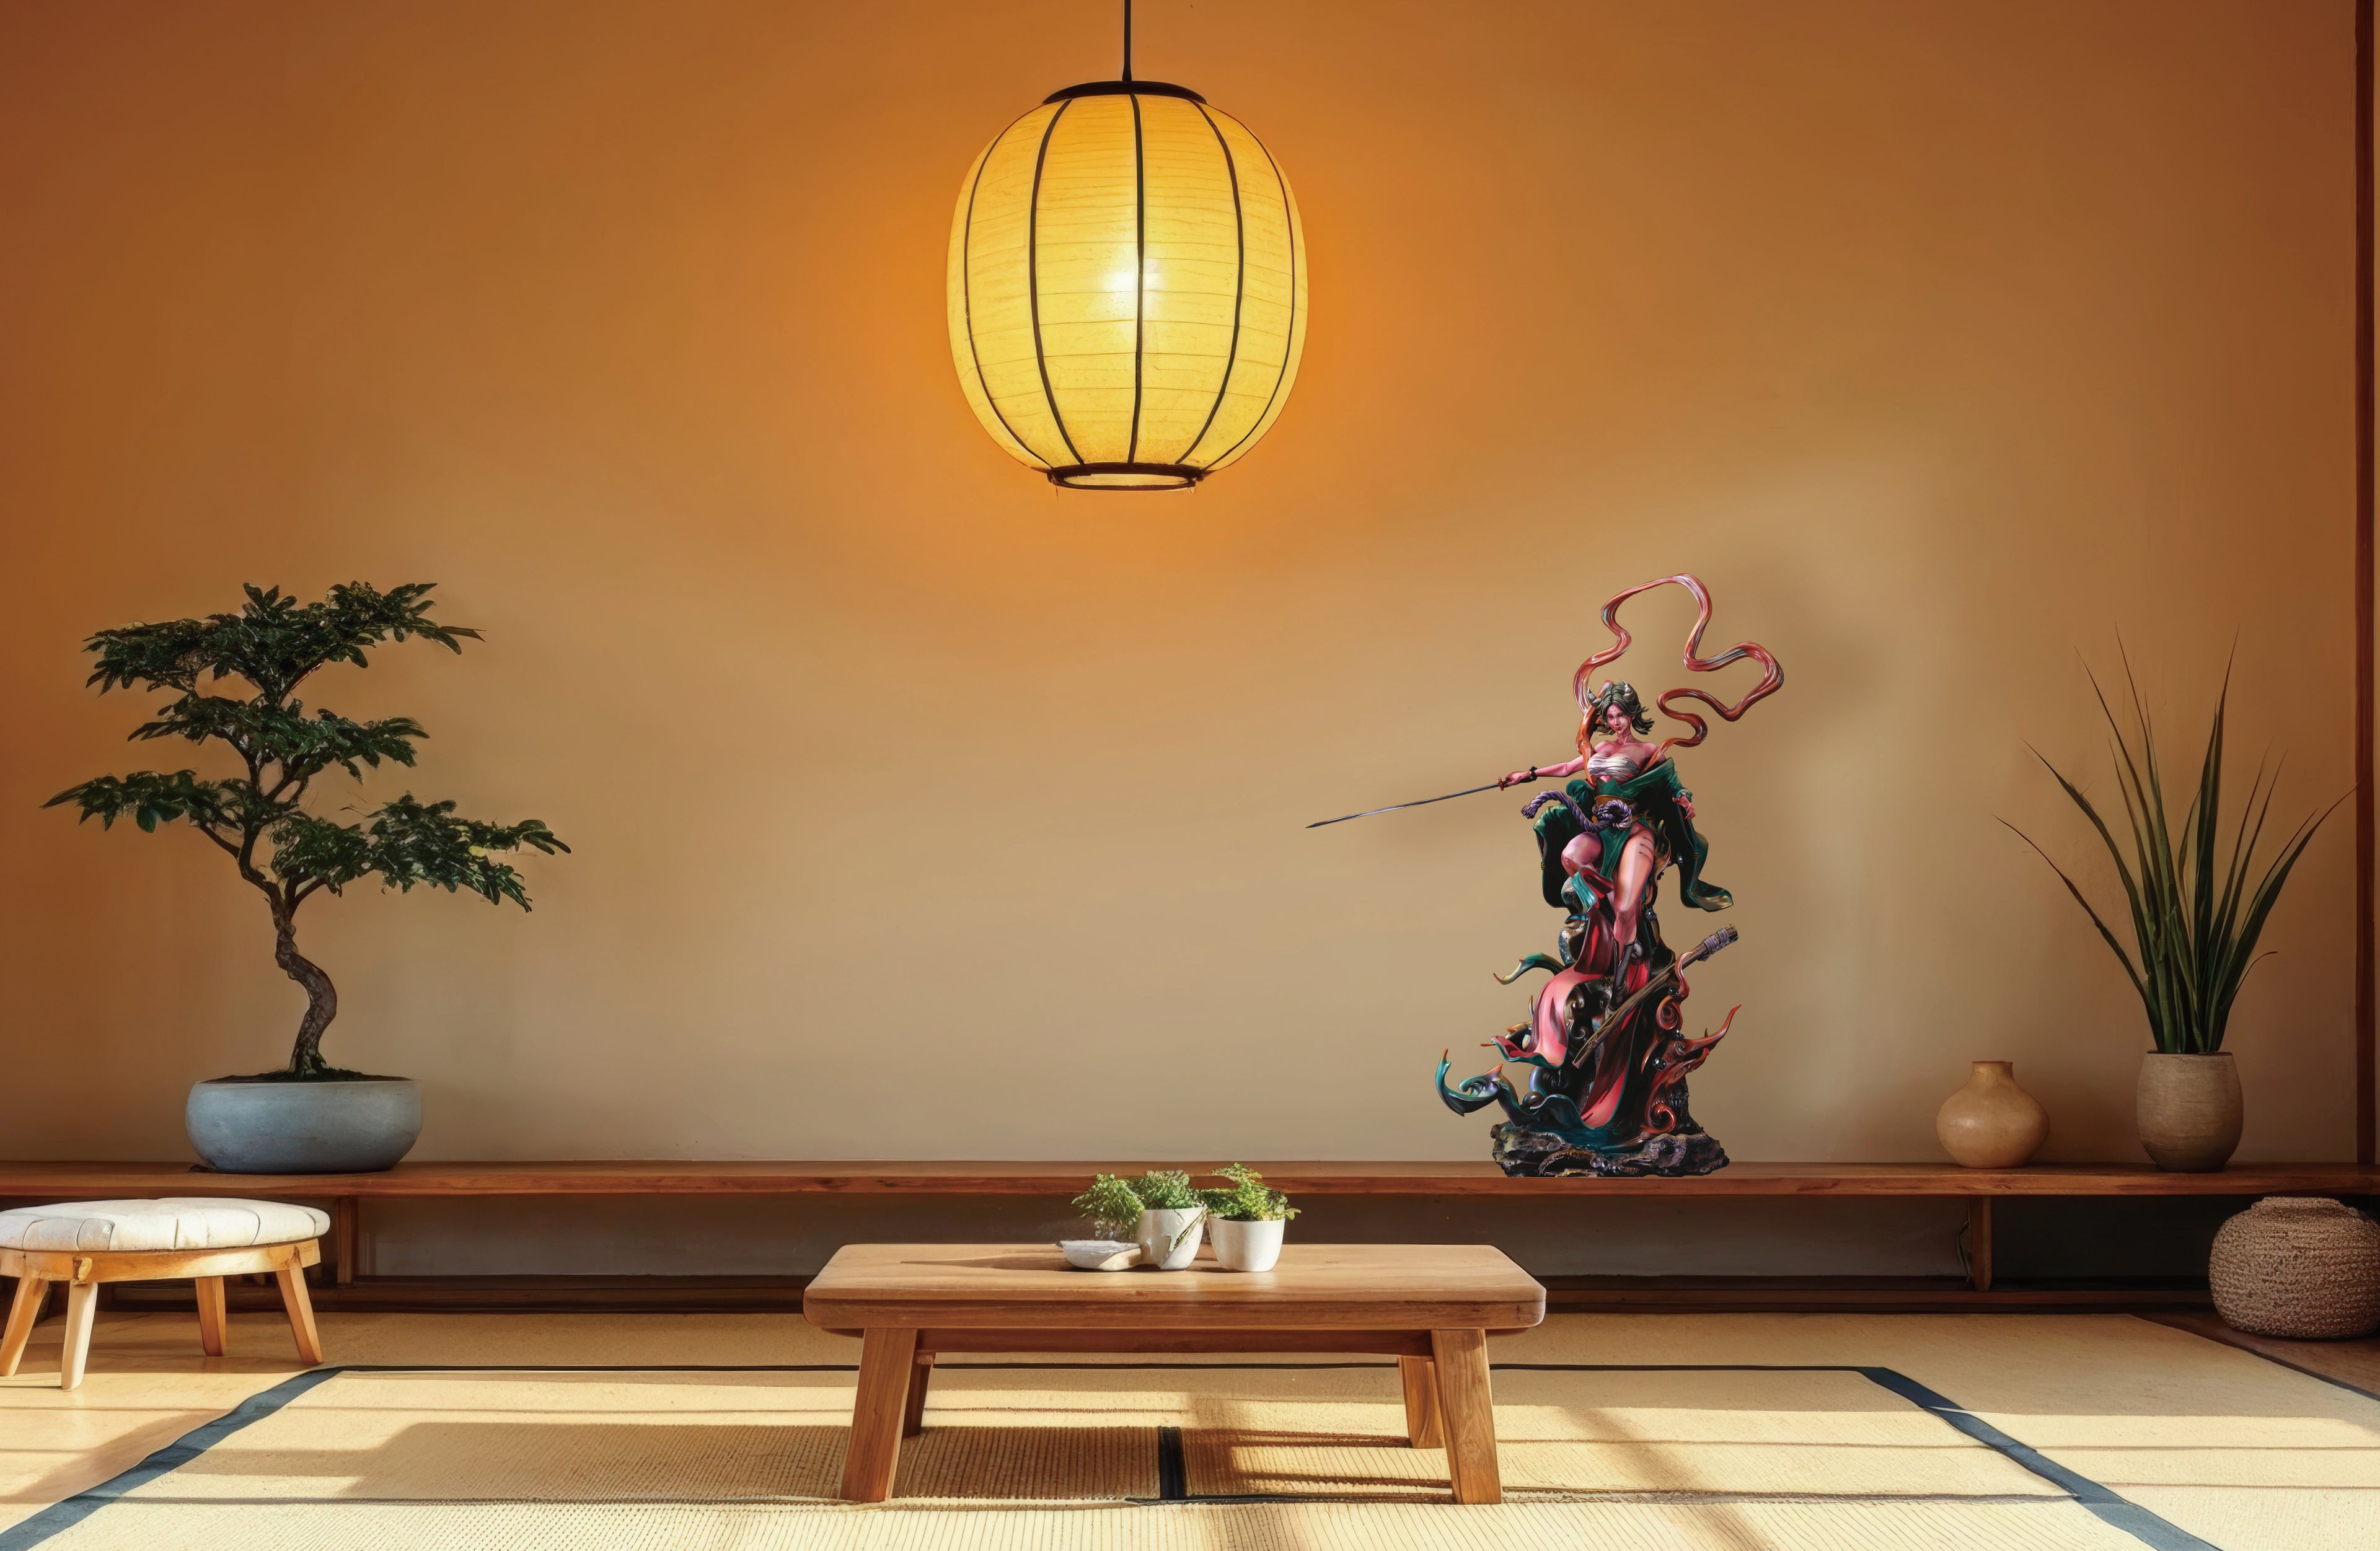
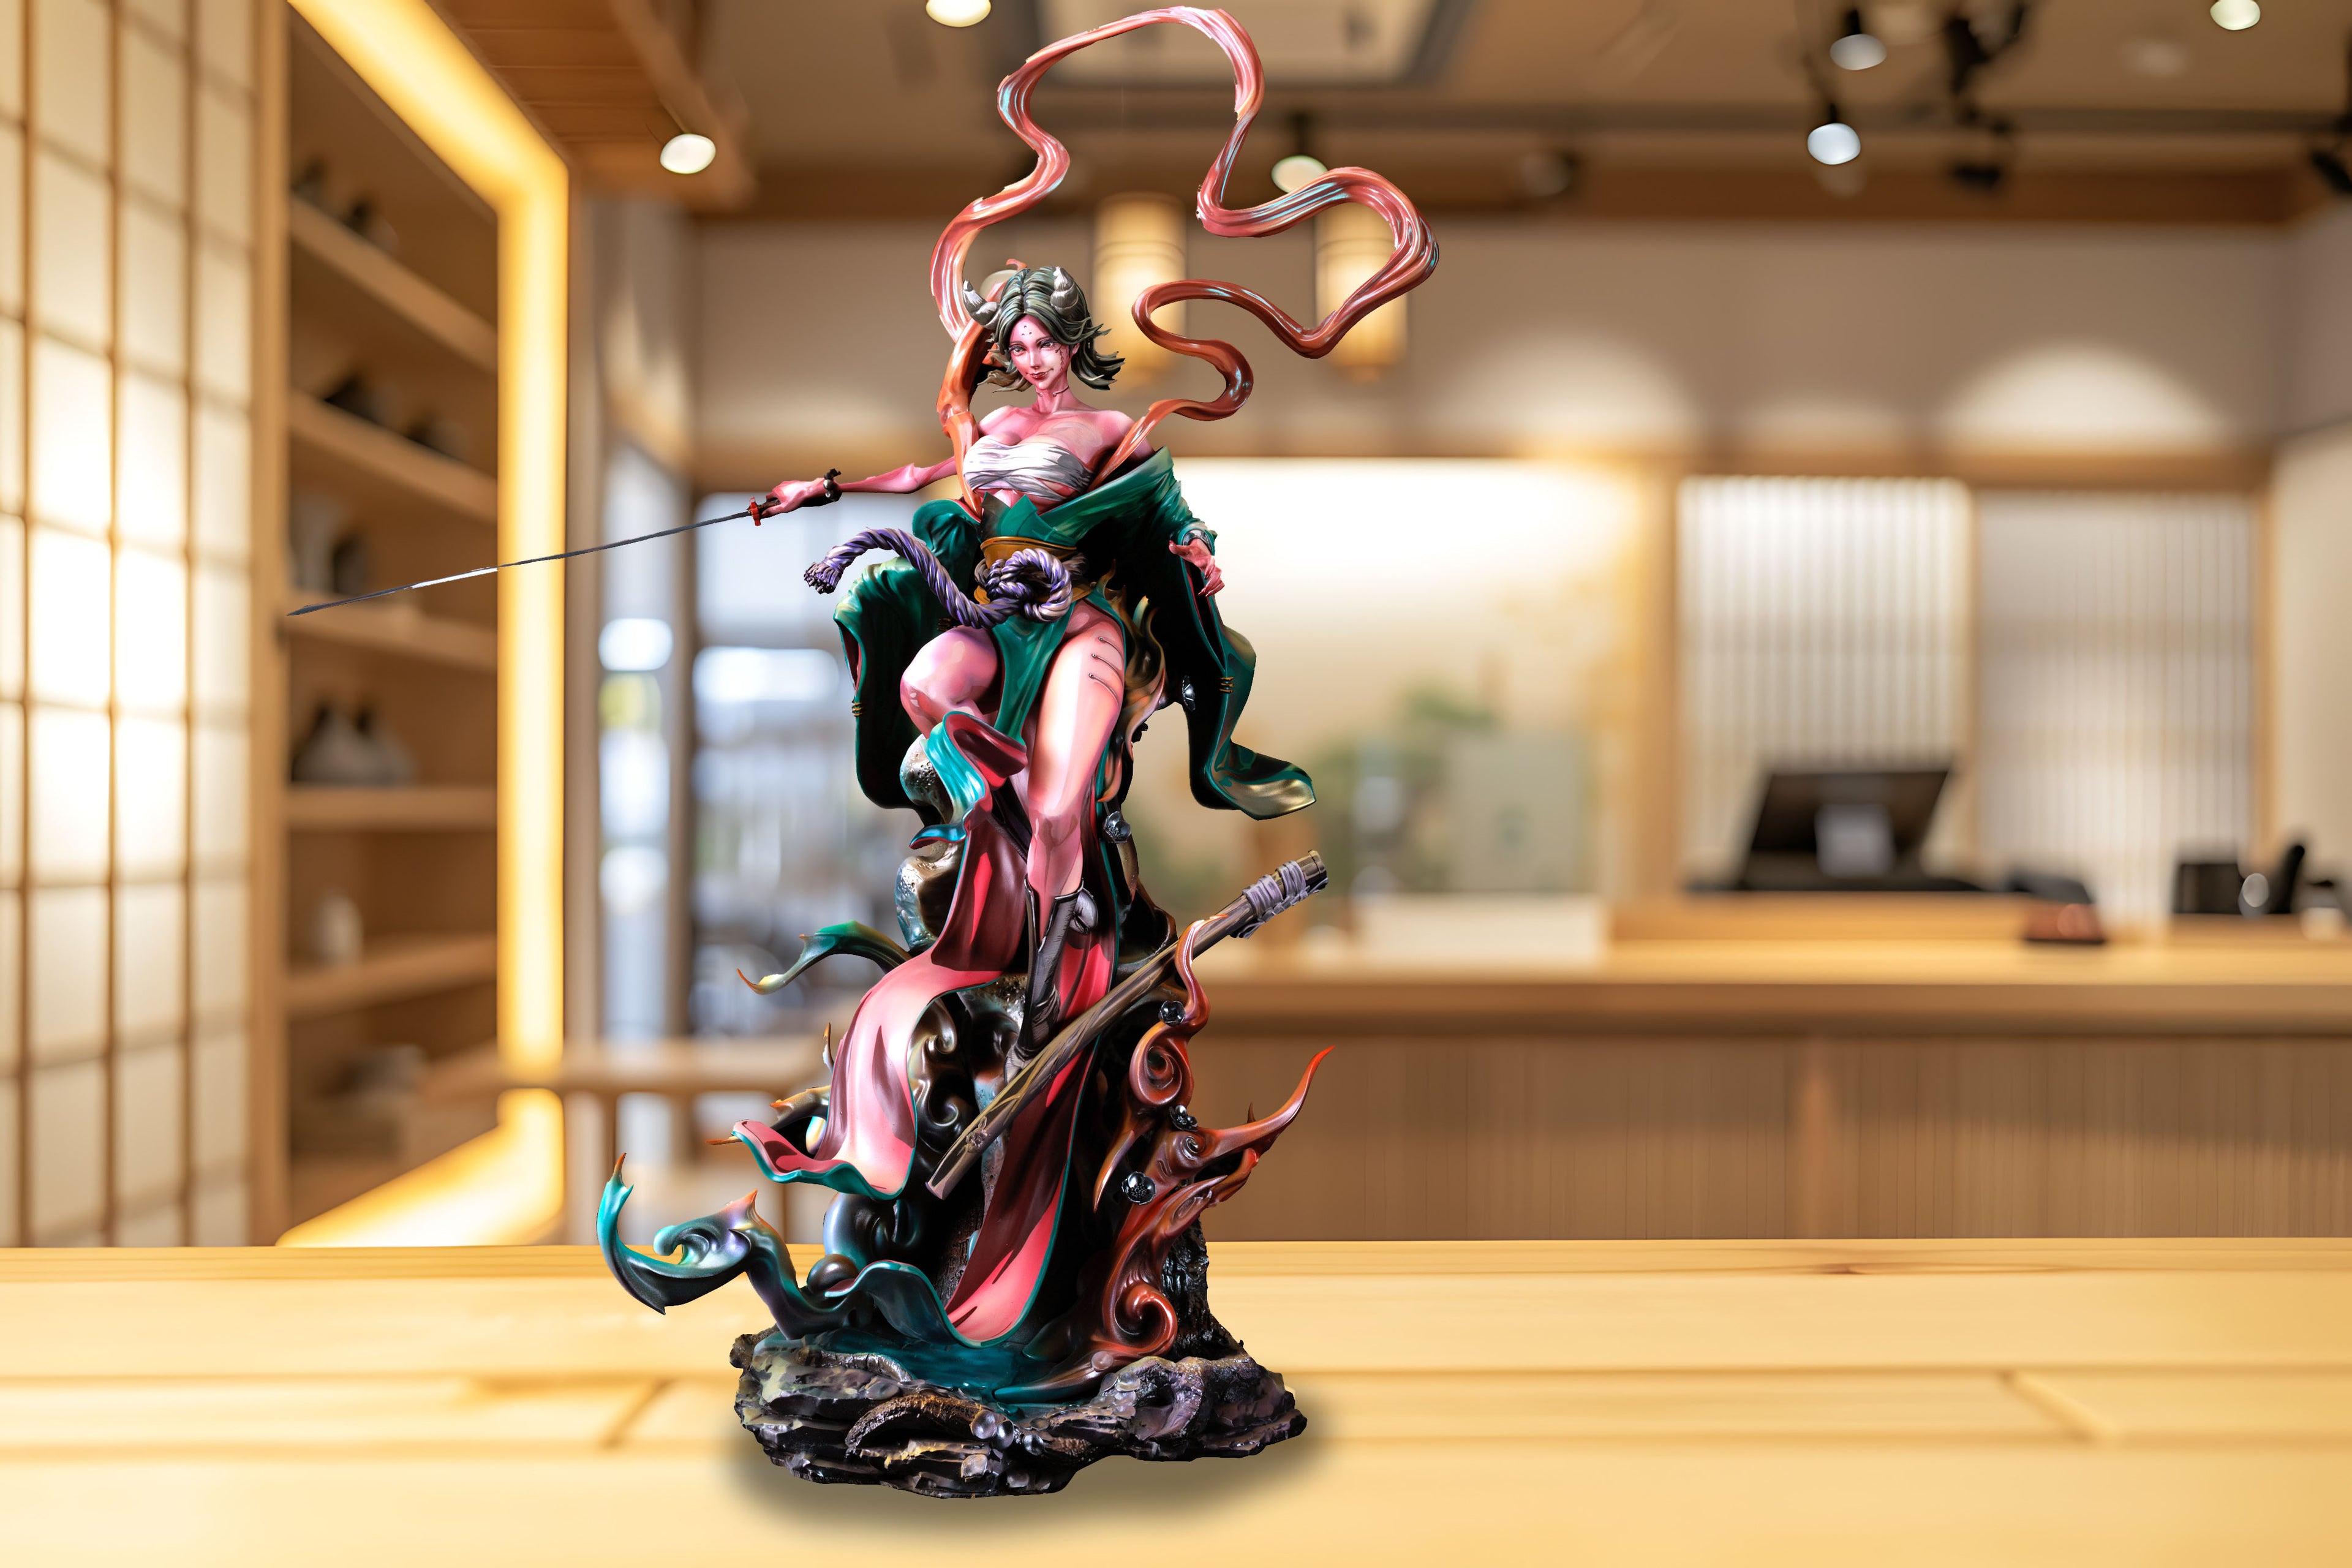
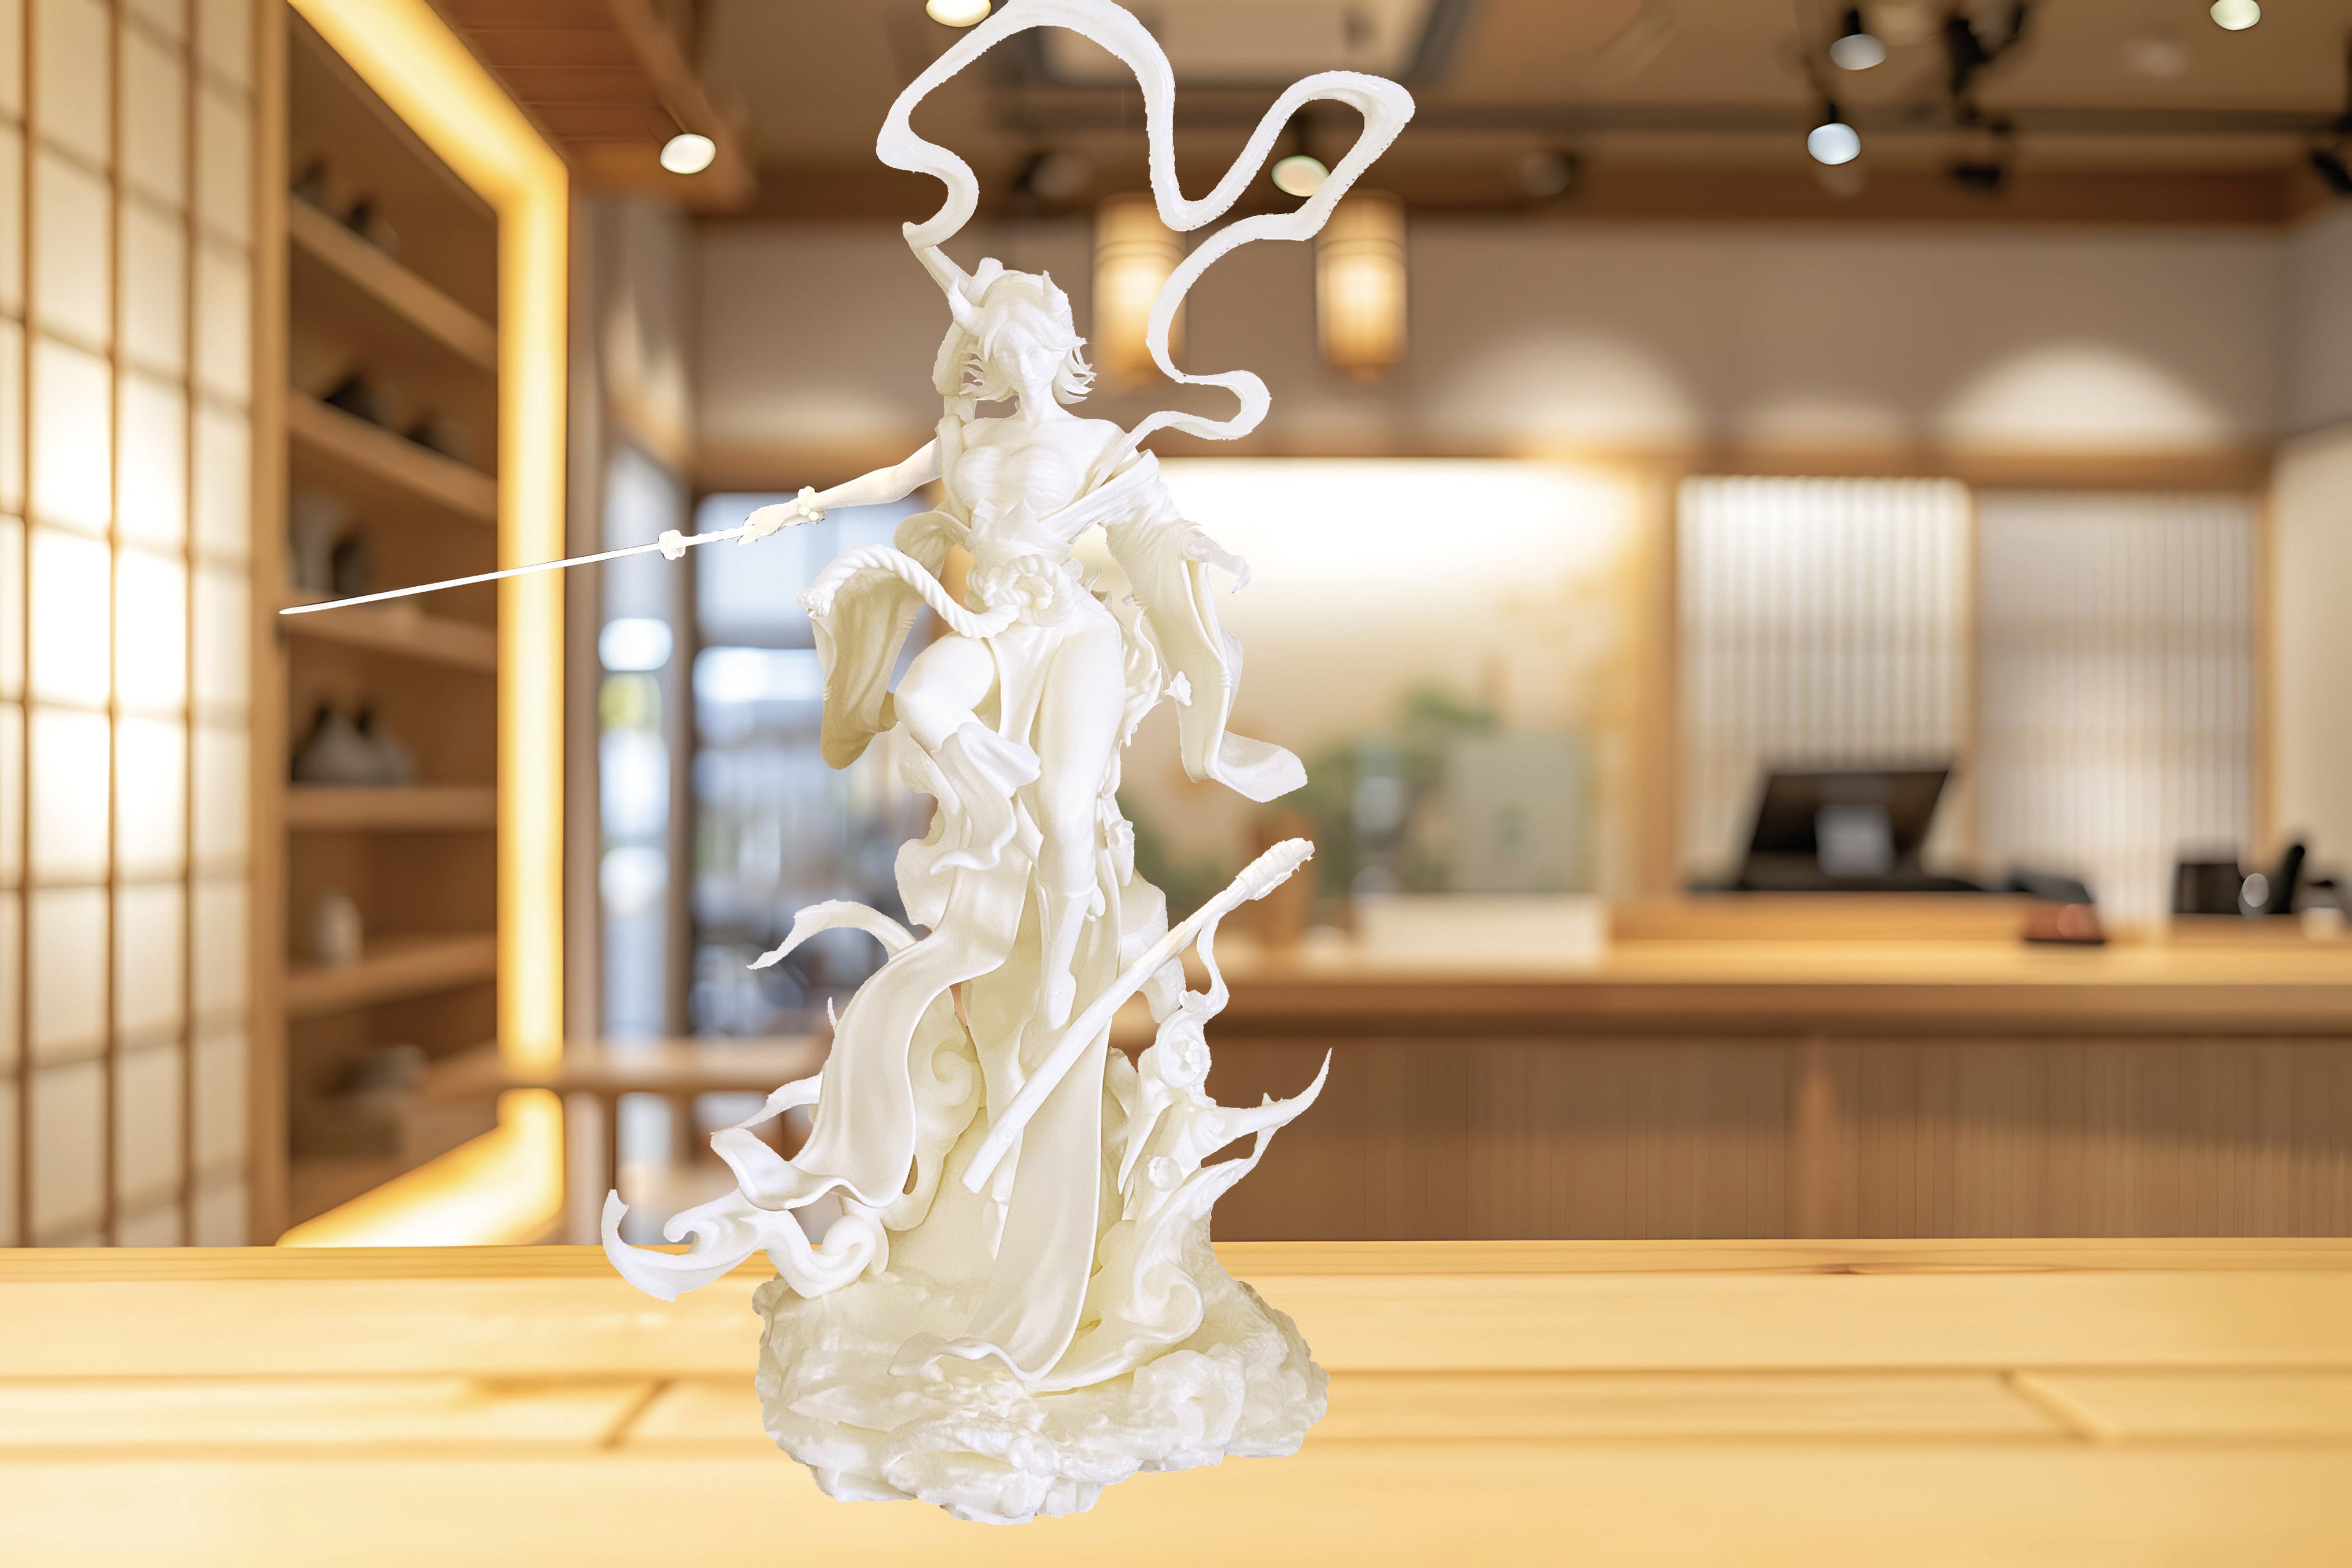
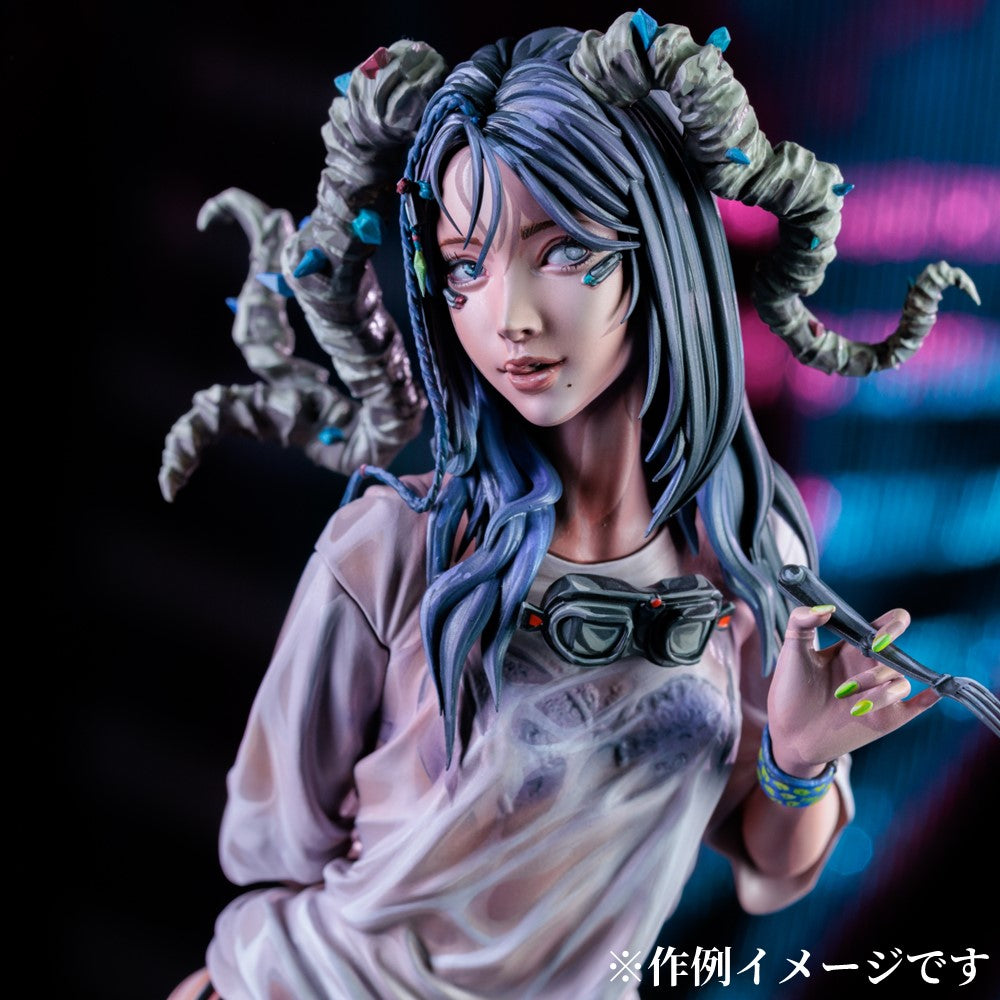
Beautifully sculpted, even unpainted it's a display piece.
The garage kits in the TSUNOID series undergo light pre-processing during the mass production stage, resulting in parts so clean that they require almost no additional preparation. They are impressive enough to display as a straight build.
Even if you're not confident in your painting skills, this kit is enjoyable to assemble and display unpainted. Please give assembly a try!
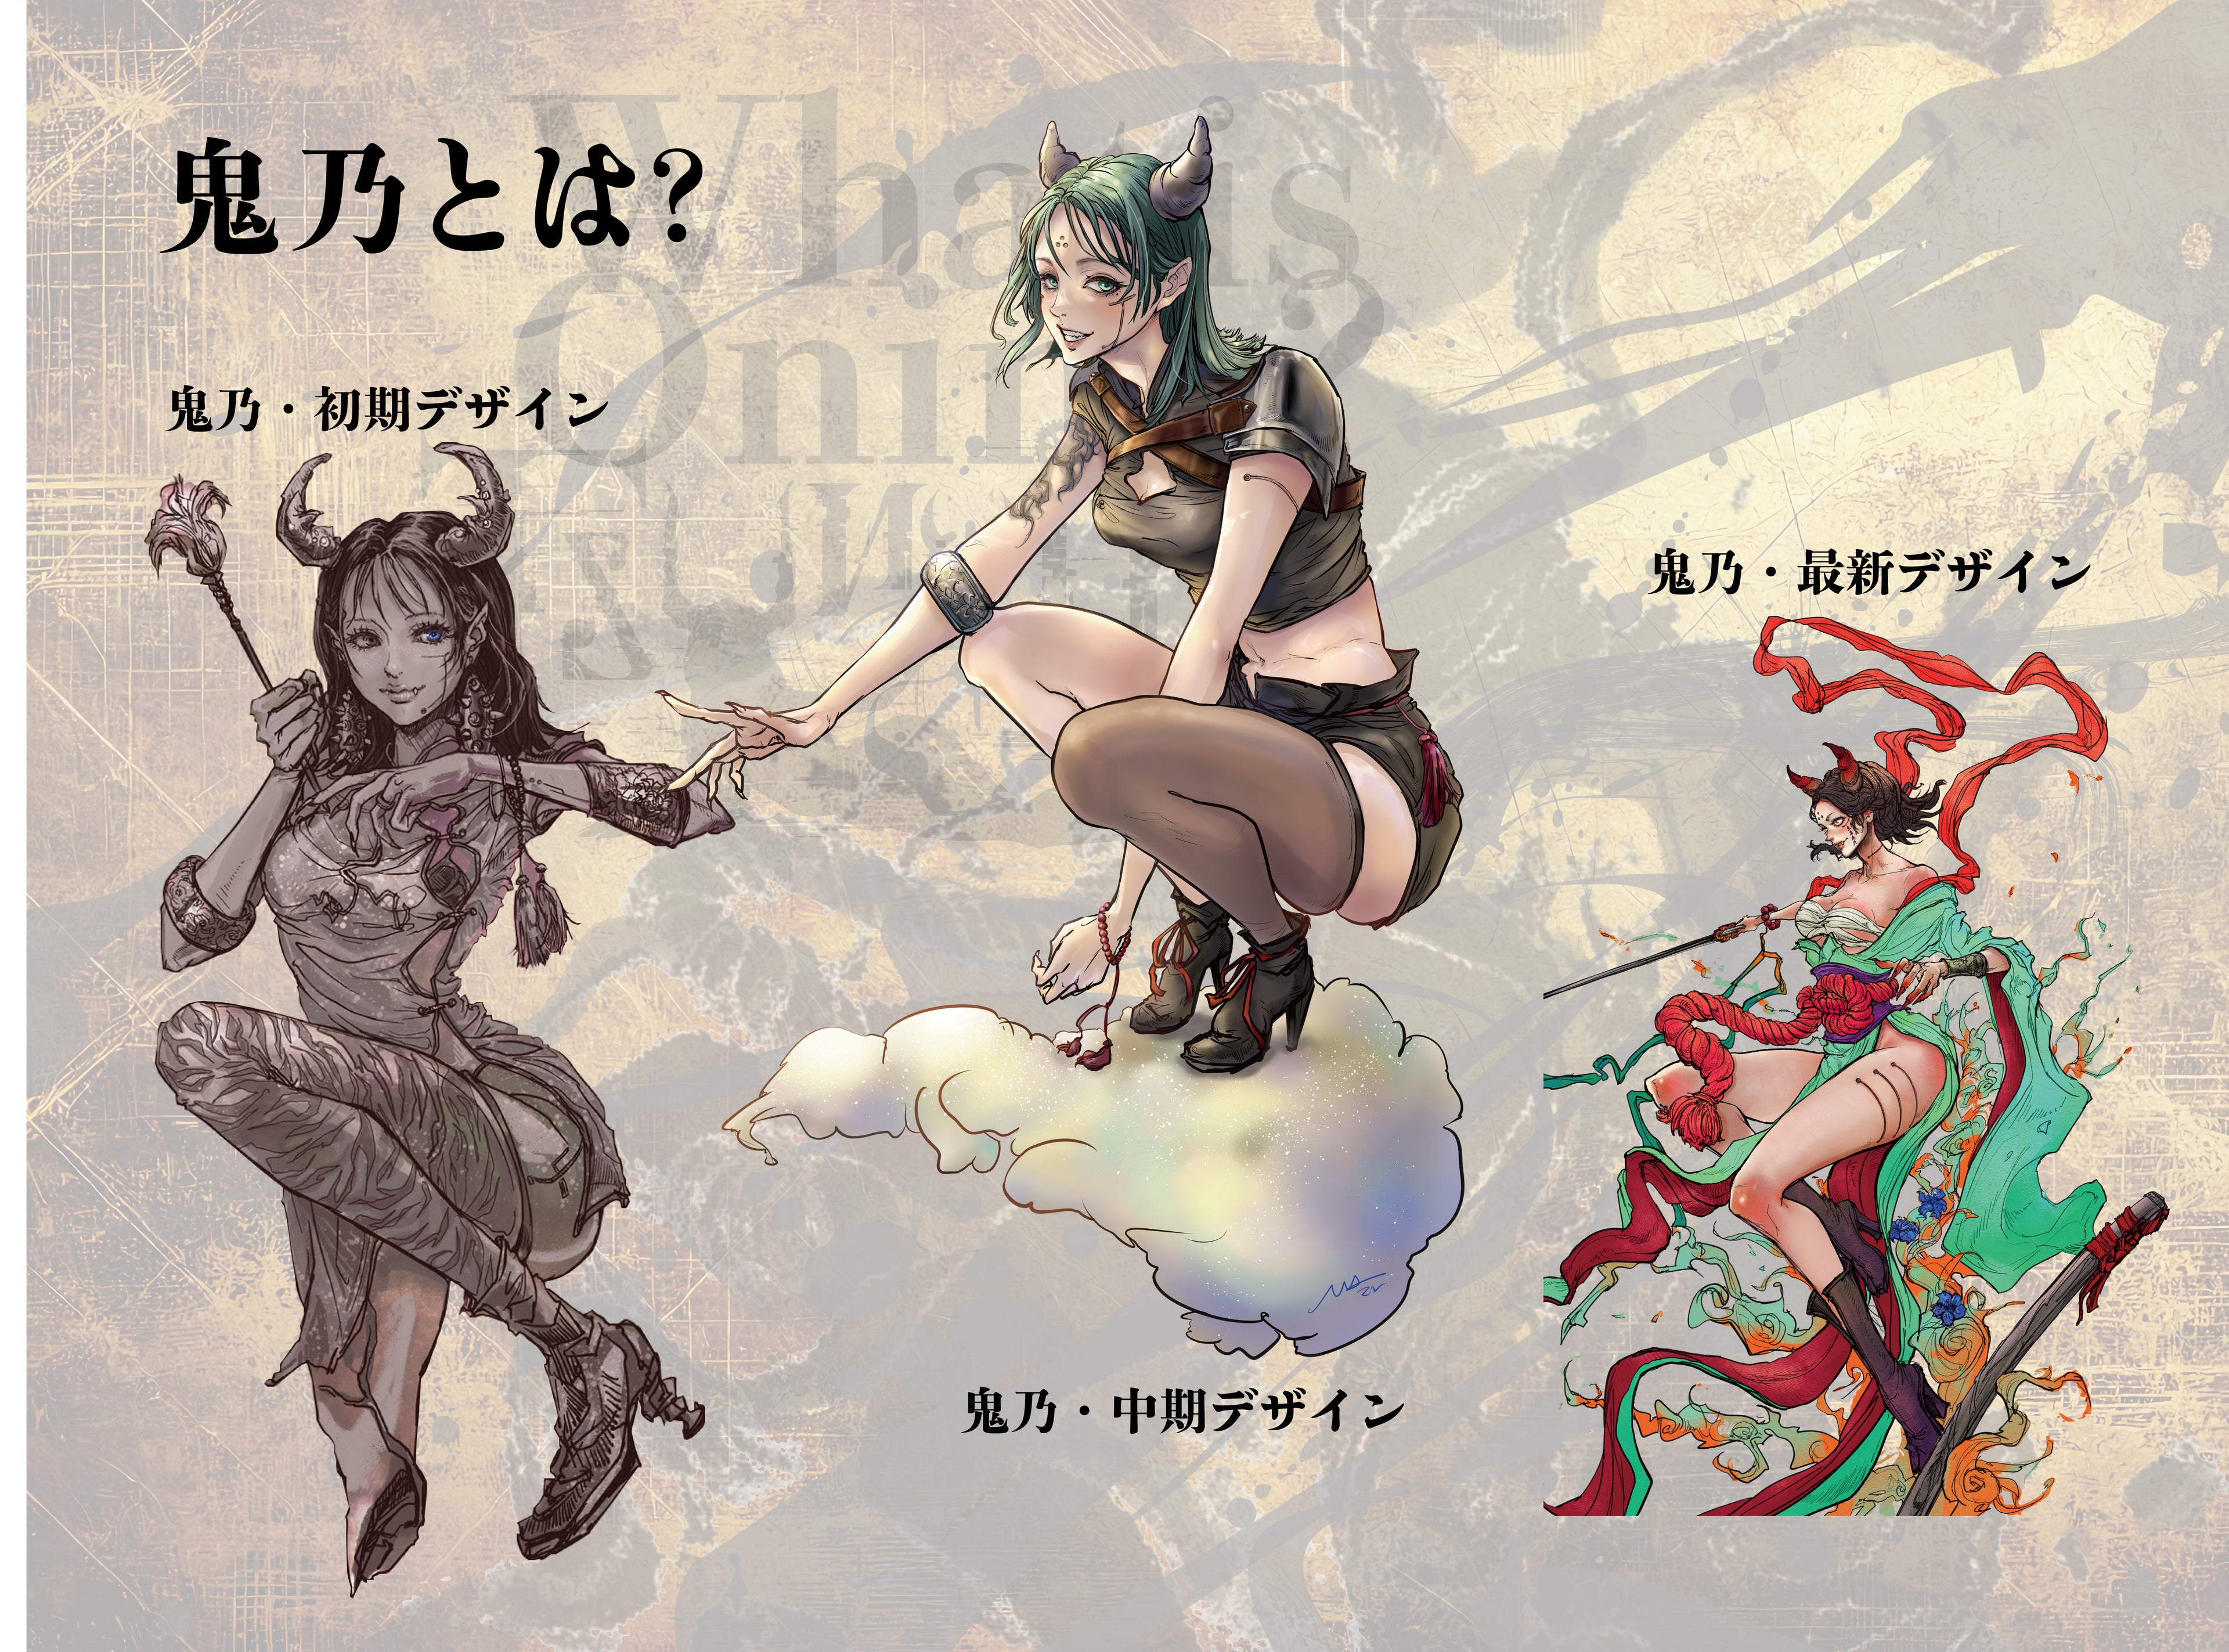
Adorn Omino
I want to convey the joy of decorating.
Let's build Kion!
For those new to assembling garage kits, here are some tips for assembling Onino!
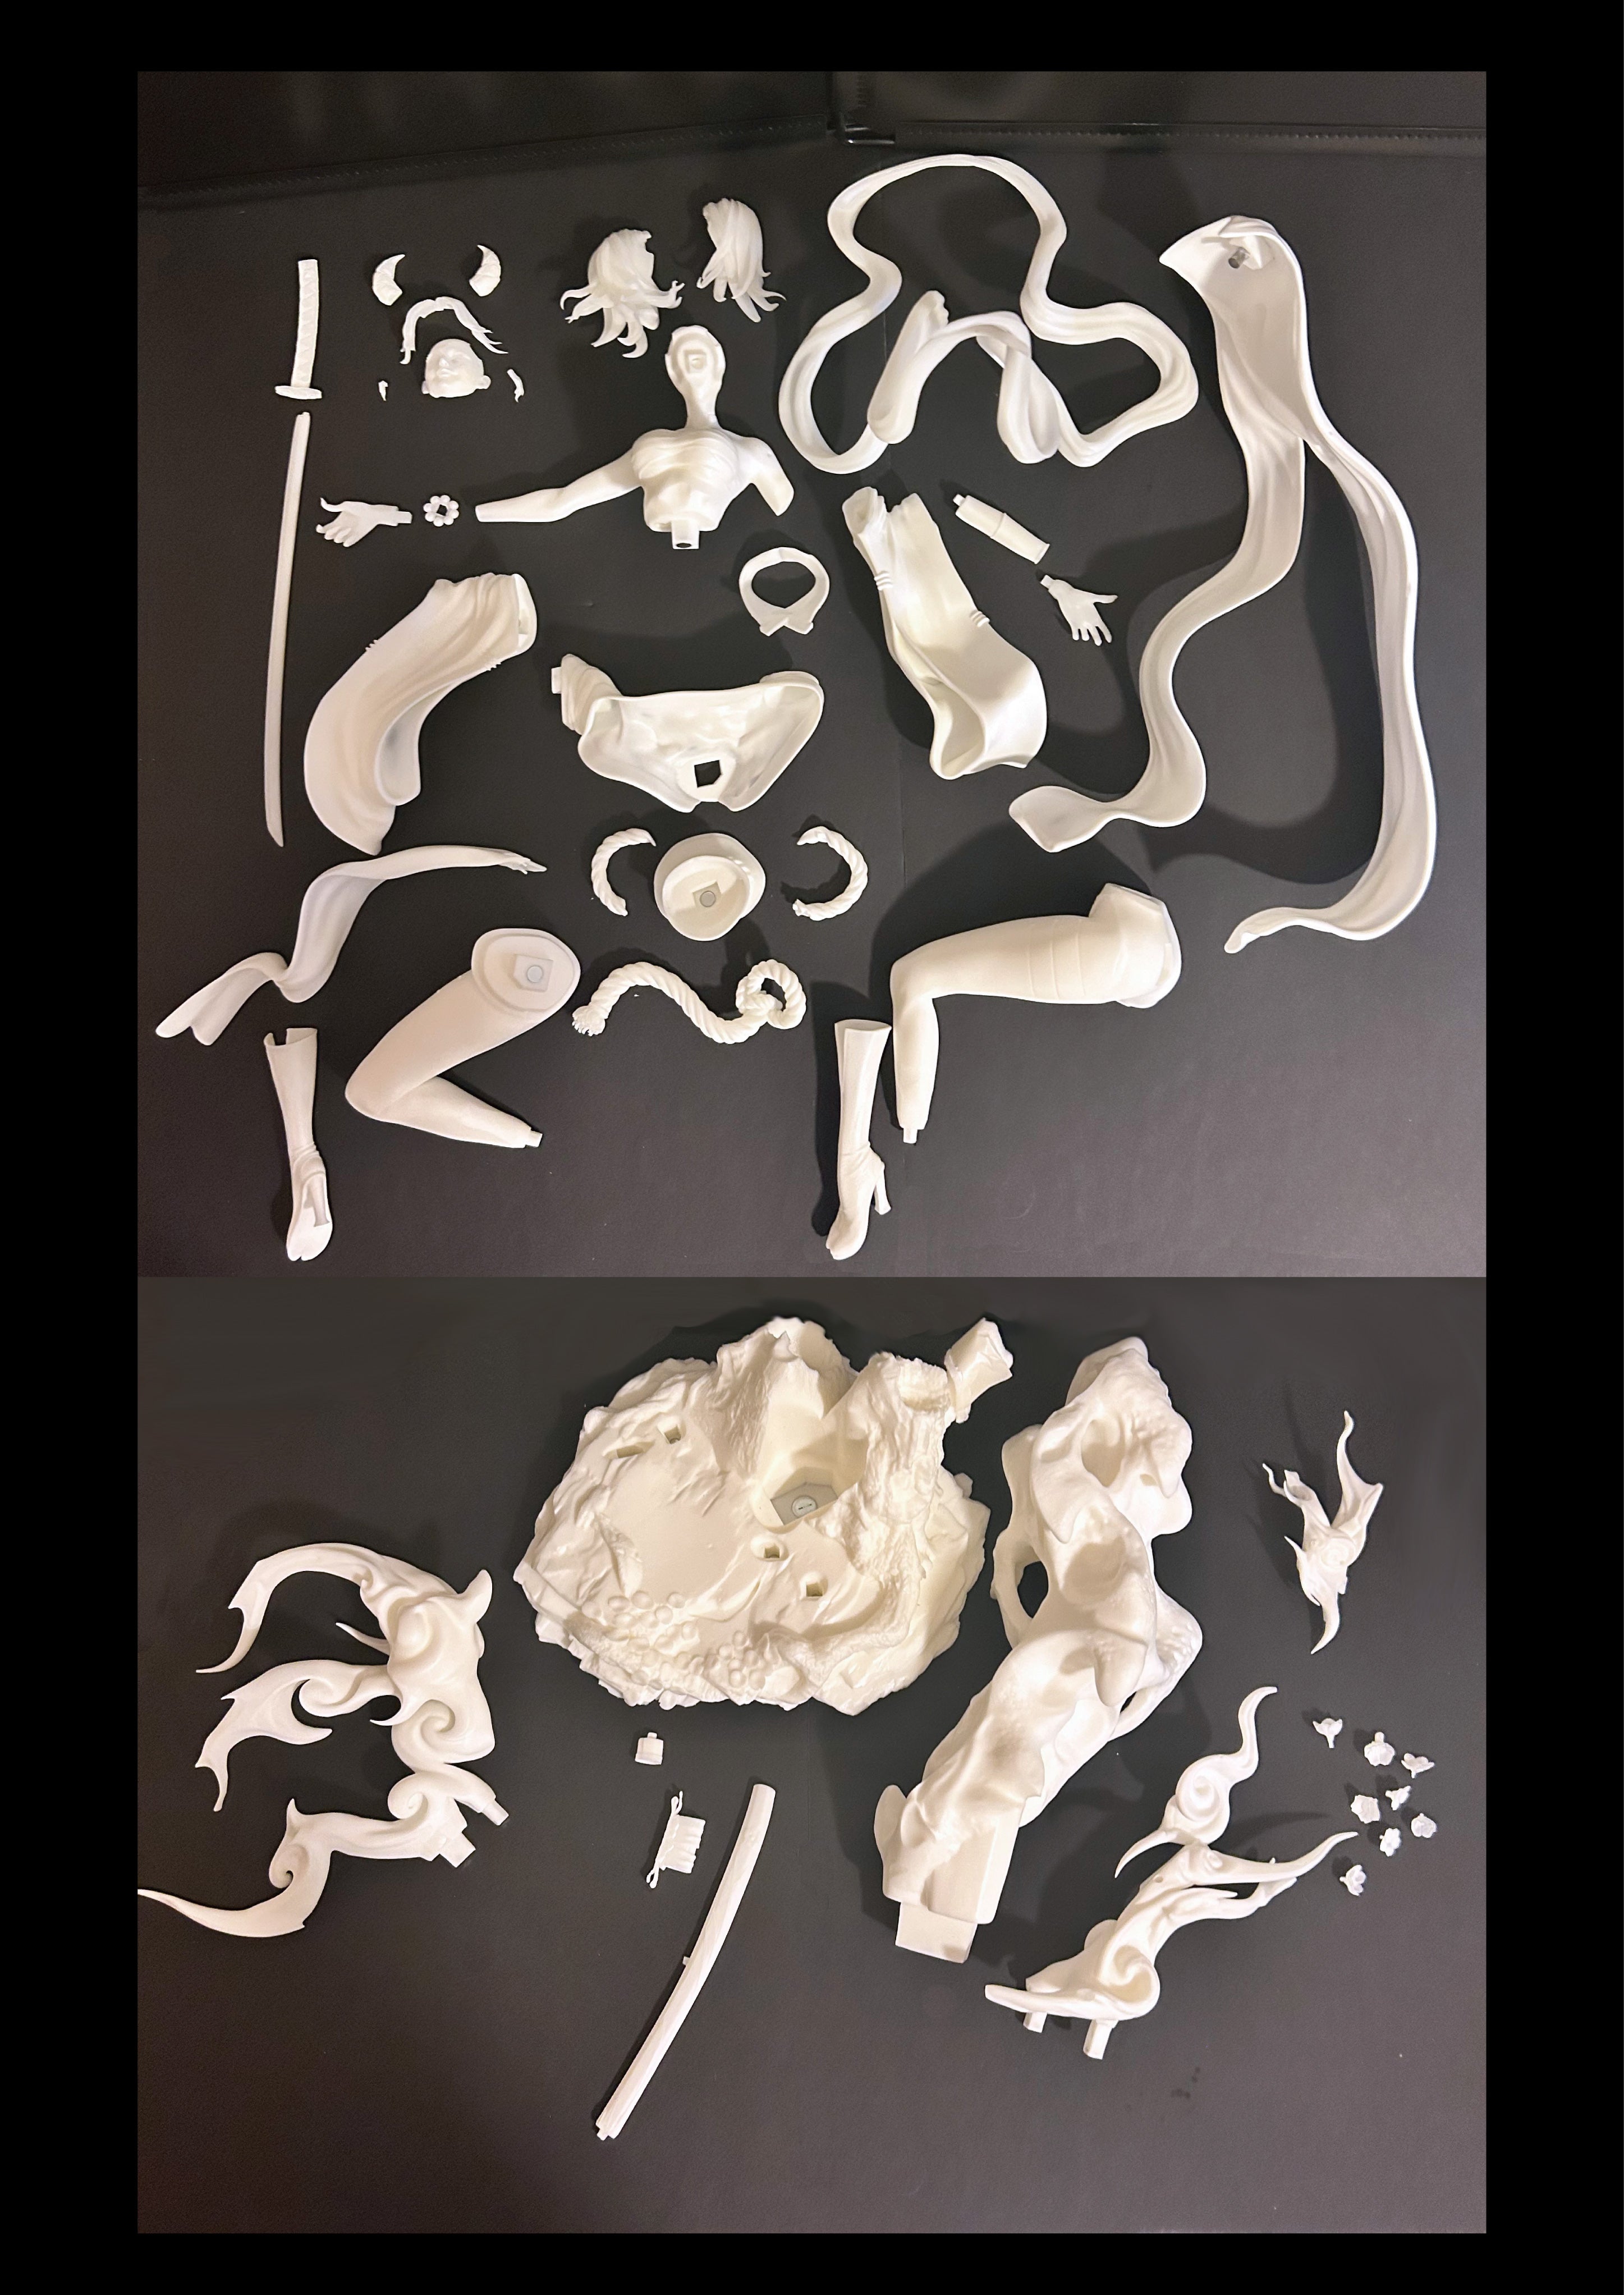
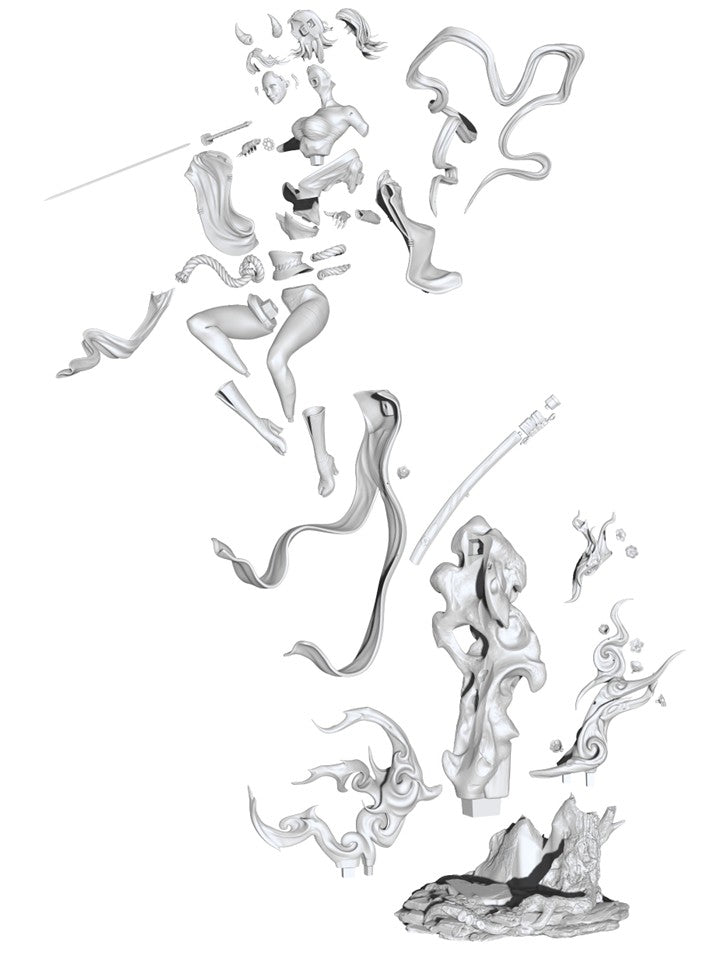
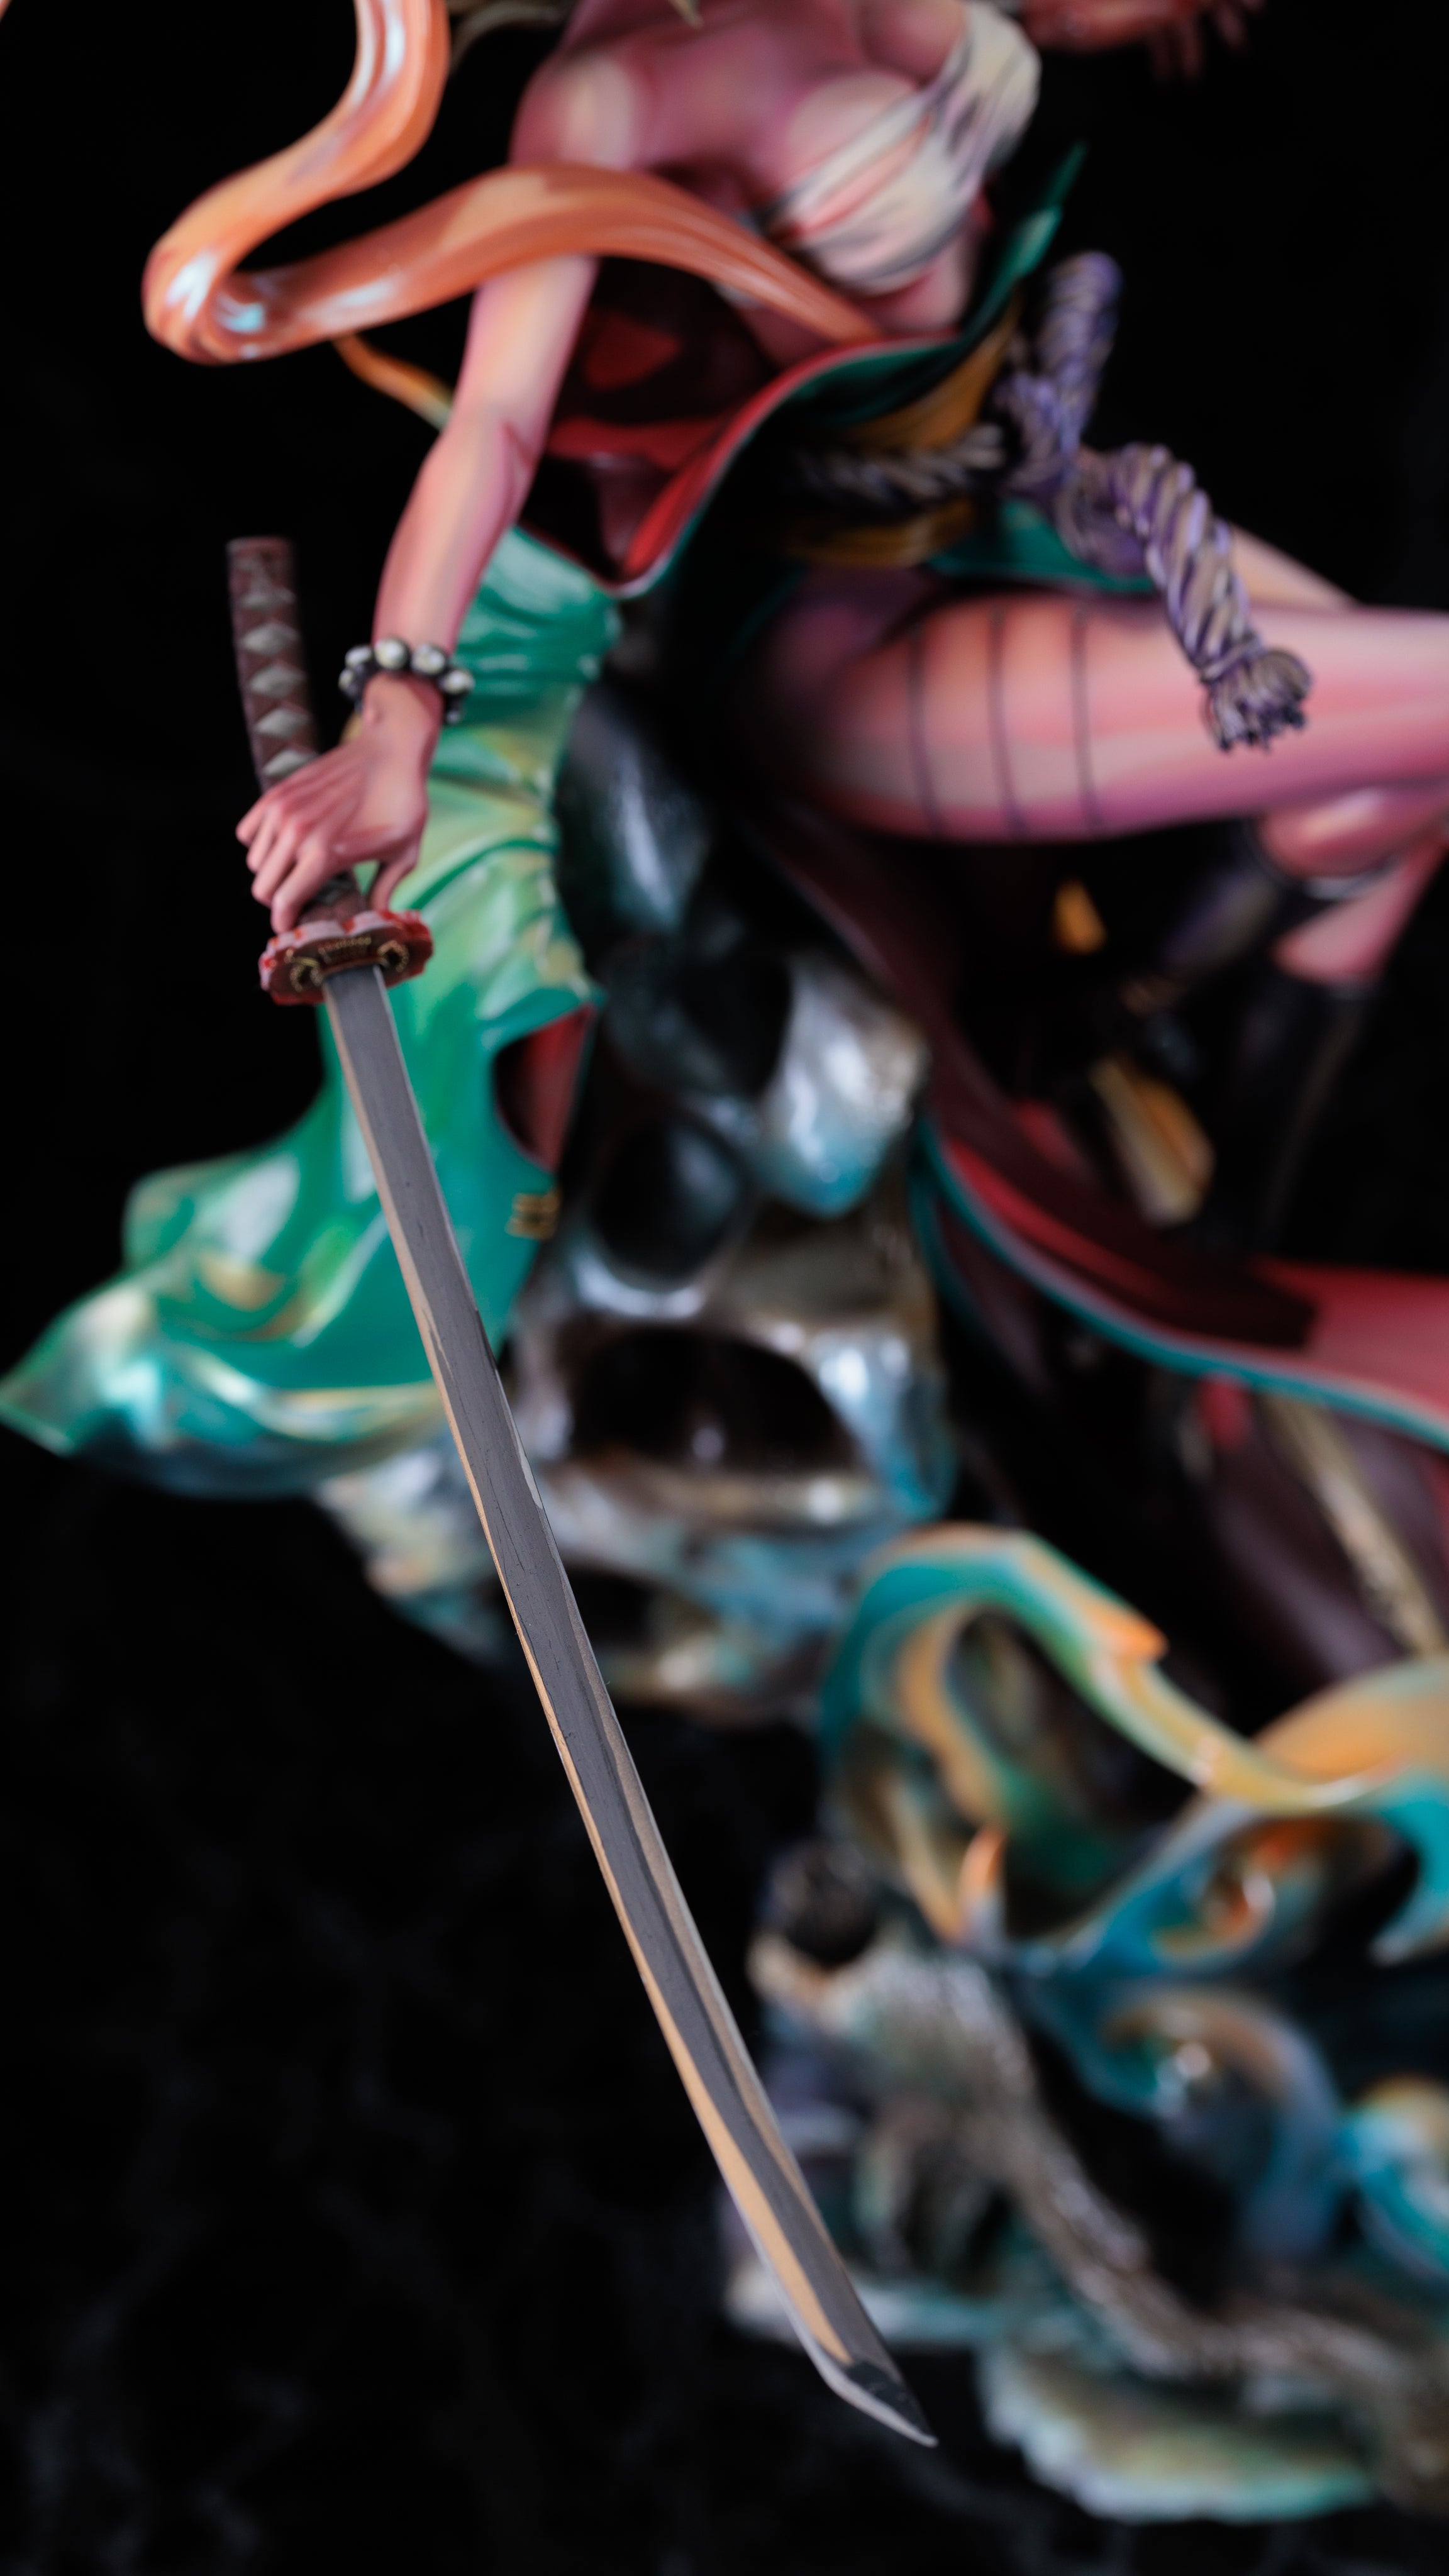
There are 46 parts in total.
Experienced modelers of the "Onino" garage kit, the largest in the TSUNOID series, should have no problem assembling it, but this time, we will introduce some tips for beginners!
*When assembling a garage kit, it is standard practice to "test fit" the parts before gluing. "Test fitting" is the process of arranging the separate parts in their correct positions to check if they fit together. We recommend starting with "test fitting."
*During "test fitting," some parts may require minor adjustments, such as sanding, if they are difficult to fit.
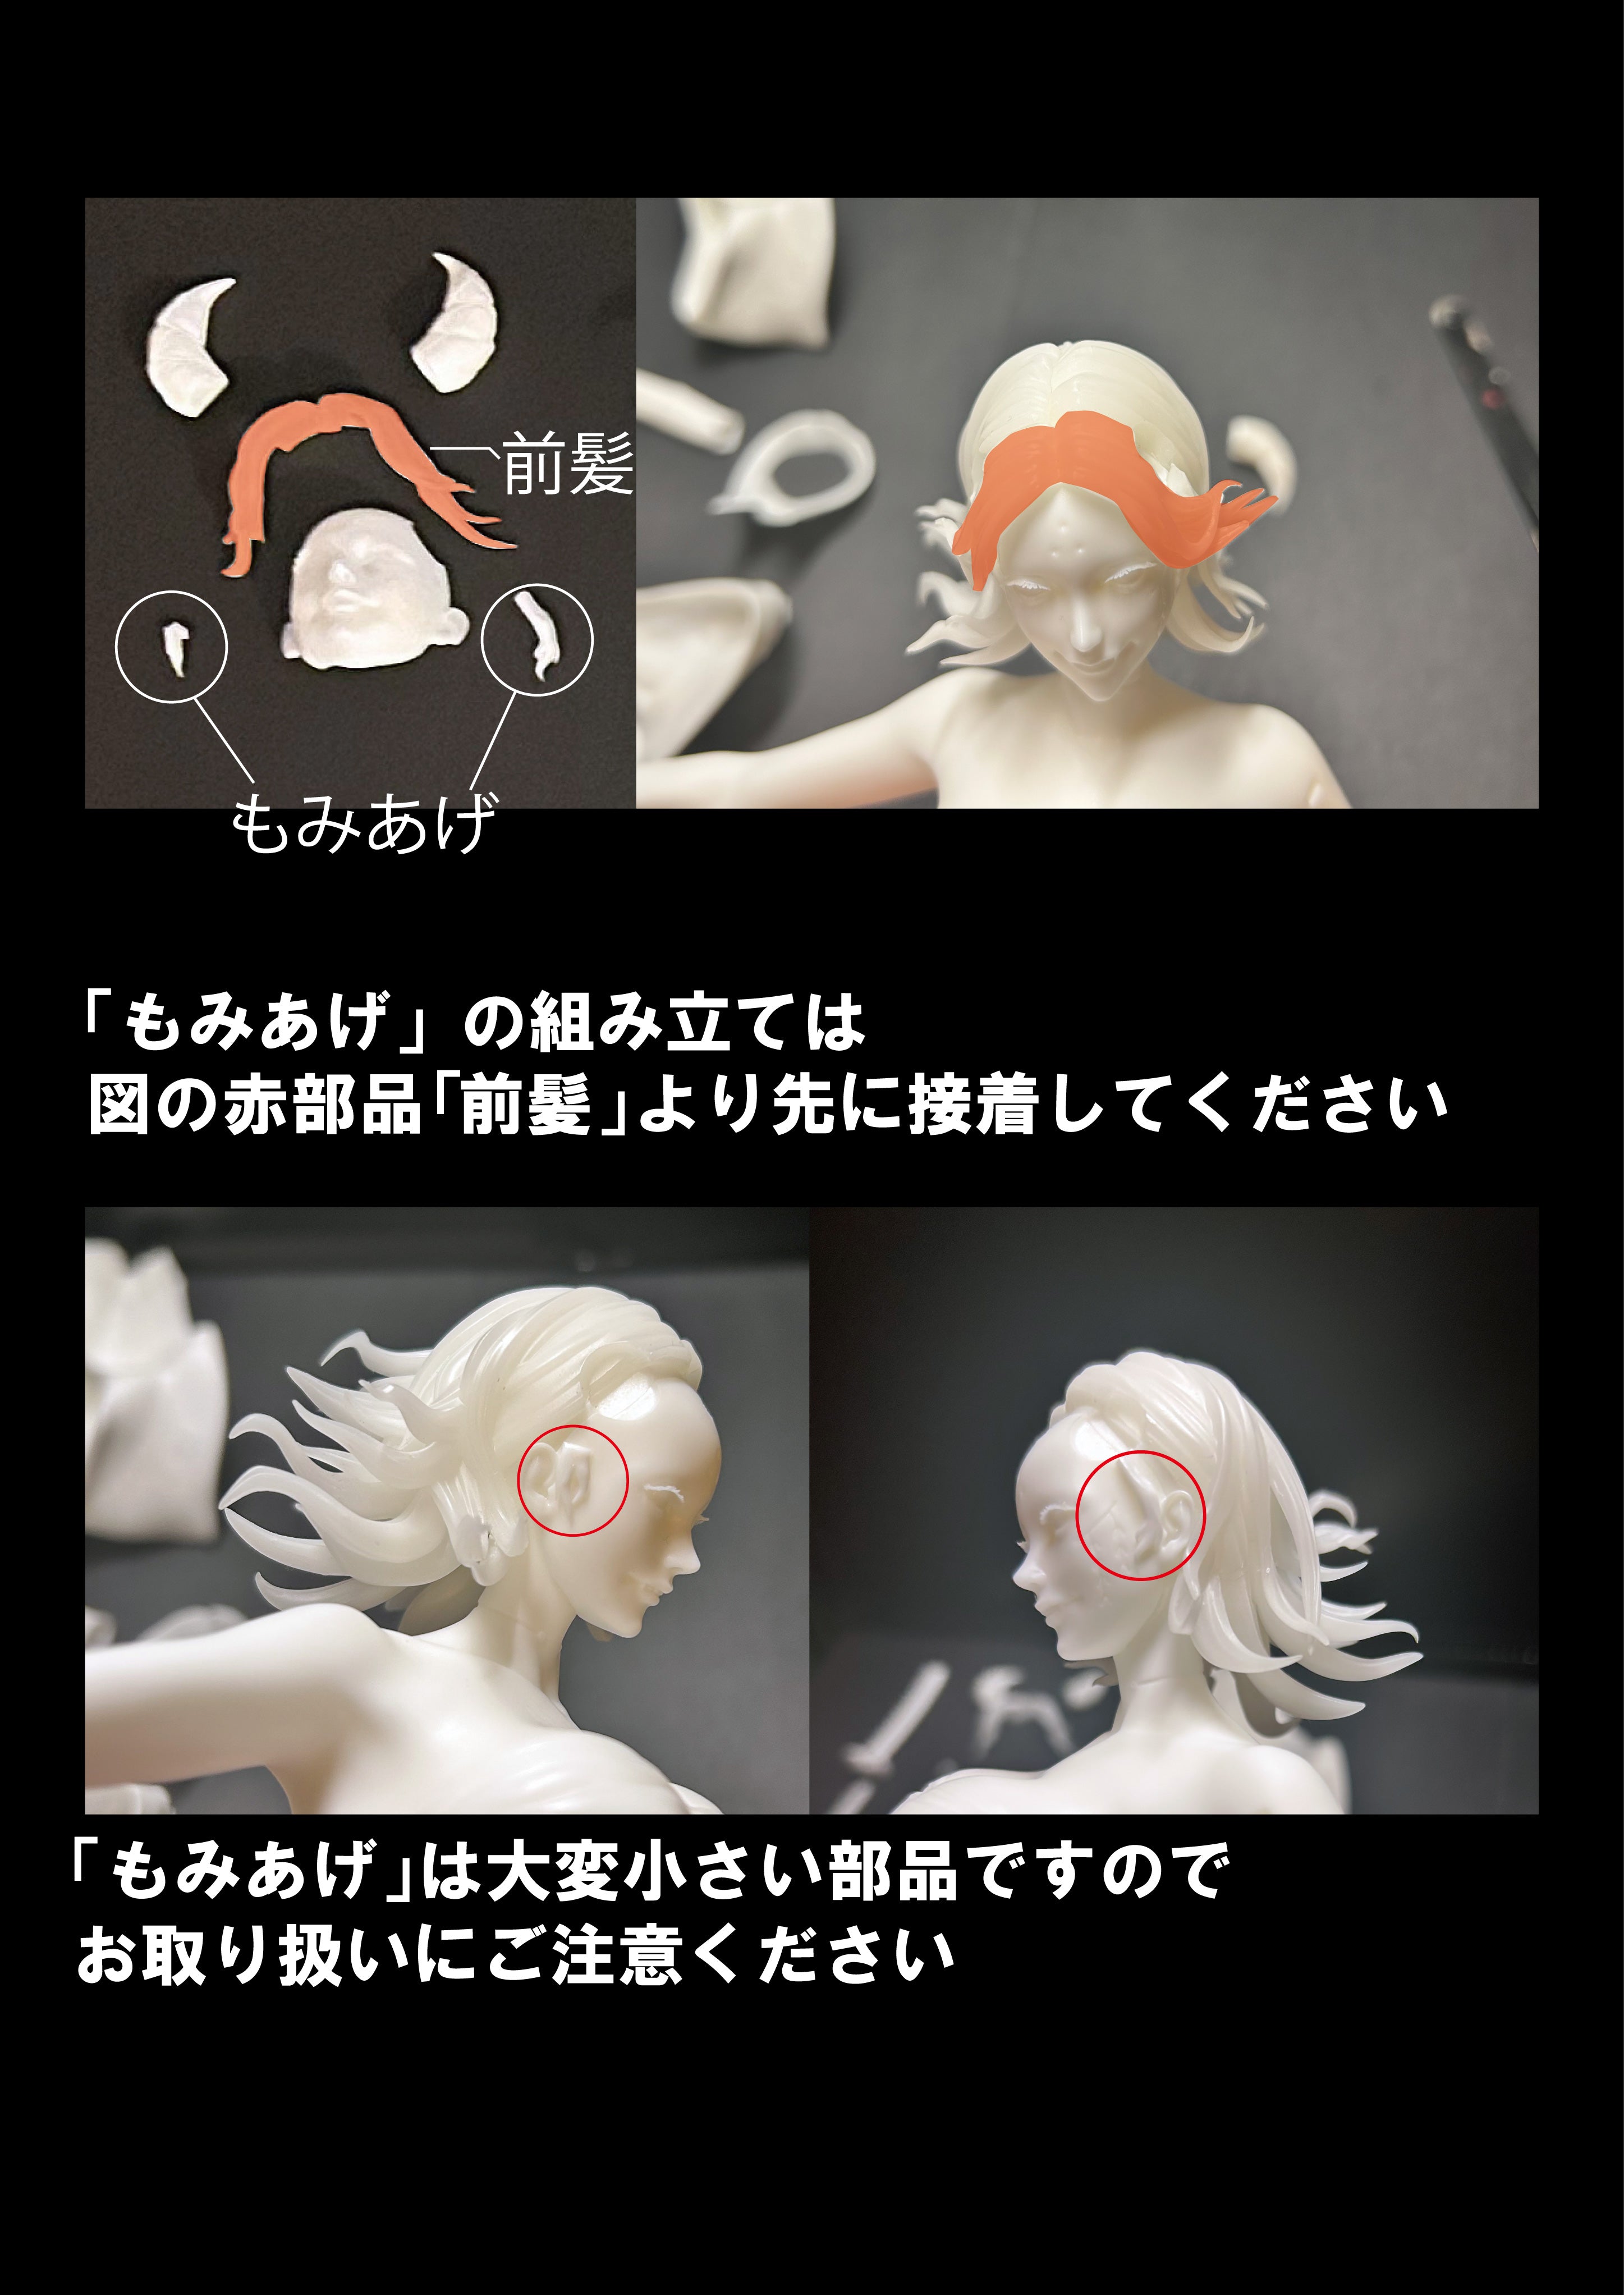
Assembly point 1
【Attaching Sideburns】
If you attach the bangs first, you won't be able to attach the sideburns. Always attach the sideburns before the bangs.
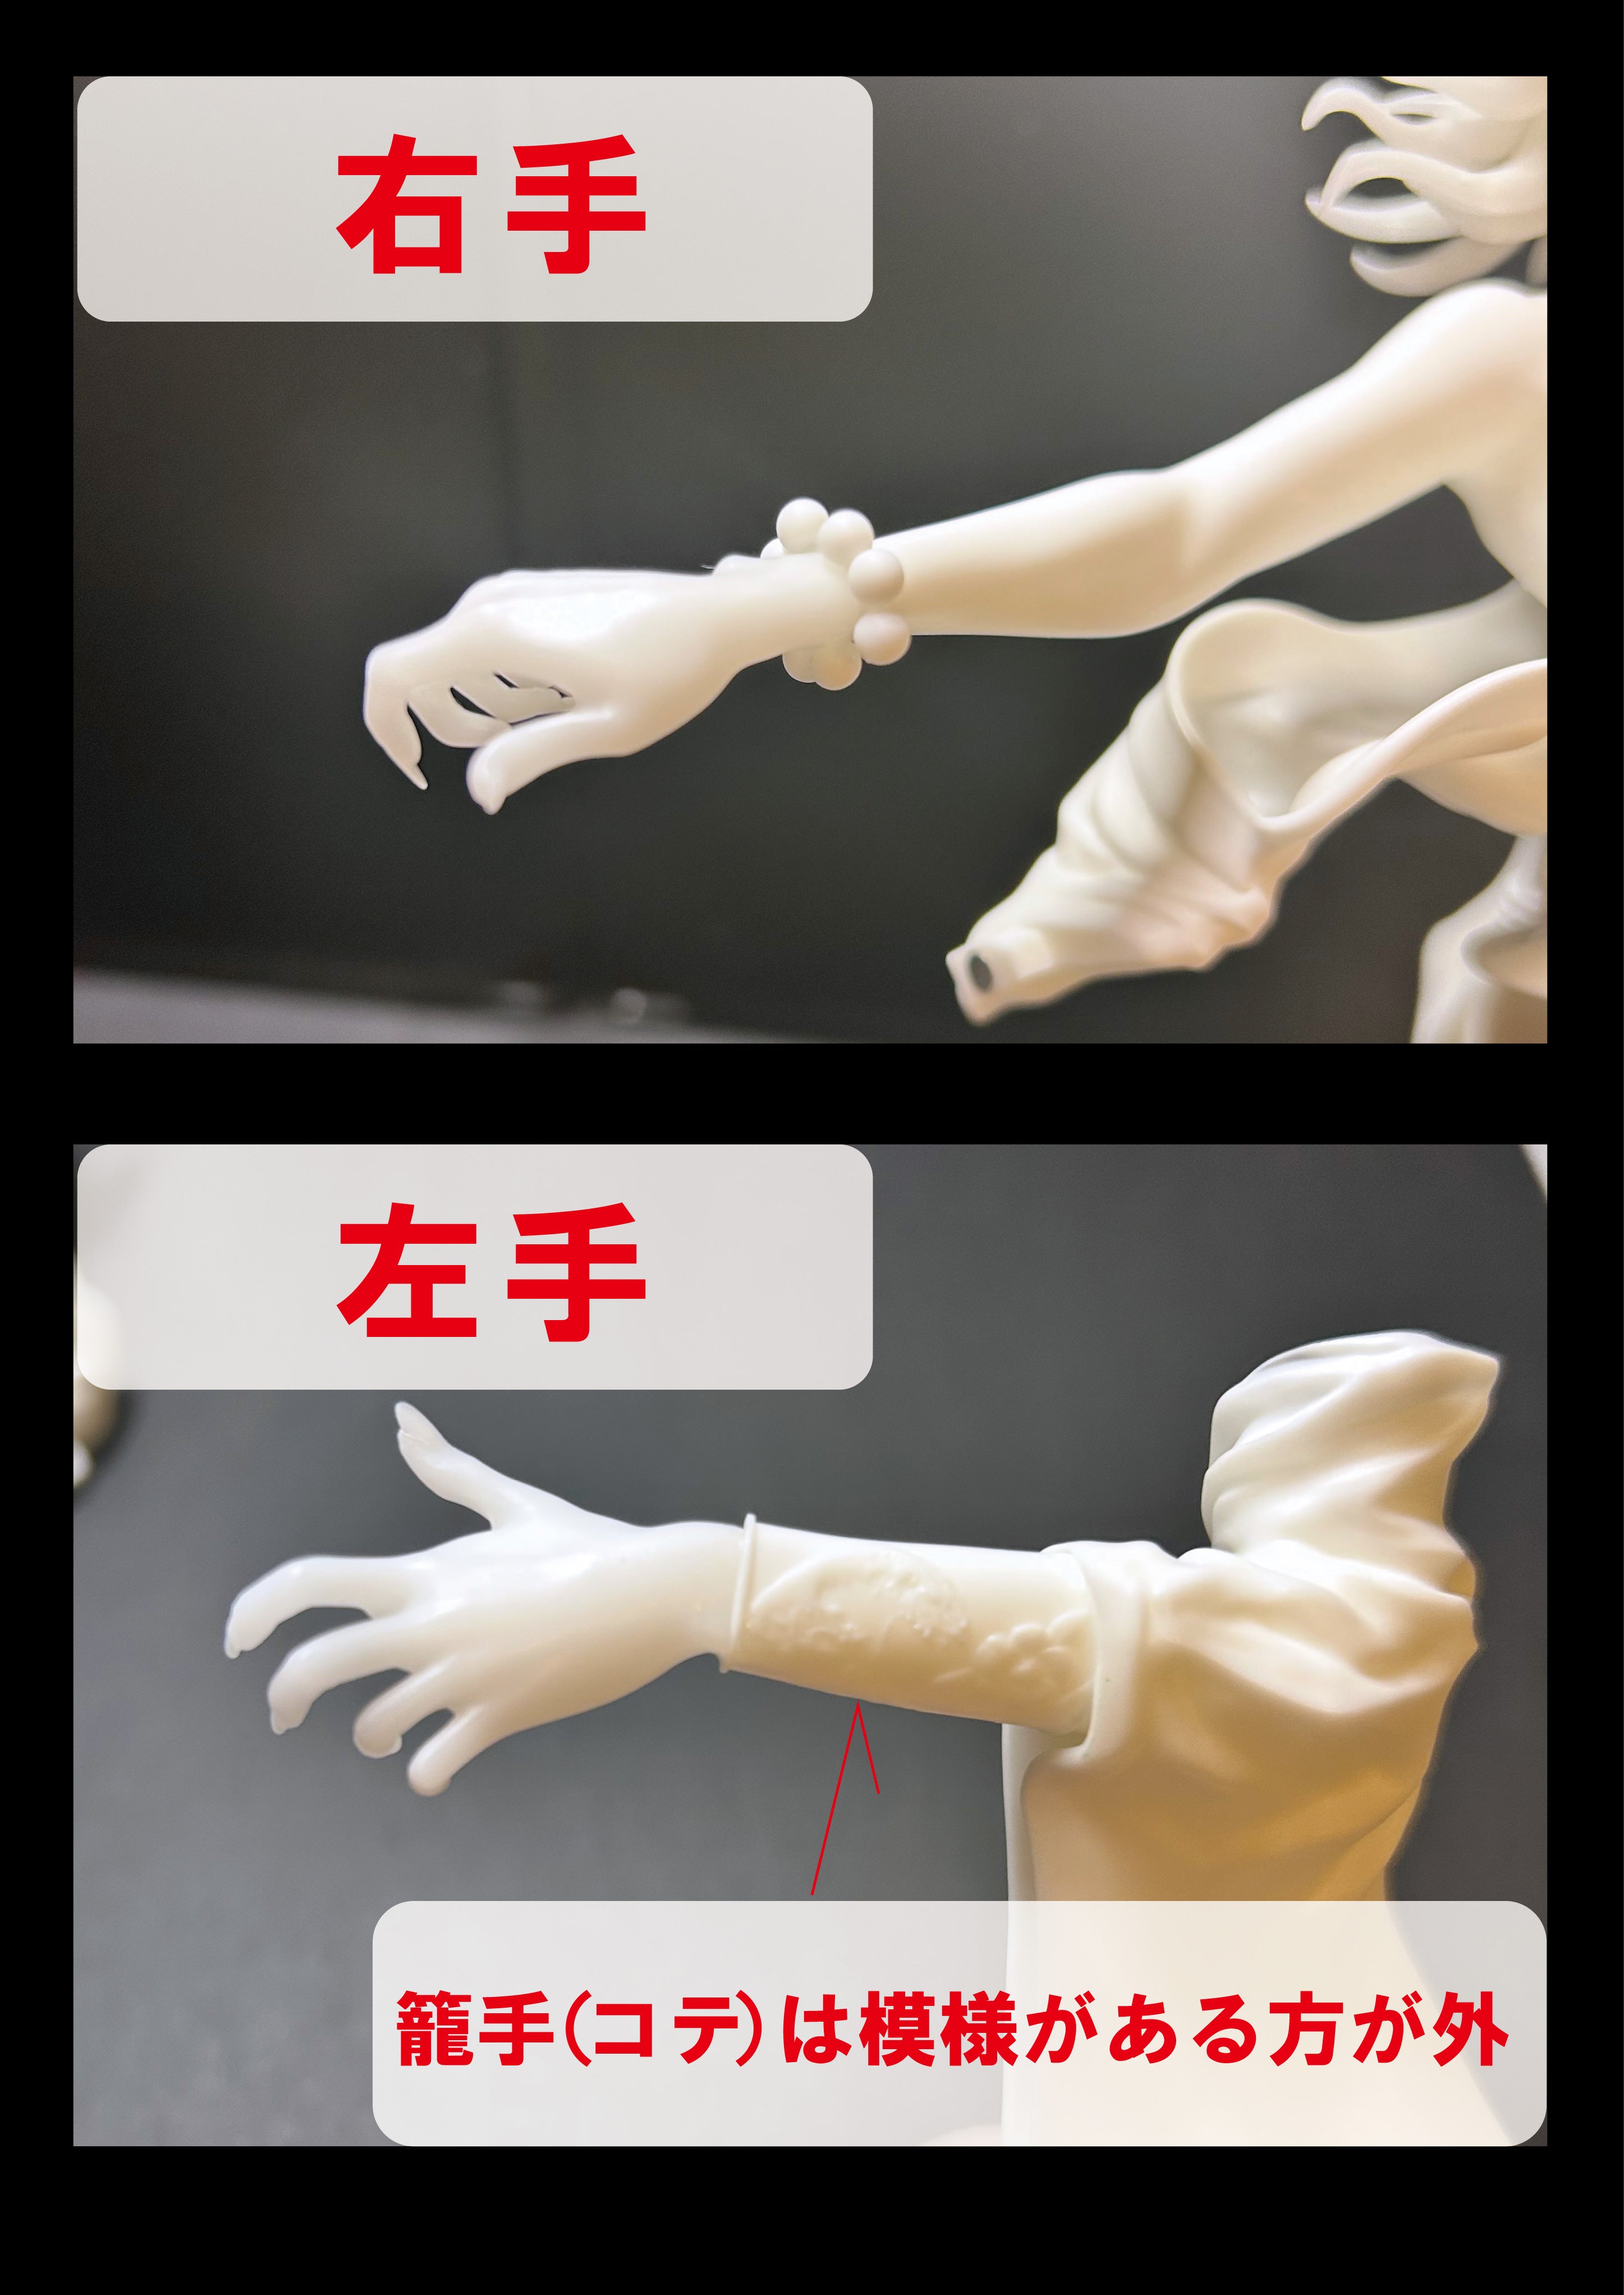
Assembly Point 2
Please pay attention to the arm's mounting direction.
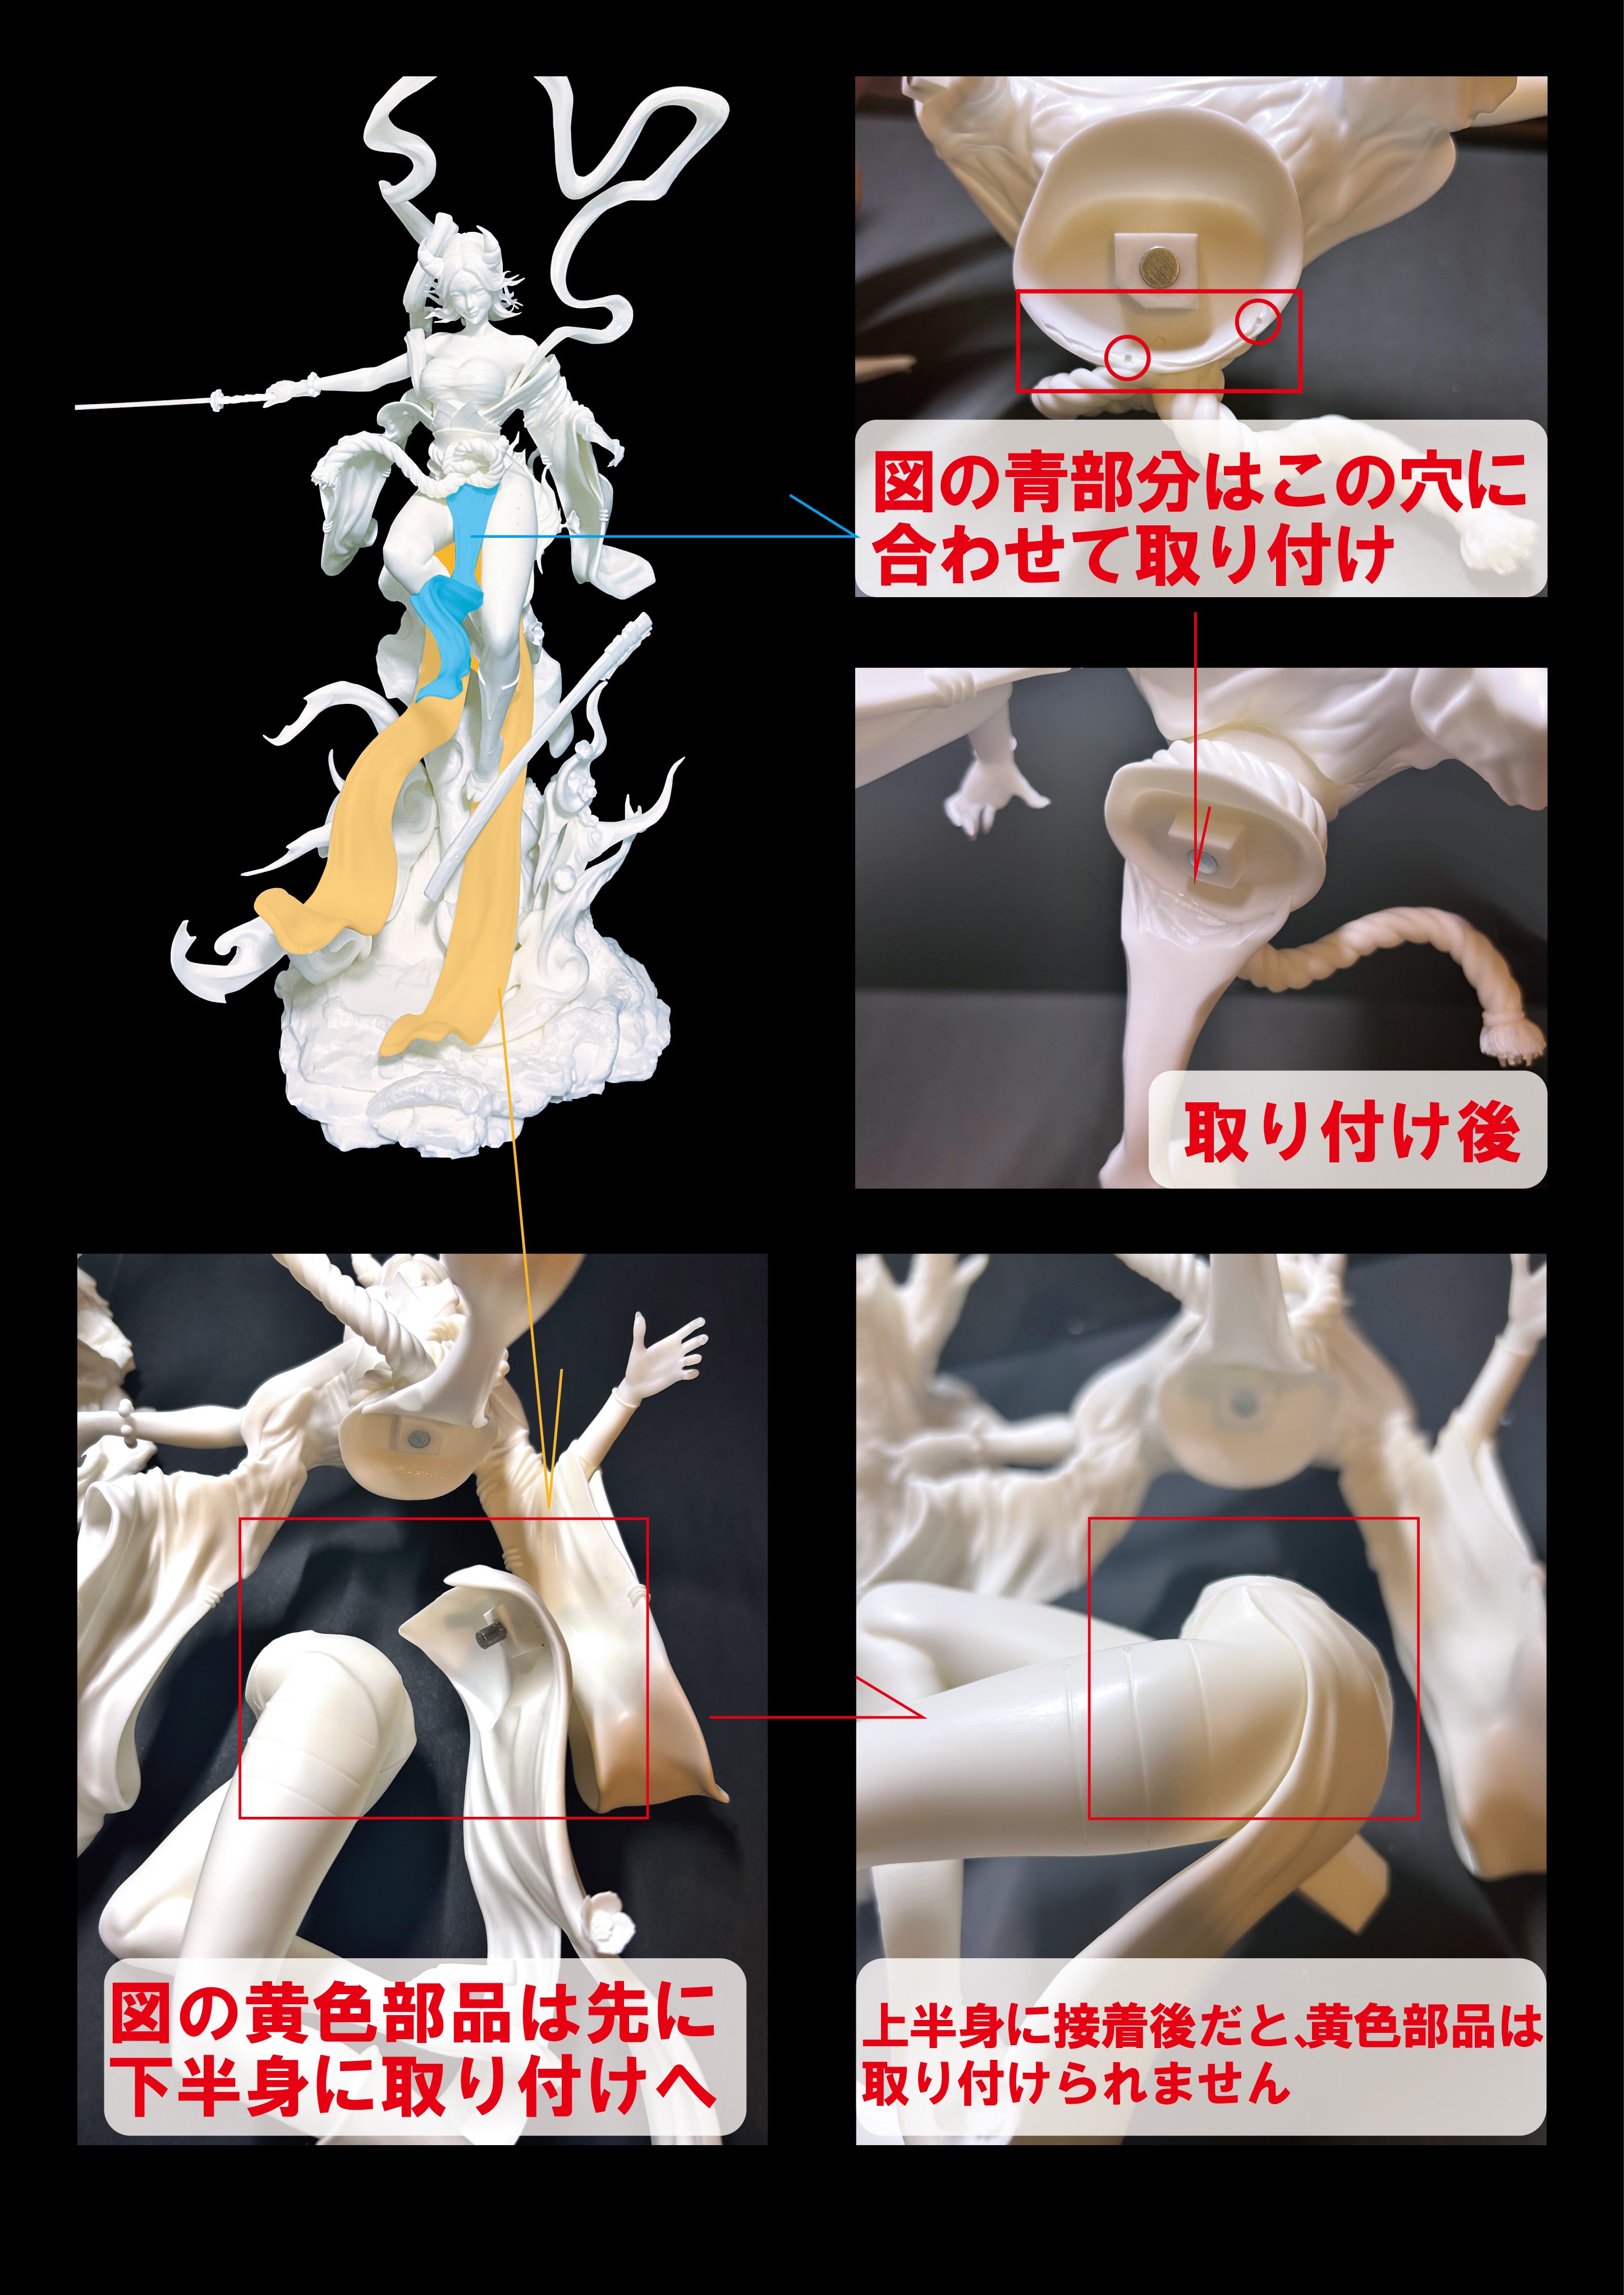
Assembly point 3
Kimono Mounting
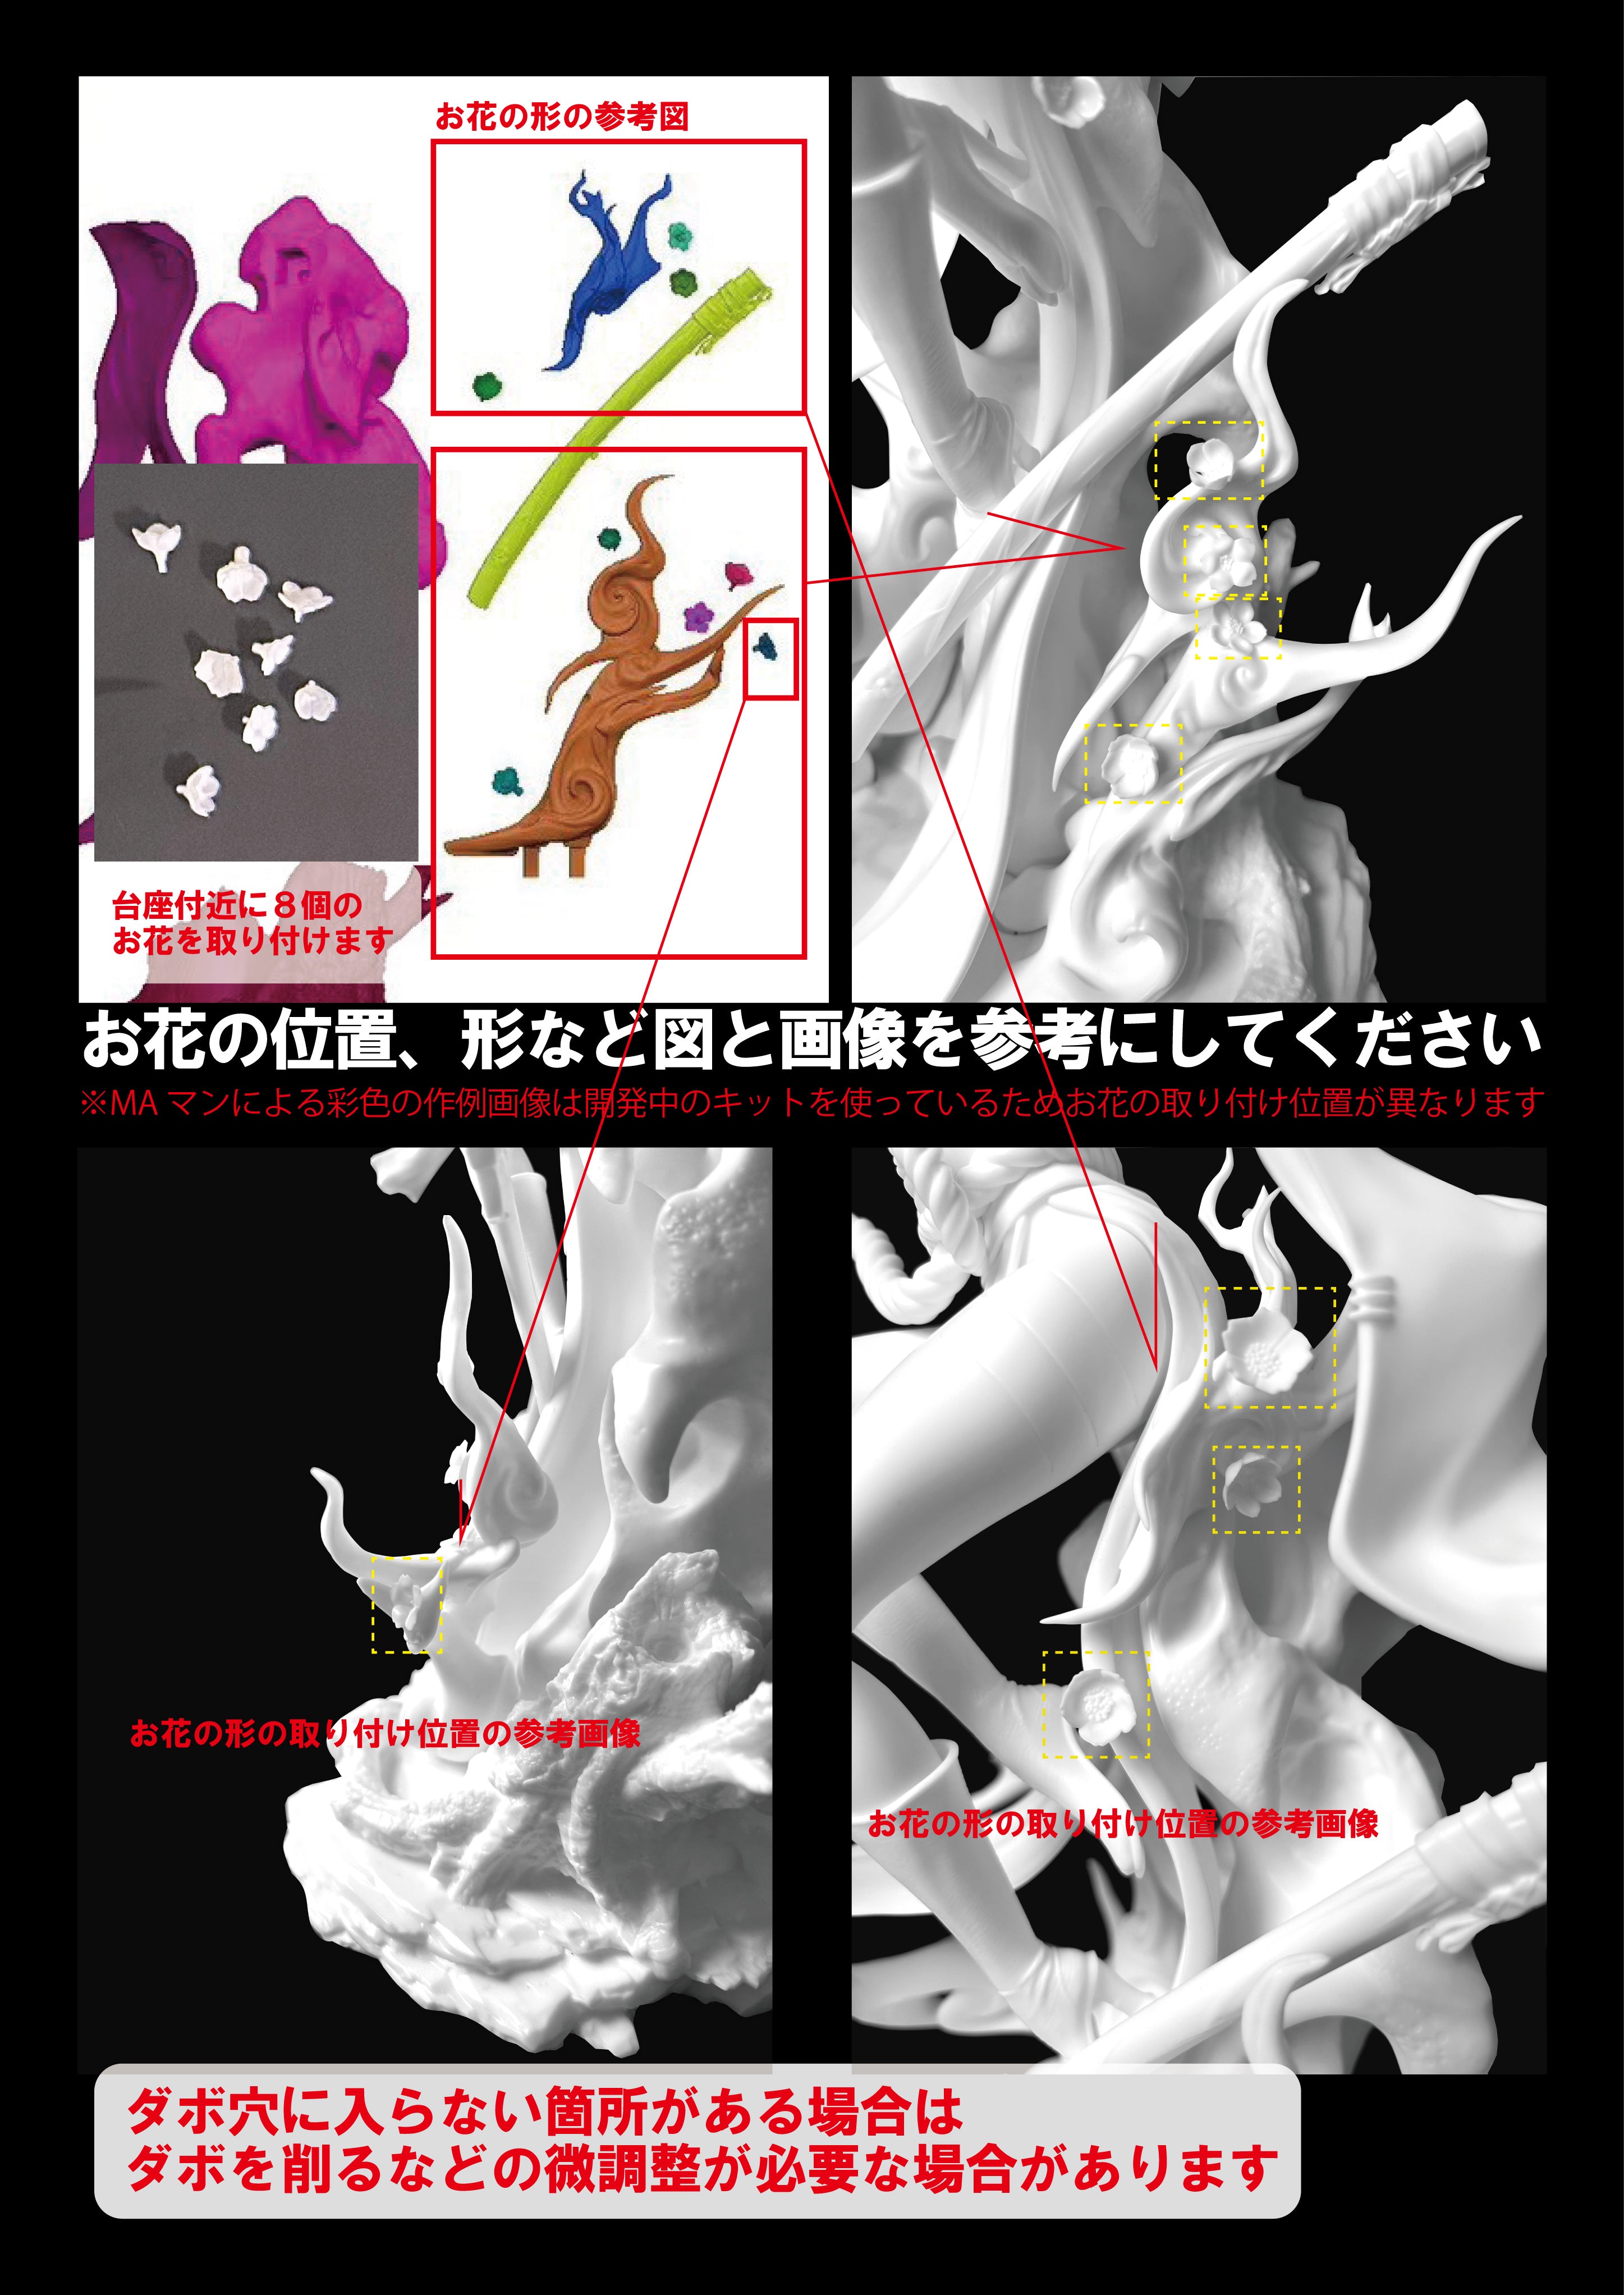
Assembly point 4
Regarding the attachment of the flowers to the base
*The example images by MA Man use a kit that was under development, so the flower attachment positions are different.
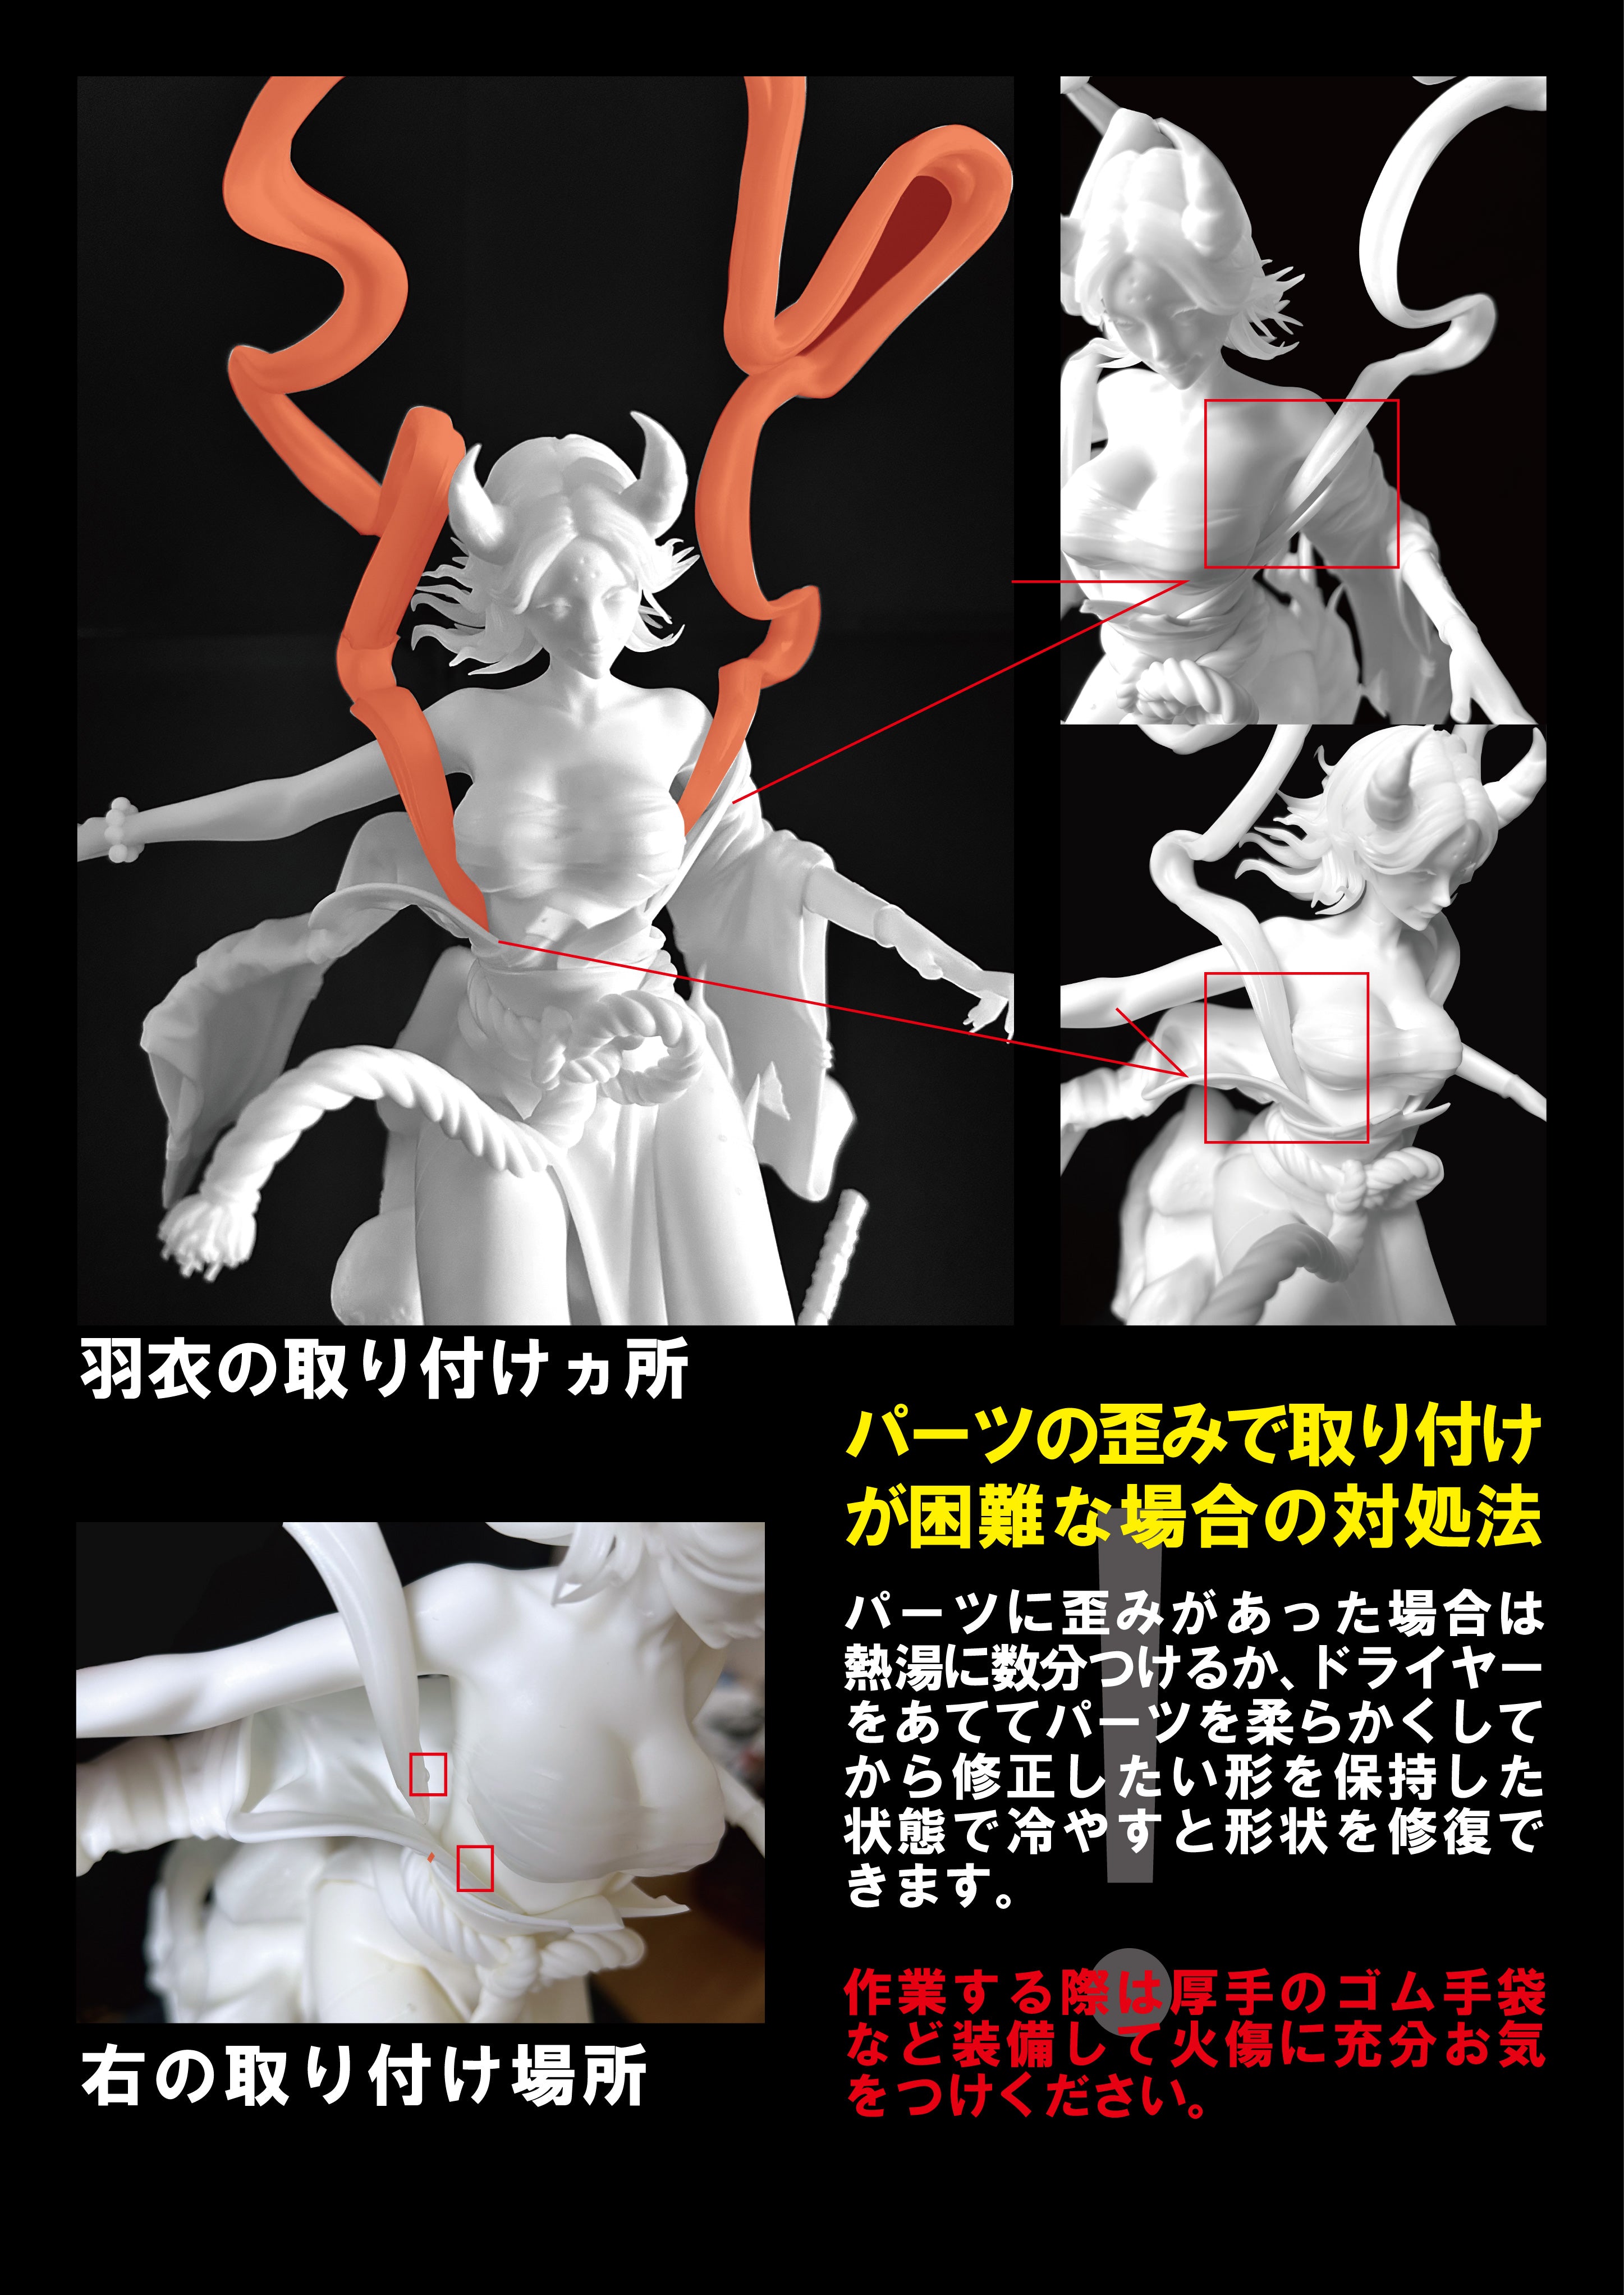
Assembly Point 5
Instructions for attaching hagoromo and how to deal with distortions are provided.
Please be careful not to burn yourself when correcting distortions.
Other Kits
-
 YAGIRI - TSUNOID Garage Kit, Unpainted, UnassembledYAGIRI - TSUNOID Garage Kit, Unpainted, Unassembled
- Regular price
- ¥28,182(税込¥31,000)
- Regular price
-
- Sale price
-
¥31,000
Quick view
-
 Battle-scarred Yagiri Garage Kit TSUNOID Unpainted/UnassembledBattle-scarred Yagiri Garage Kit TSUNOID Unpainted/Unassembled
- Regular price
- ¥30,000(税込¥33,000)
- Regular price
-
¥33,000 - Sale price
-
¥33,000
Quick view
-
 LUCICA "LUCICA" - TSUNOID Garage Kit Unpainted and UnassembledLUCICA "LUCICA" - TSUNOID Garage Kit Unpainted and Unassembled
- Regular price
- ¥30,000(税込¥33,000)
- Regular price
-
¥33,000 - Sale price
-
¥33,000
Quick view
-
 LUDRA "Rudra" - TSUNOID Garage Kit - Unpainted, UnassembledLUDRA "Rudra" - TSUNOID Garage Kit - Unpainted, Unassembled
- Regular price
- ¥30,000(税込¥33,000)
- Regular price
-
¥33,000 - Sale price
-
¥33,000
Quick view


